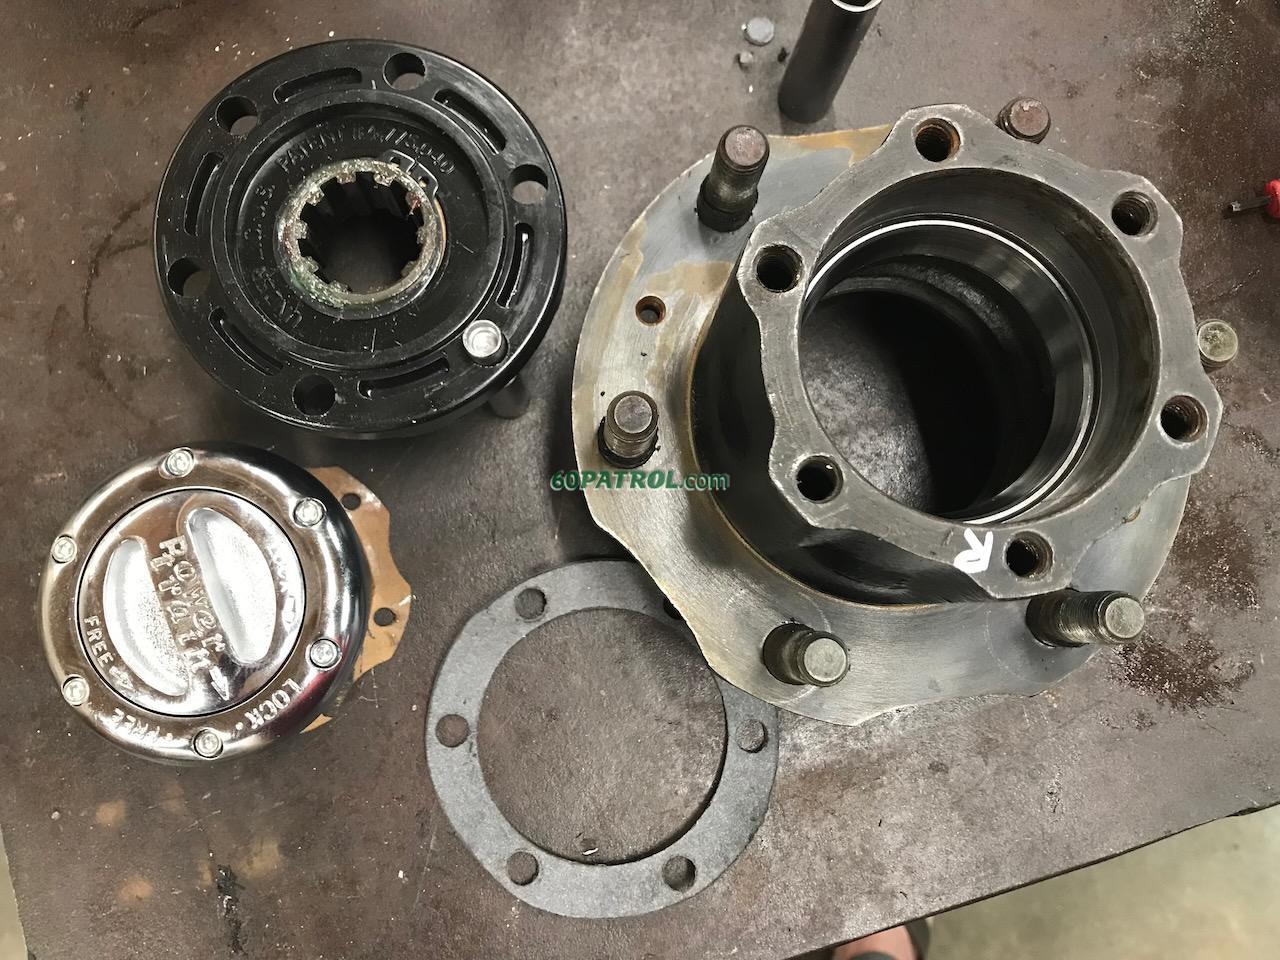
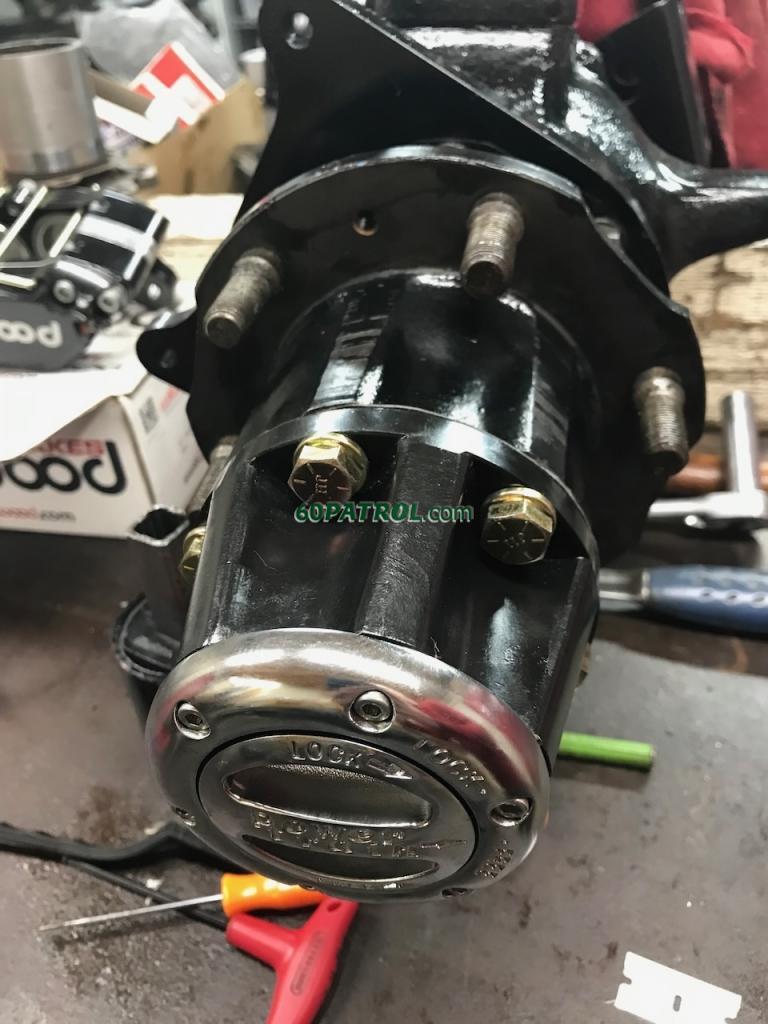
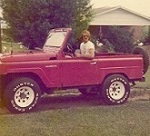
Once you start driving your Patrol, keep at hand an infrared thermometer to check the hubs after 10 or so miles. Temperature readings will help you have some peace of mind or help you pinpoint a too tight bearing.faux40 wrote: I was following the manual's crank it down until it locks, the back it off a quarter turn... but it never locked up! It got pretty stiff to turn the hub, so I called it good. Then I backed the nut off just under that quarter turn as that was the point it would turn smooth yet a little firm (probably firm from the sticky grease in it!).
J
1967 Family Patrol Project
- Patrol Fanatic!

- Posts: 3004
- Joined: Sat Feb 23, 2013 11:28 am
- Location: Lutherville, MD
- Has thanked: 6018 times
- Been thanked: 1603 times
Re: 1967 Family Patrol Project
Excellent report as always! Your pictures are always great and tell a lot also.
Owner of the same Patrol since 1967
- I love driving my Patrol!

- Posts: 655
- Joined: Mon Feb 27, 2017 9:05 am
- Location: Louisville KY USA
- Location: Louisville, Kentucky
- Has thanked: 514 times
- Been thanked: 631 times
- Contact:
Re: 1967 Family Patrol Project
I had those same hubs, but once i got some warn hubs I let them go... cannot remember if i sold them to someone on the facebook page i think.
- Administrator

- Posts: 1225
- Joined: Sun Jul 28, 2013 12:45 am
- Location: Roseville, California
- Has thanked: 646 times
- Been thanked: 1149 times
- Contact:
Re: 1967 Family Patrol Project
What do you do on a Friday night? I make gaskets!
I cut out the basic gasket using a simple razor knife, but I have to punch a dozen holes!

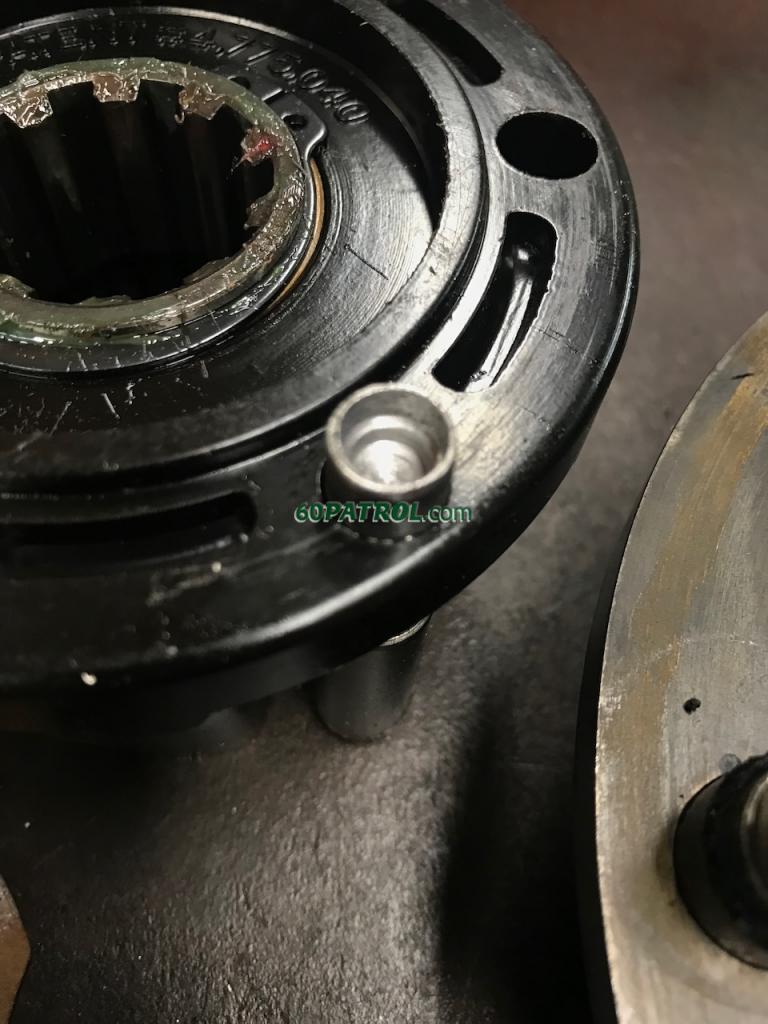
I decided to make a punch - so I found a steel dowel that slides into the bolt holes, then I drilled it out on the lathe. Next, I used a file to somewhat sharpen the edge. Put the gasket in place and set it onto a piece of wood. Slide the new punch tool into the hole and WHACK! There's a perfect hole! Repeat, repeat, repeat!

Ready for final assembly!

Okie doke -- Passenger side DONE!

Now, that's a good Friday night!
j
I cut out the basic gasket using a simple razor knife, but I have to punch a dozen holes!
I decided to make a punch - so I found a steel dowel that slides into the bolt holes, then I drilled it out on the lathe. Next, I used a file to somewhat sharpen the edge. Put the gasket in place and set it onto a piece of wood. Slide the new punch tool into the hole and WHACK! There's a perfect hole! Repeat, repeat, repeat!
Ready for final assembly!
Okie doke -- Passenger side DONE!
Now, that's a good Friday night!
j
- Administrator

- Posts: 1225
- Joined: Sun Jul 28, 2013 12:45 am
- Location: Roseville, California
- Has thanked: 646 times
- Been thanked: 1149 times
- Contact:
Re: 1967 Family Patrol Project
So excited! Today is a MAJOR milestone...

I don't have time right now, so I'll get into the details later...
J
I don't have time right now, so I'll get into the details later...
J
- Administrator

- Posts: 7821
- Joined: Thu Oct 04, 2012 10:42 am
- Location: Temecula, CA
- Has thanked: 7709 times
- Been thanked: 2480 times
- Contact:
- Administrator

- Posts: 1225
- Joined: Sun Jul 28, 2013 12:45 am
- Location: Roseville, California
- Has thanked: 646 times
- Been thanked: 1149 times
- Contact:
Re: 1967 Family Patrol Project
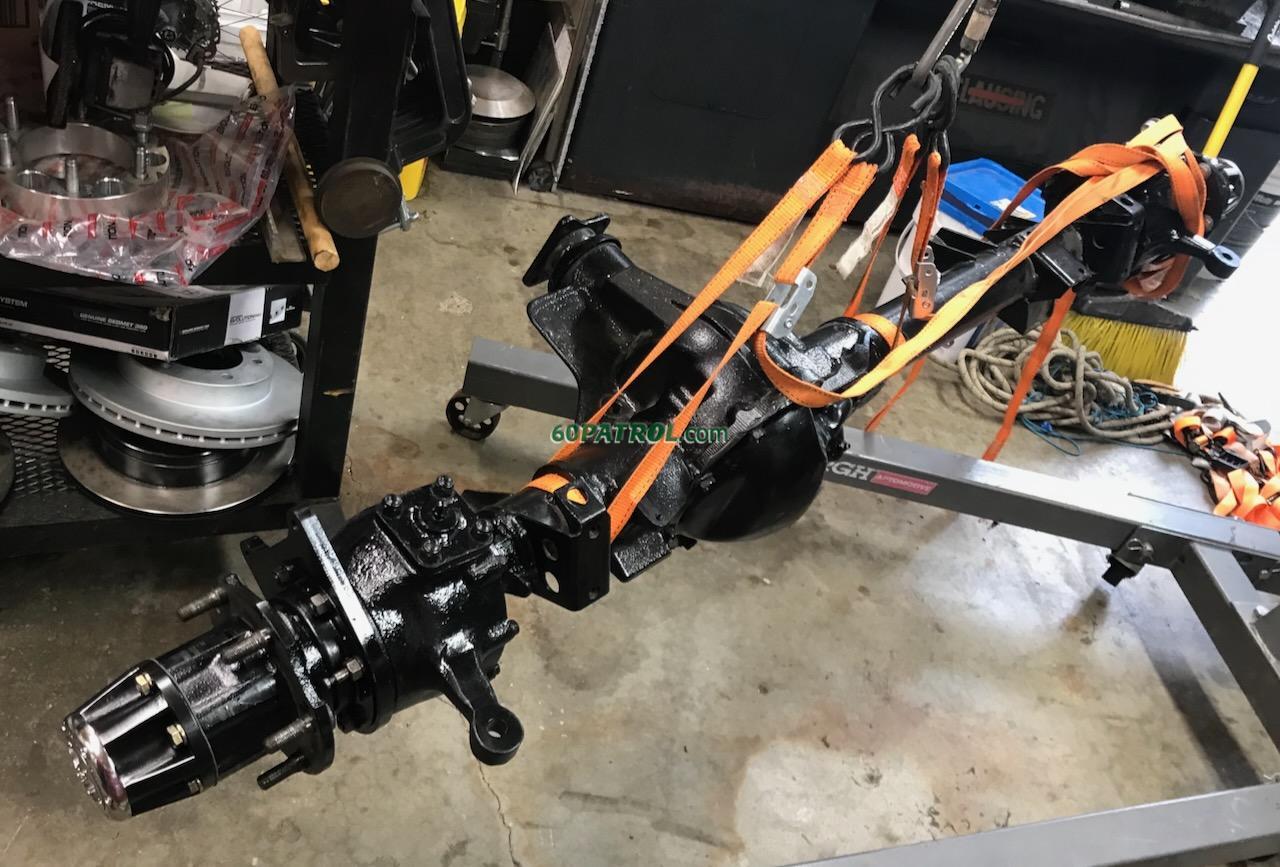
It really does feel like a major milestone to just get that axle off the bench... The disk rotors and calipers have been test fit of course, but I pulled them off and will wait to install until I am ready to run brake lines so I can minimize any rusting on the rotors.
First, a little history
It has "owning" the workbench for 521 days... and taking up space in my garage for 330 days! If you wanna get technical, that axle/brake project has taken 854 days! At this rate, it will only take 37-ish years to get the Patrol running! I *REALLY* need to pick up the pace!
Sep 2, 2021 - Axle on bench outside
viewtopic.php?p=49205#p49205
March 12, 2022 - The bench with the axle moved into the garage
viewtopic.php?p=50250#p50250
Oct 04, 2020 - Work Starts on the rear axle -- I called it "rear axle week" -- yea, I said week... pffft!
viewtopic.php?p=47567#p47567
Yesterday, when getting to the milestone, I asked my son for help getting the axle to the ground.. we both gave it a test lift and wisely realized that it is heavy! So, instead of the classic manual lift, we used the engine hoist to lower it down

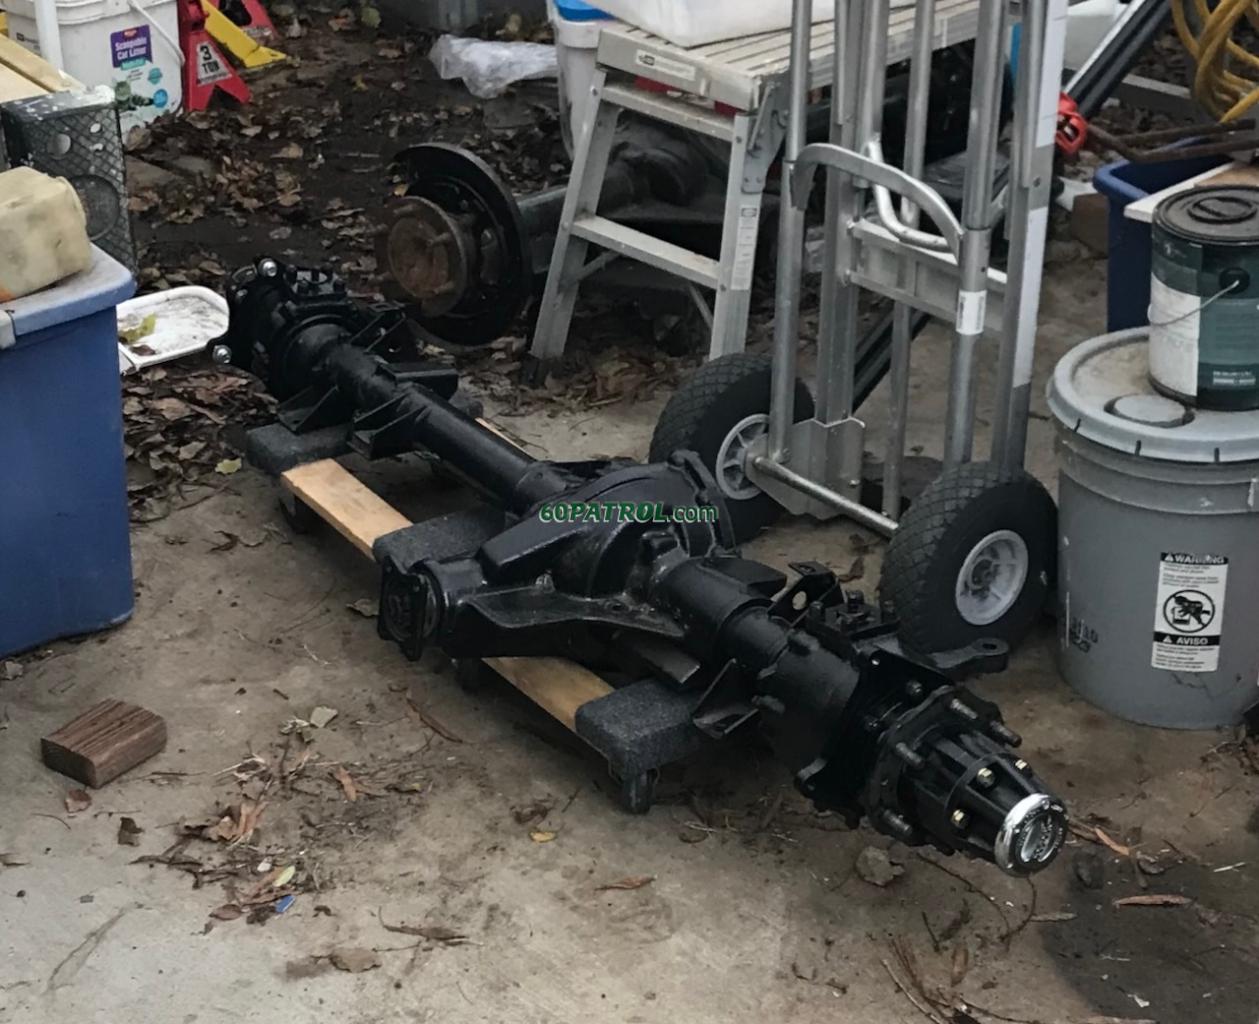
It will live on a couple of moving carts for a bit

And, it's moved here -- to my outdoor temp carport -- to wait for the next phase. Boy, does winter make a mess in my carport! Yea, *ALL* that mess is caused by winter... not me of course!

What's next
Finishing the axles means that I get to start assembling things! Next stop, bolting the wheels onto the hubs, then springs on the axles, then the frame on the springs!
My next *custom* project will be to make a replacement gas tank. I actually have two tanks in *functional* condition - the one from aerogirl is old and tired, but I had it cleaned and lined a couple years ago. The other appears to have been cleaned and lined too, but it's the other, smaller style and with the Patrol's fuel drinking habits, bigger will be better!. Also, I still plan to go fuel injection and will need a return line and in-tank fuel pump -- and I can make the tank slightly larger too! So, knowing me, why would I even take the easy path!
.
Now, my next major decision:
Happy Sunday!
j
First, a little history
It has "owning" the workbench for 521 days... and taking up space in my garage for 330 days! If you wanna get technical, that axle/brake project has taken 854 days! At this rate, it will only take 37-ish years to get the Patrol running! I *REALLY* need to pick up the pace!
Sep 2, 2021 - Axle on bench outside
viewtopic.php?p=49205#p49205
March 12, 2022 - The bench with the axle moved into the garage
viewtopic.php?p=50250#p50250
Oct 04, 2020 - Work Starts on the rear axle -- I called it "rear axle week" -- yea, I said week... pffft!
viewtopic.php?p=47567#p47567
Yesterday, when getting to the milestone, I asked my son for help getting the axle to the ground.. we both gave it a test lift and wisely realized that it is heavy! So, instead of the classic manual lift, we used the engine hoist to lower it down
It will live on a couple of moving carts for a bit
And, it's moved here -- to my outdoor temp carport -- to wait for the next phase. Boy, does winter make a mess in my carport! Yea, *ALL* that mess is caused by winter... not me of course!
What's next
Finishing the axles means that I get to start assembling things! Next stop, bolting the wheels onto the hubs, then springs on the axles, then the frame on the springs!
My next *custom* project will be to make a replacement gas tank. I actually have two tanks in *functional* condition - the one from aerogirl is old and tired, but I had it cleaned and lined a couple years ago. The other appears to have been cleaned and lined too, but it's the other, smaller style and with the Patrol's fuel drinking habits, bigger will be better!. Also, I still plan to go fuel injection and will need a return line and in-tank fuel pump -- and I can make the tank slightly larger too! So, knowing me, why would I even take the easy path!
Now, my next major decision:
- Stainless steel -- Probably the best for a fuel tank, but it's expensive and I've never made a tank, so the likelihood of one or more fails is high... particularly if you factor in that I have zero experience tig welding stainless steel!
- Aluminum -- Generally considered a decent choice for a fuel tank and less expensive that stainless. But, again, my limited experience welding aluminum.
- Mild Steel -- Easy to bend, easy to weld, strong, and very forgiving to mistakes (such as having to re-weld or over-weld a seam to get a seal. I have a decent amount of experience welding mild steel... I can even get a decent looking weld! Plus, it's easy to bend and shape. BUT, there is that rust issue that neither stainless or aluminum have, so it will need to be lined on the inside and painted on the outside.
Happy Sunday!
j
- Administrator

- Posts: 1225
- Joined: Sun Jul 28, 2013 12:45 am
- Location: Roseville, California
- Has thanked: 646 times
- Been thanked: 1149 times
- Contact:
Re: 1967 Family Patrol Project
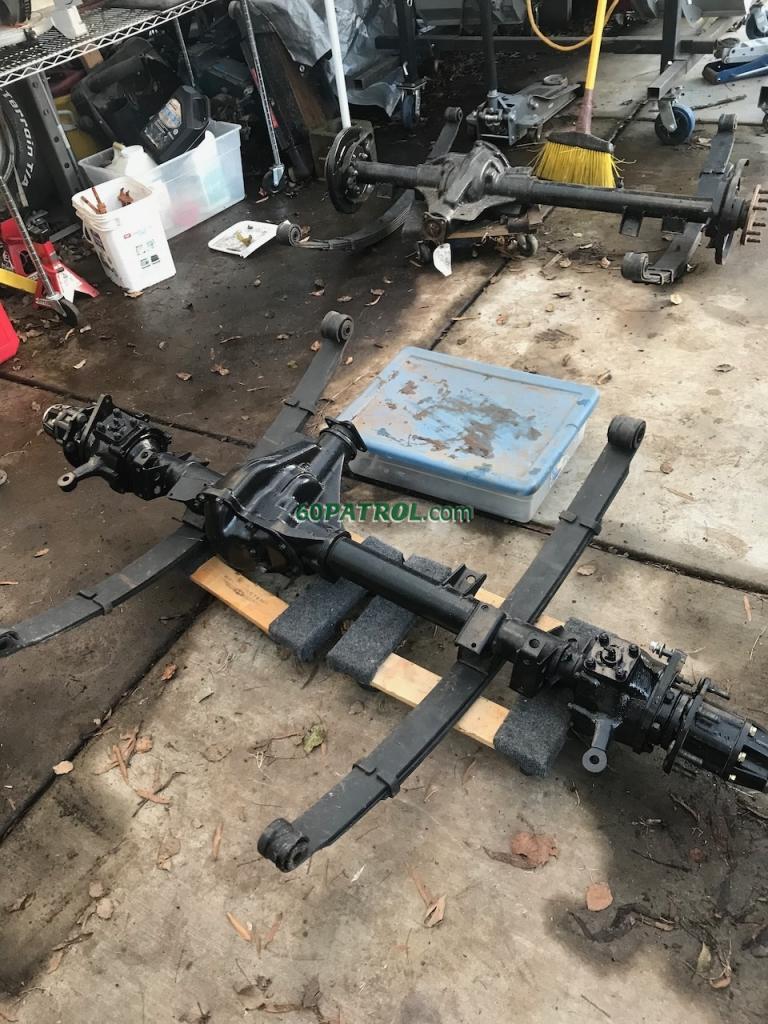
Sunday is cleaning day, right? I tidied up the carport area -- in the winter is seems to be the collecting point for all the debris and leaves for the entire neighborhood and then we stuff everything under the sun... er, clouds... there to keep them dry.
It was exciting to just lay out the axles and springs.

All the spring hardware is crusty... layers of dirt, oil and rust! These are crusted together... with a little luck PBlaster will help free them!

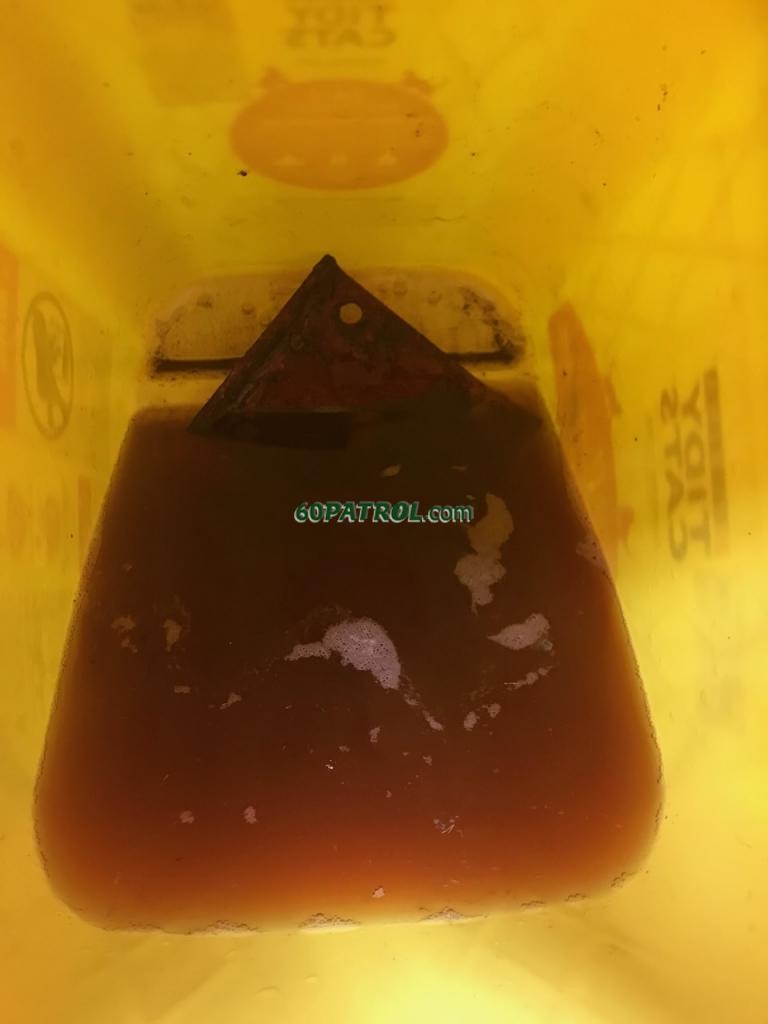
All the rusty pieces and parts -- like the plate that go below the springs and such -- are spending the night in a 6" deep vinegar bath to help loosen/remove the rust before the sandblaster completes the task.

Fast forward several hours... I peeked into the vinegar bath while locking up the shop tonight. Can anyone guess the which parts are at the bottom of the bucket?

j
It was exciting to just lay out the axles and springs.
All the spring hardware is crusty... layers of dirt, oil and rust! These are crusted together... with a little luck PBlaster will help free them!
All the rusty pieces and parts -- like the plate that go below the springs and such -- are spending the night in a 6" deep vinegar bath to help loosen/remove the rust before the sandblaster completes the task.
Fast forward several hours... I peeked into the vinegar bath while locking up the shop tonight. Can anyone guess the which parts are at the bottom of the bucket?
j
- Administrator

- Posts: 1225
- Joined: Sun Jul 28, 2013 12:45 am
- Location: Roseville, California
- Has thanked: 646 times
- Been thanked: 1149 times
- Contact:
Re: 1967 Family Patrol Project
Ready for a long, twisted story? One containing some slightly incriminating info about me? Its kind of a when life gives you lemons, make lemonade story. 
Several weeks ago, when it was nice and cold here in Northern California, I was painting the Patrol's front hubs. But to make sure they look halfway decent despite the cold weather, I warmed the paint and the part in the oven. Yea, I know, I know, not a good idea, but it's one that I've done dozens of times in the past. You see, our oven would happily run at just 100 degrees... less that what our summer sun provides!
On this particular day, I put the parts and paint inside, set it to 100 and got back to work (I work from home most days). The plan was to pull them out at lunch and get a couple coats of paint on them... See! Nothing surprising for a Patrol owner to do! Who's with me on this?
However, this was an at-home day for my teenage son... Yea, the one that eats twice his body weight daily. He decided to cook a pizza in the same oven. He simply dialed in 425 degrees to let the oven pre-heat -- then wandered off -- Never noticing that the oven was on and that there was some stuff -- weird stuff at that -- already in the oven!
I'm guessing that somewhere around 250 or 300 degrees the pressure in that paint can just was too much and... BOOM! Luckily, it exploded sideways -- it put a huge dent in the side of the oven. The door flung open, then immediately slammed shut from the pressure wave. But, it was open long enough to allow the aerosolized and warm paint to spray all around the kitchen... Doh! (But, I do have an awesome wife!)
Check out the paint-can-shaped dent in the side!
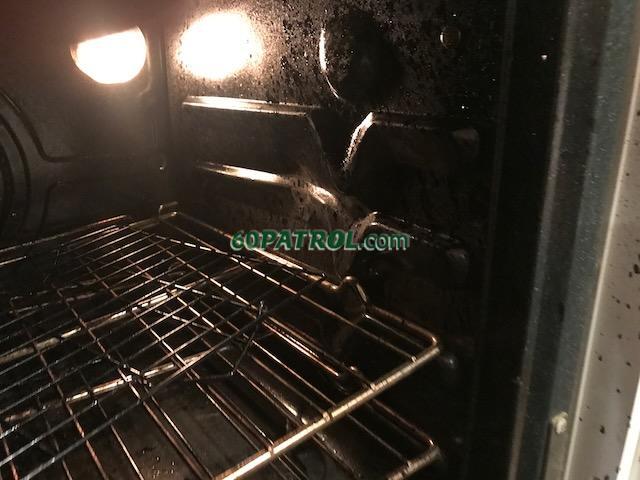
We got most of the paint cleaned up -- the hardwood floor has some black speckles... but we were already talking about when we'd need to refinish it. That oopsie made the decision for us -- summer project!
Luckily, it's a double oven -- both ovens actually work fine, but the upper oven emits a distinct paint smell, so we've only been using the lower oven while shopping for a replacement. Last weekend, I found one! 5 years old, high end model, in mint condition, and inexpensive! Jay and I darted out and grabbed it --Within 2 hours of it arriving, that new oven makes our kitchen look fantastic!

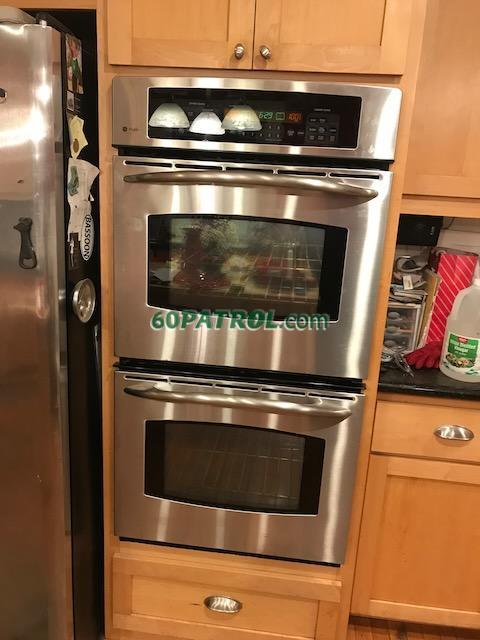
So, when one has a spare, working oven, what does one do?
They order an Eastwood Dual Voltage Powder Coat gun of course! (and some powder coat powder and accessories) It's scheduled to arrive on Monday!

Today is Saturday -- Since I can't powder coat yet and now there is no reason to paint
, I decided to upgrade my Harbor Freight Sand Blaster! There are dozens of videos from folks who have done the upgrade.
Here are the improvements I did:
Replaced the glass. One sheet of 1/8" with a sheet of 1/4" double-strength on top. The 1/8" is really a consumable. The top was also sagging a little, so I cut out a piece of 16-guage steel to double up & reinforce the top layer and attached it. Dang, it's dusty already! (but only dusty, not scratched!)
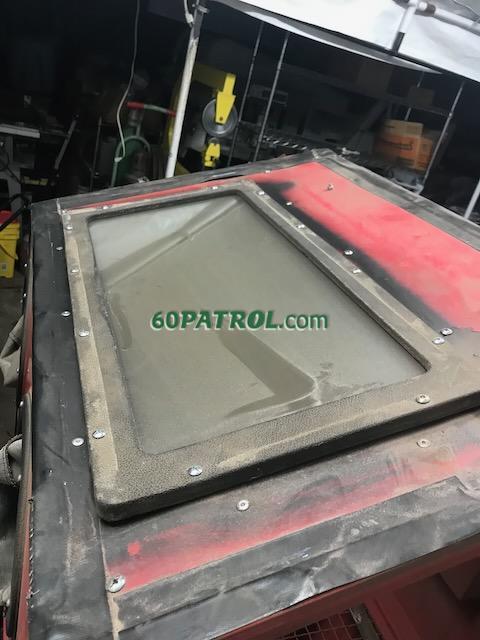
Ditched the in-cabinet siphon tube and moved it to the hopper drain. Created an air-sand manifold with adjustable airflow. Another benefit is that it requires far less sand in the hopper to function well!
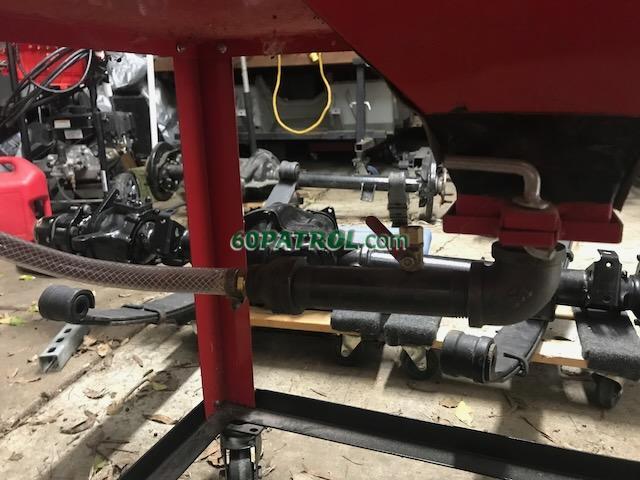
Moved the air inlet tube and place the sand-tube on the non-door side of the cabinet
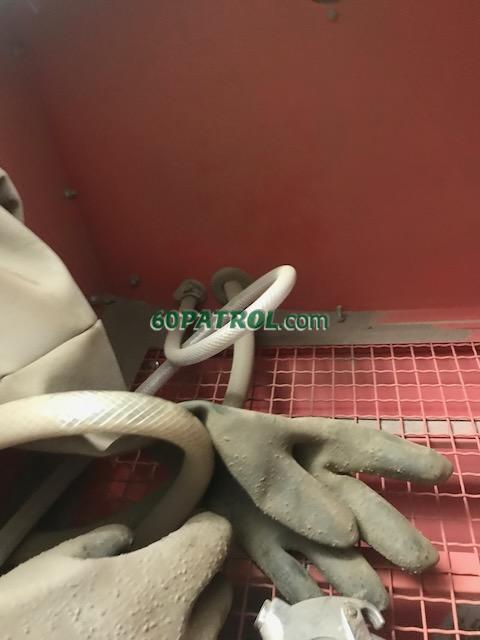
Put a piece of sheet metal on the door to keep sand out of those little pockets (you know the ones! They dump a ton of sand whenever you open the door!

Made a frame and put the blaster on casters - I mean, who doesn't want to sandblast on the move!?

OH MY! IT WORKS SO, SO MUCH BETTER!
Admittedly my air compressor is way undersized, but even as the pressure drops it continues to work AND I don't have to futz with that stupid sand pickup tube! Today -- The air compressor cuts-out at about 140 psi, but I have the air compressor regulator set to 100psi. Blasting is really aggressive and will take off paint and hard-to-remove stuff well when it's above 90-ish. As it passes around 80psi, it seems to move more sand -- really, a higher volume sand flow (weird, but that's what it's doing!). At this pressure, it clears the metal quickly and thoroughly (but not the hard to get stuff). It seems to continue to work down to 60-ish psi, then kinda putzes along kinda working, but not super well. I mean, it just doesn't clean the metal well. The sand feed is still better than the original system. My compressor will keep it between 45 and 50 psi indefinitely, so I have to stop after a 5-ish minutes and let it rebuild pressure.
The one with paint remaining only saw the pressure at starting at 75-ish psi -- then I ran out of time to finish -- tomorrow it will finish being prepped for powder coating!

I also want to make a few more mods to the sandblaster as well in the near future...
- There are some gun mods that will increase the sand consistency without increasing the airflow
- Adding a screen at the bottom to filter the crud out of the sand before it enters the mixing manifold
- Adding a catch below the air inlet -- if you burp the line (blocking the air-sand nozzle to cause the sand tube to back-flush), it spritzes sand onto the floor.
- Put plywood in the rolling frame to create a storage shelf
- The new hoses are quite stiff. I'm wondering if smaller, more flexible lines would hurt the flow too much... I may do some "research" on that!
- Lastly, and, perhaps, most importantly, I'm already shopping for a larger air compressor!
Have a great Sunday!
j
Several weeks ago, when it was nice and cold here in Northern California, I was painting the Patrol's front hubs. But to make sure they look halfway decent despite the cold weather, I warmed the paint and the part in the oven. Yea, I know, I know, not a good idea, but it's one that I've done dozens of times in the past. You see, our oven would happily run at just 100 degrees... less that what our summer sun provides!
On this particular day, I put the parts and paint inside, set it to 100 and got back to work (I work from home most days). The plan was to pull them out at lunch and get a couple coats of paint on them... See! Nothing surprising for a Patrol owner to do! Who's with me on this?
However, this was an at-home day for my teenage son... Yea, the one that eats twice his body weight daily. He decided to cook a pizza in the same oven. He simply dialed in 425 degrees to let the oven pre-heat -- then wandered off -- Never noticing that the oven was on and that there was some stuff -- weird stuff at that -- already in the oven!
I'm guessing that somewhere around 250 or 300 degrees the pressure in that paint can just was too much and... BOOM! Luckily, it exploded sideways -- it put a huge dent in the side of the oven. The door flung open, then immediately slammed shut from the pressure wave. But, it was open long enough to allow the aerosolized and warm paint to spray all around the kitchen... Doh! (But, I do have an awesome wife!)
Check out the paint-can-shaped dent in the side!
We got most of the paint cleaned up -- the hardwood floor has some black speckles... but we were already talking about when we'd need to refinish it. That oopsie made the decision for us -- summer project!
Luckily, it's a double oven -- both ovens actually work fine, but the upper oven emits a distinct paint smell, so we've only been using the lower oven while shopping for a replacement. Last weekend, I found one! 5 years old, high end model, in mint condition, and inexpensive! Jay and I darted out and grabbed it --Within 2 hours of it arriving, that new oven makes our kitchen look fantastic!
So, when one has a spare, working oven, what does one do?
They order an Eastwood Dual Voltage Powder Coat gun of course! (and some powder coat powder and accessories) It's scheduled to arrive on Monday!
Today is Saturday -- Since I can't powder coat yet and now there is no reason to paint
Here are the improvements I did:
Replaced the glass. One sheet of 1/8" with a sheet of 1/4" double-strength on top. The 1/8" is really a consumable. The top was also sagging a little, so I cut out a piece of 16-guage steel to double up & reinforce the top layer and attached it. Dang, it's dusty already! (but only dusty, not scratched!)
Ditched the in-cabinet siphon tube and moved it to the hopper drain. Created an air-sand manifold with adjustable airflow. Another benefit is that it requires far less sand in the hopper to function well!
Moved the air inlet tube and place the sand-tube on the non-door side of the cabinet
Put a piece of sheet metal on the door to keep sand out of those little pockets (you know the ones! They dump a ton of sand whenever you open the door!
Made a frame and put the blaster on casters - I mean, who doesn't want to sandblast on the move!?
OH MY! IT WORKS SO, SO MUCH BETTER!
Admittedly my air compressor is way undersized, but even as the pressure drops it continues to work AND I don't have to futz with that stupid sand pickup tube! Today -- The air compressor cuts-out at about 140 psi, but I have the air compressor regulator set to 100psi. Blasting is really aggressive and will take off paint and hard-to-remove stuff well when it's above 90-ish. As it passes around 80psi, it seems to move more sand -- really, a higher volume sand flow (weird, but that's what it's doing!). At this pressure, it clears the metal quickly and thoroughly (but not the hard to get stuff). It seems to continue to work down to 60-ish psi, then kinda putzes along kinda working, but not super well. I mean, it just doesn't clean the metal well. The sand feed is still better than the original system. My compressor will keep it between 45 and 50 psi indefinitely, so I have to stop after a 5-ish minutes and let it rebuild pressure.
The one with paint remaining only saw the pressure at starting at 75-ish psi -- then I ran out of time to finish -- tomorrow it will finish being prepped for powder coating!
I also want to make a few more mods to the sandblaster as well in the near future...
- There are some gun mods that will increase the sand consistency without increasing the airflow
- Adding a screen at the bottom to filter the crud out of the sand before it enters the mixing manifold
- Adding a catch below the air inlet -- if you burp the line (blocking the air-sand nozzle to cause the sand tube to back-flush), it spritzes sand onto the floor.
- Put plywood in the rolling frame to create a storage shelf
- The new hoses are quite stiff. I'm wondering if smaller, more flexible lines would hurt the flow too much... I may do some "research" on that!
- Lastly, and, perhaps, most importantly, I'm already shopping for a larger air compressor!
Have a great Sunday!
j
- I love driving my Patrol!

- Posts: 635
- Joined: Sun Jul 19, 2015 4:36 pm
- Location: USA
- Location: North Carolina, USA
- Has thanked: 455 times
- Been thanked: 791 times
- Contact:
Re: 1967 Family Patrol Project
Wow, if I had done that to our oven, I would be living down in the basement for at least a month! 
Paul
- Patrol Fanatic!

- Posts: 3004
- Joined: Sat Feb 23, 2013 11:28 am
- Location: Lutherville, MD
- Has thanked: 6018 times
- Been thanked: 1603 times
Re: 1967 Family Patrol Project
Glad nothing major happened. I was once scolded for just heating parts!
Good progress with the sandblaster!
Owner of the same Patrol since 1967