
Yeah! Another project within the project!
Can’t wait to see the tank being built!
Sent from my iPhone using Tapatalk
1967 Family Patrol Project
-

- Patrol Fanatic!

- Posts: 3003
- Joined: Sat Feb 23, 2013 11:28 am
- Location: Lutherville, MD
- Location: Lutherville, MD
- Has thanked: 6017 times
- Been thanked: 1601 times
-

- Administrator

- Posts: 1225
- Joined: Sun Jul 28, 2013 12:45 am
- Location: Roseville, California
- Has thanked: 646 times
- Been thanked: 1149 times
- Contact:
Re: 1967 Family Patrol Project
THIS is the Ikea Gas Tank Kit! 

The first trial fit with the end plates and bottom
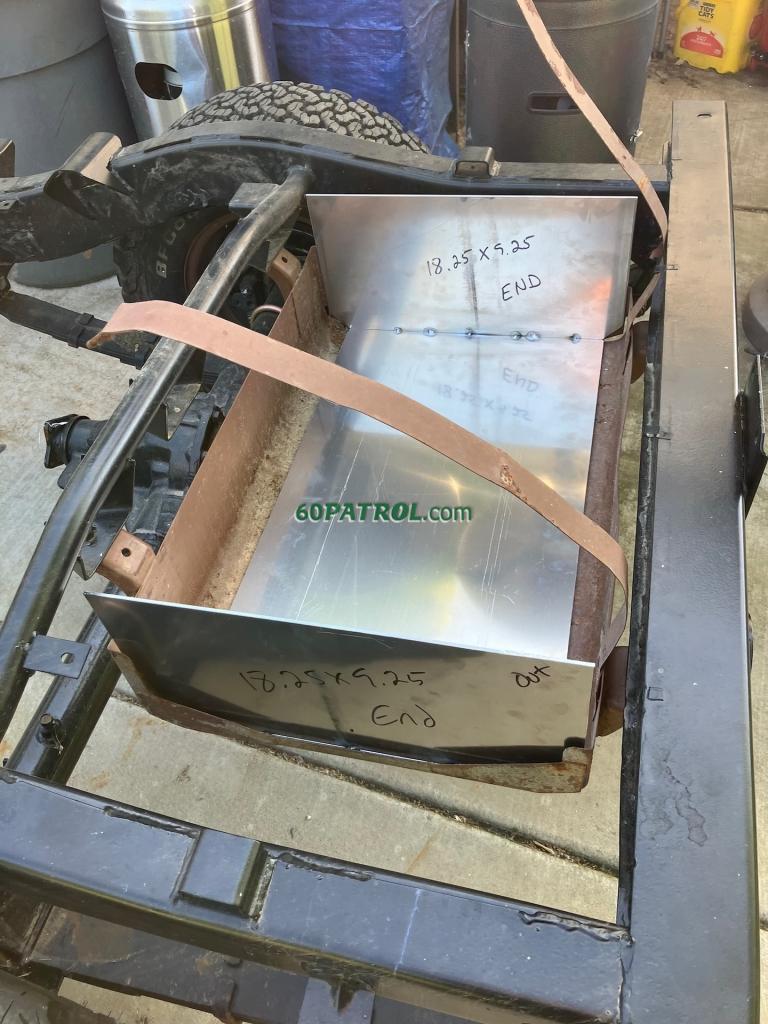
A few shots of the basic shape all tacked together!

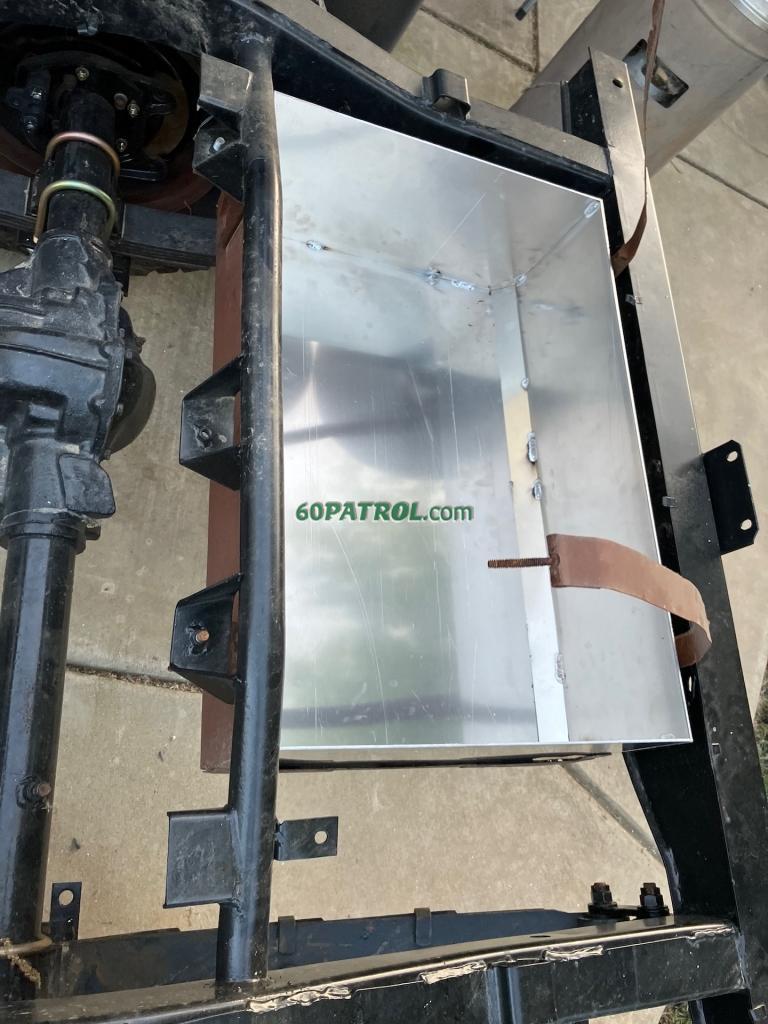
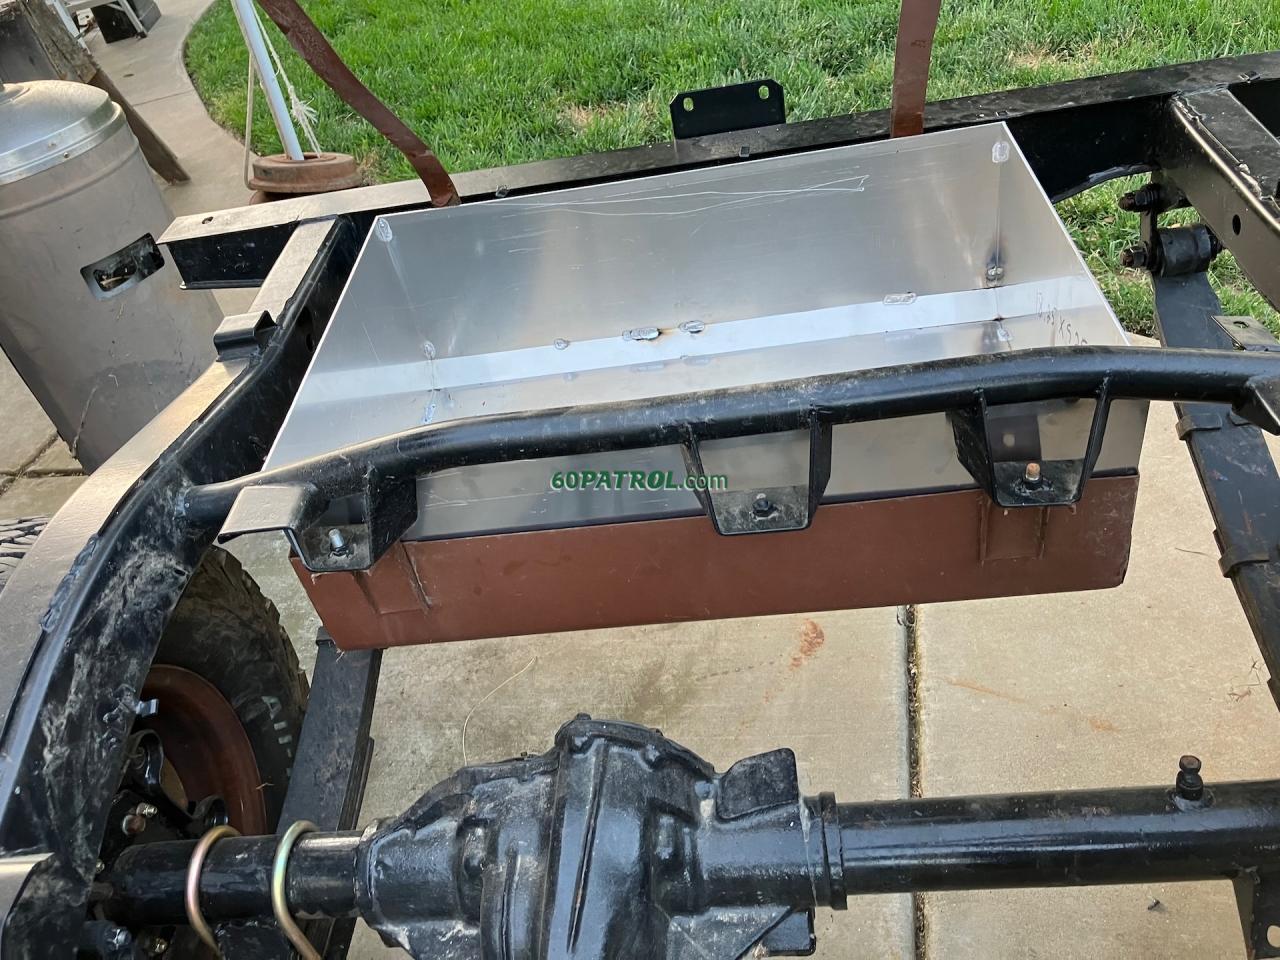
And with the top just setting in place and the flanges also just setting in place

There are a few issues with the tank that have been revealed! Notice the upper left corner -- the tank is really close to the frame at that corner. Also, the square top design means that the stock straps won't fit. Also, the tank sits about 3/8" or so above the rear frame member.
I do want to keep using the tank skid plate, so I'm not sure how I am going to handle these issues... I could modify the skid plate mounts to lower the tank slightly and push the tank 3/8" rearward. I could also add chamfers along the top edges like are on the bottom of the tank
Here's the inside view - Not sure if I am going to weld the seams outside only or both inside and outside. I did weld the inside seam along the top right edge in this picture.
Notice the black charring around the tack weld in the lower left corner... Yea, that's what happens when you dip the tungsten into the weld pool! Dang it! Every time that happens, you have to stop and re-grind the tungsten.
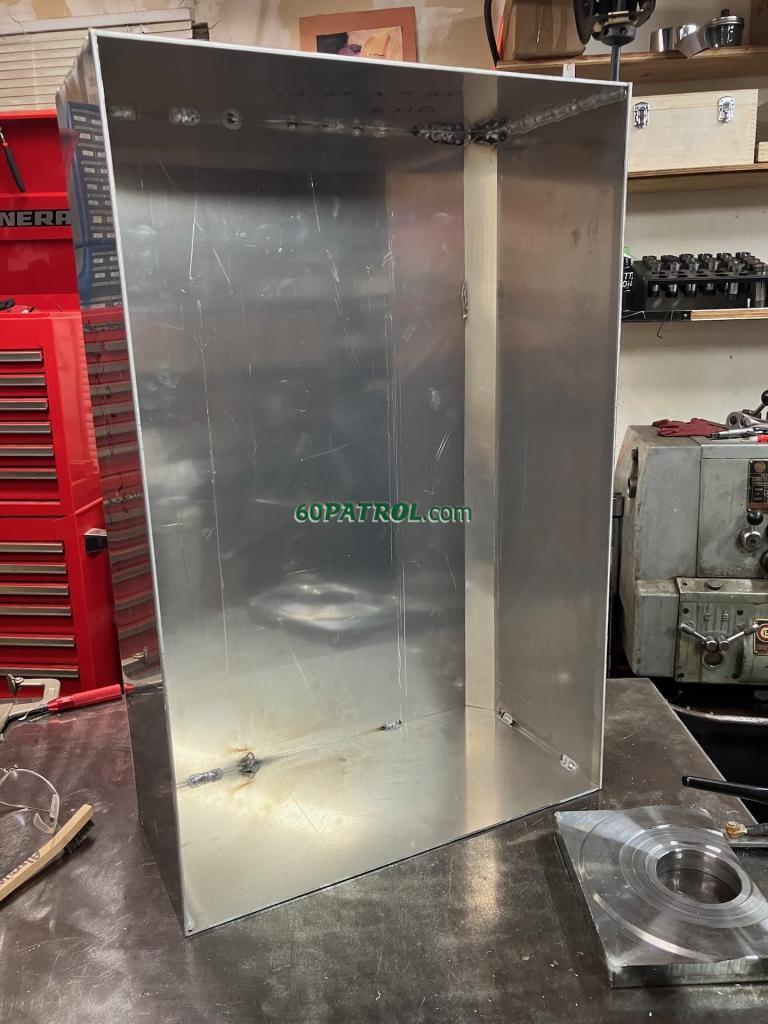
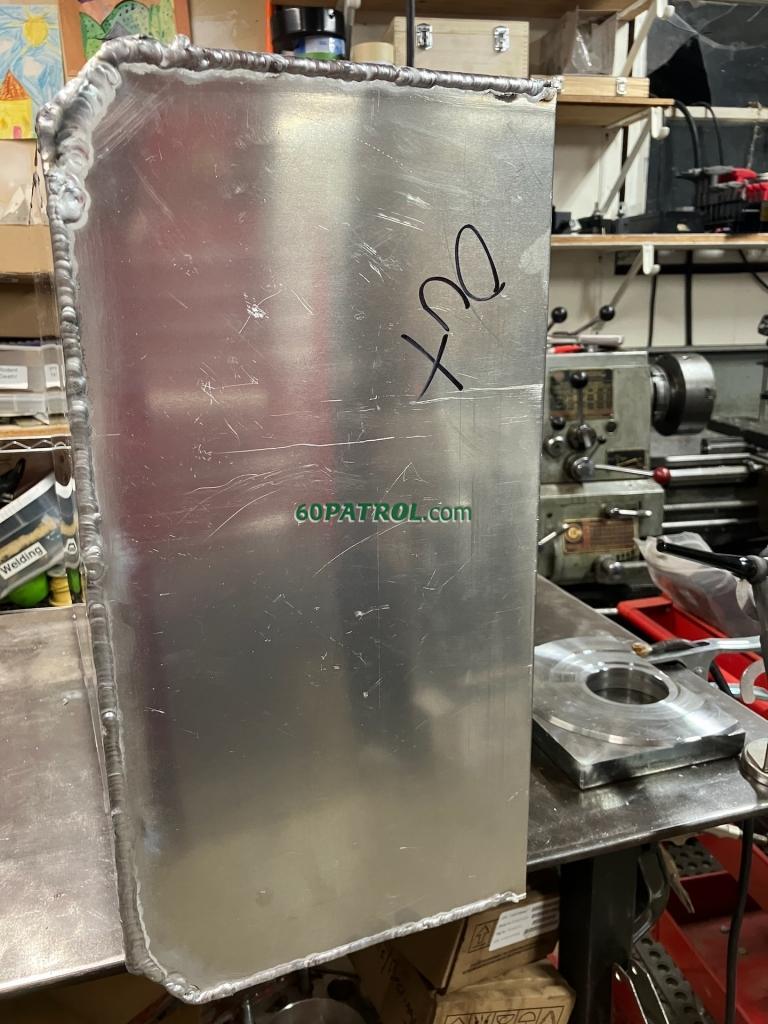
And the end-view... that weld got away from me a little in the corner! When you blow a hole, you have to build up the bead around the hole to close it back over. It gets kinda ugly, doesn't it!
Anyway, I'll keep going on it tomorrow!
j
The first trial fit with the end plates and bottom
A few shots of the basic shape all tacked together!
And with the top just setting in place and the flanges also just setting in place
There are a few issues with the tank that have been revealed! Notice the upper left corner -- the tank is really close to the frame at that corner. Also, the square top design means that the stock straps won't fit. Also, the tank sits about 3/8" or so above the rear frame member.
I do want to keep using the tank skid plate, so I'm not sure how I am going to handle these issues... I could modify the skid plate mounts to lower the tank slightly and push the tank 3/8" rearward. I could also add chamfers along the top edges like are on the bottom of the tank
Here's the inside view - Not sure if I am going to weld the seams outside only or both inside and outside. I did weld the inside seam along the top right edge in this picture.
Notice the black charring around the tack weld in the lower left corner... Yea, that's what happens when you dip the tungsten into the weld pool! Dang it! Every time that happens, you have to stop and re-grind the tungsten.
And the end-view... that weld got away from me a little in the corner! When you blow a hole, you have to build up the bead around the hole to close it back over. It gets kinda ugly, doesn't it!
Anyway, I'll keep going on it tomorrow!
j
-
- Administrator
- Posts: 1225
- Joined: Sun Jul 28, 2013 12:45 am
- Location: Roseville, California
- Has thanked: 646 times
- Been thanked: 1149 times
- Contact:
Re: 1967 Family Patrol Project
I know this is petty... particularly since I have not had the opportunity to fill the Patrol tank in a few years, but it was always frustrating that the pump would continuously shut off during filling. I suspect it has a lot to do with that hard 90-degree angle at the back of the filler pipe into the tank. My guess is that it would create back pressure and convince the pump that the tank was full causing the repeated shut offs.

So, my solution to this is to make that a 45 degree angle instead -- BUT, welding that super tight inside angle under the slop is really hard! In my first attempt, I lost control over the bead. The weld puddle went up the pipe while the arc when out the flange and instantly trashed the flange! Doh! It does happen quickly, but my biggest mistake was not immediately stopping and then restarting, but I tried to save it... It instantly got way worse. Glad I got a decent length of pipe and had a couple of those flanges made!
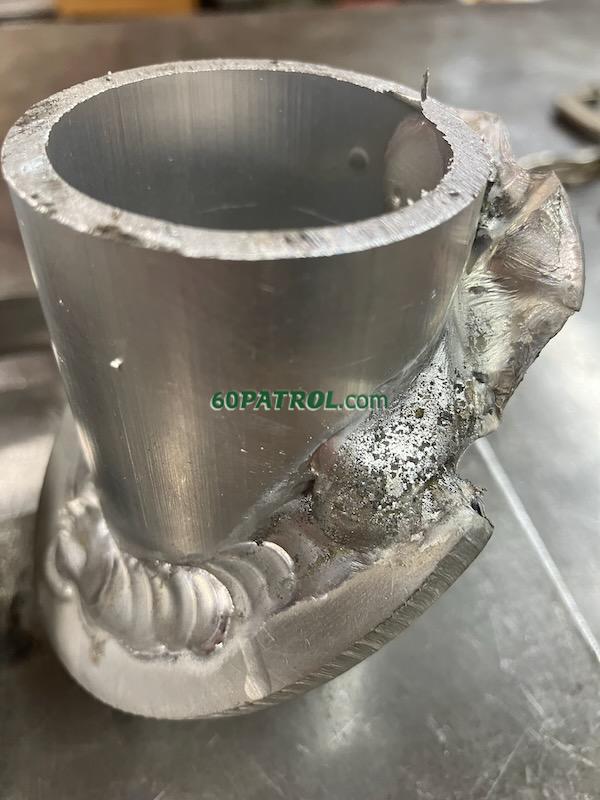
Success! After that one disastrous attempt, a usable filler neck flange is ready to go! Next stop will be to adjust the angle a bit on the belt sander as the pipe is actually a few degrees off 45 so I need to adjust the angle so the extension will be parallel with the tank top. Then weld it to the tank lid.
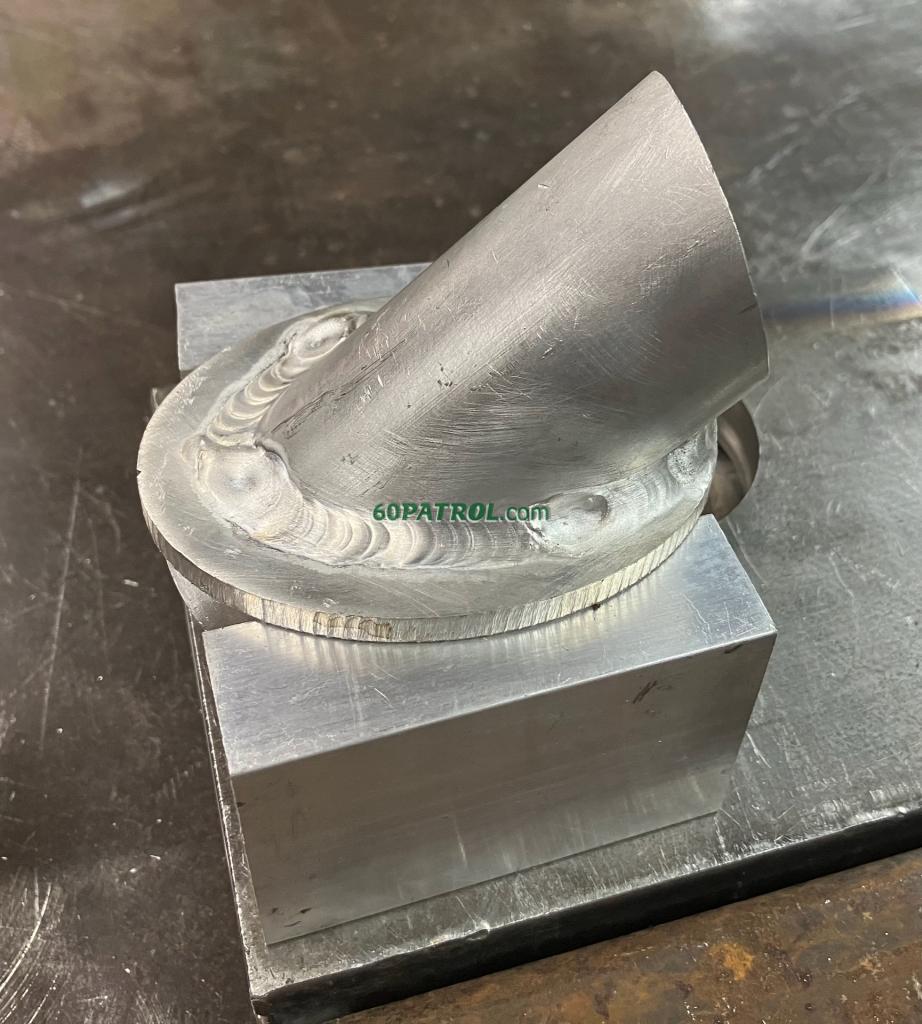
Always an adventure!
j
So, my solution to this is to make that a 45 degree angle instead -- BUT, welding that super tight inside angle under the slop is really hard! In my first attempt, I lost control over the bead. The weld puddle went up the pipe while the arc when out the flange and instantly trashed the flange! Doh! It does happen quickly, but my biggest mistake was not immediately stopping and then restarting, but I tried to save it... It instantly got way worse. Glad I got a decent length of pipe and had a couple of those flanges made!
Success! After that one disastrous attempt, a usable filler neck flange is ready to go! Next stop will be to adjust the angle a bit on the belt sander as the pipe is actually a few degrees off 45 so I need to adjust the angle so the extension will be parallel with the tank top. Then weld it to the tank lid.
Always an adventure!
j
-
- Patrol Fanatic!
- Posts: 3003
- Joined: Sat Feb 23, 2013 11:28 am
- Location: Lutherville, MD
- Location: Lutherville, MD
- Has thanked: 6017 times
- Been thanked: 1601 times
Re: 1967 Family Patrol Project
Looks great and a nice solution to the fill problem.
Thanks John for showing everything in you weld process including your troubles!
Thanks John for showing everything in you weld process including your troubles!
Owner of the same Patrol since 1967
-
- Administrator
- Posts: 1225
- Joined: Sun Jul 28, 2013 12:45 am
- Location: Roseville, California
- Has thanked: 646 times
- Been thanked: 1149 times
- Contact:
Re: 1967 Family Patrol Project
Ha! Mistakes and all! That is my motto!
So, I started attaching the mounting flanges for the pump and sender and tacked my extra fuel filler shape in place as a routing guide
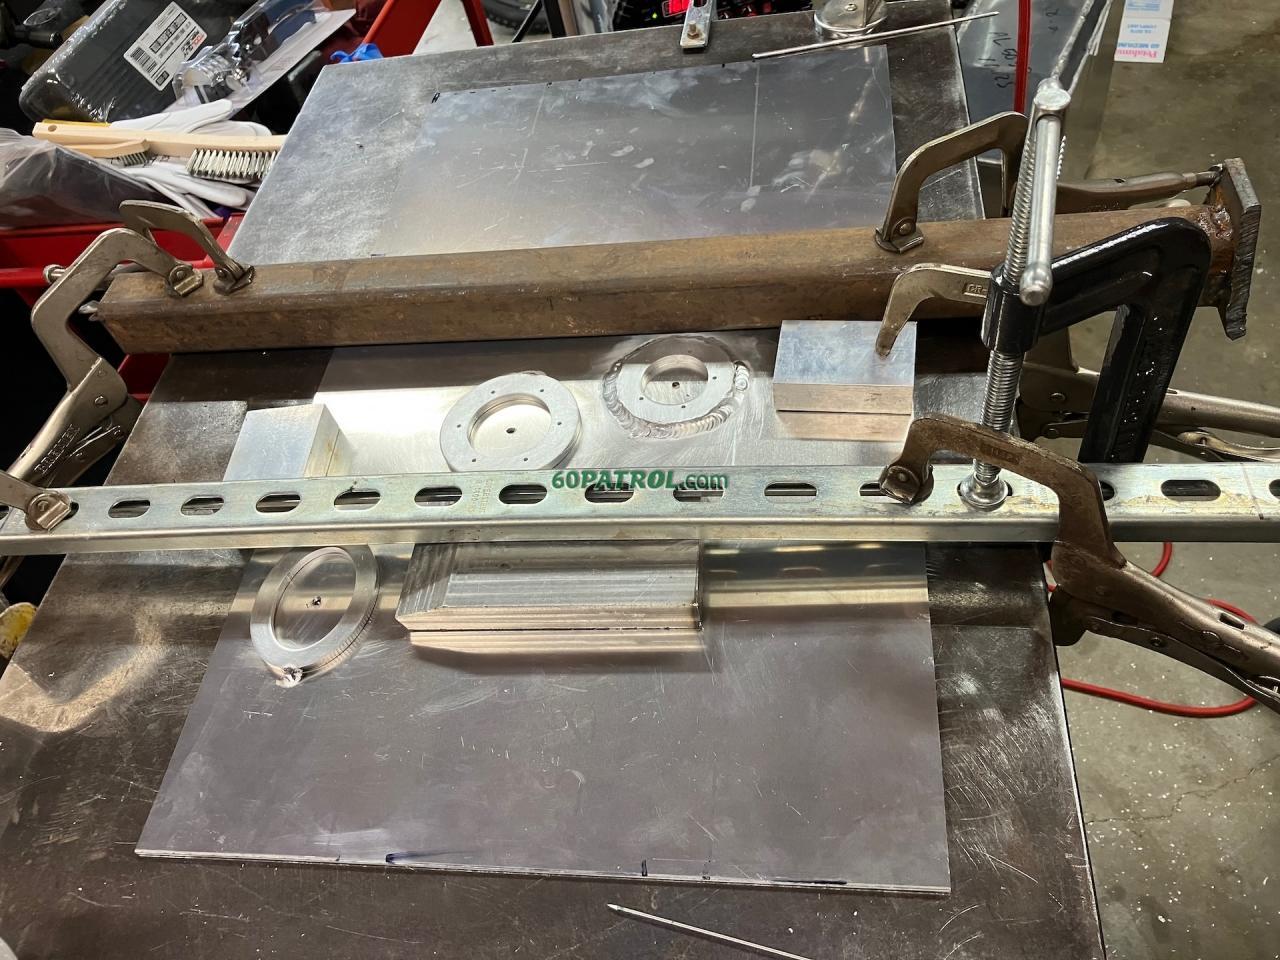
I had to reposition the clamps to get into the second flange... but I was seeing some sheet metal distortion.
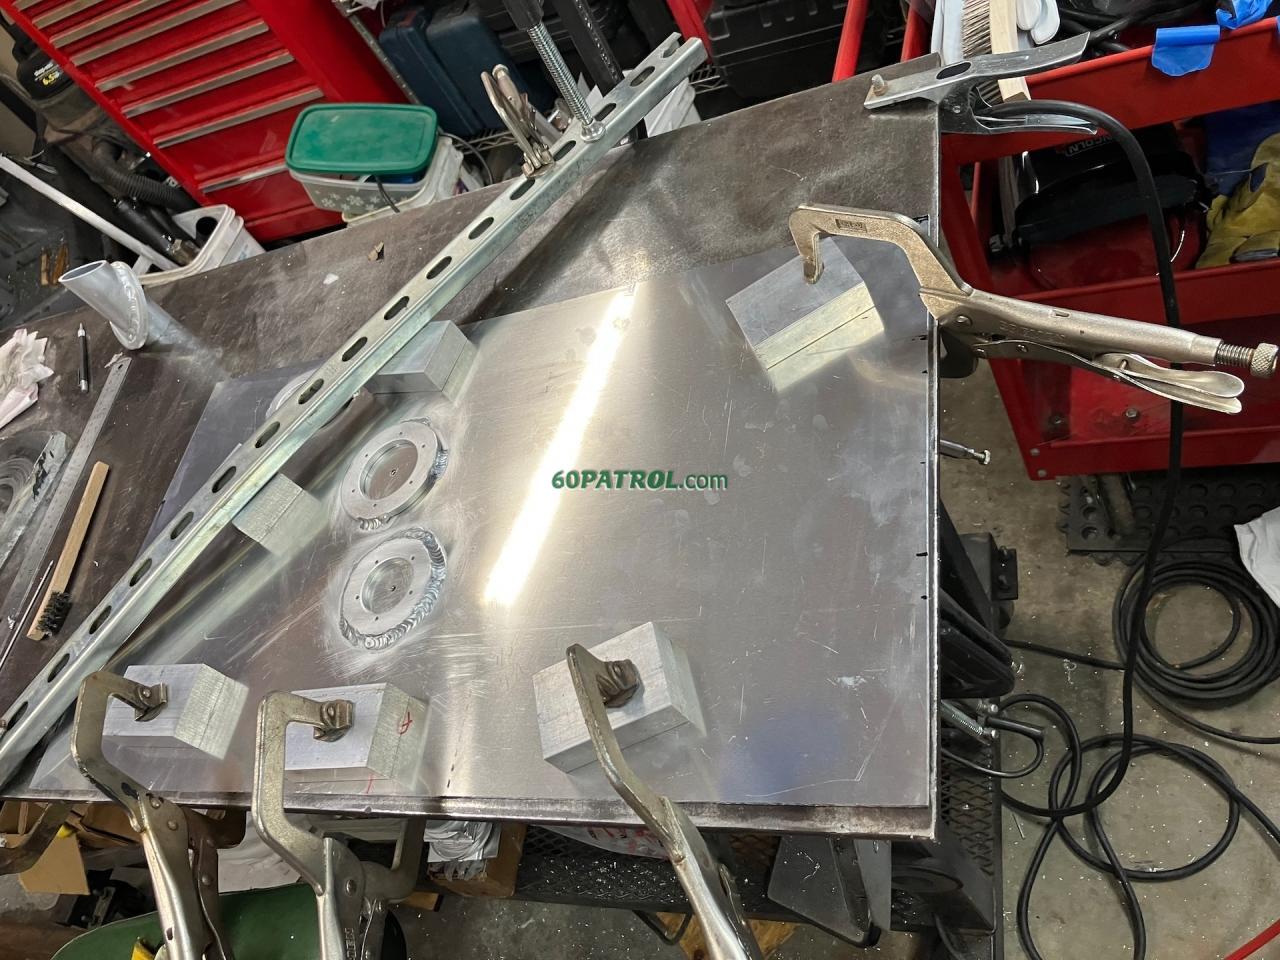
Yep. A little more... well, a lot more distortion than I expected. But, I'm sure I will be able to tweak it straight enough to use it.
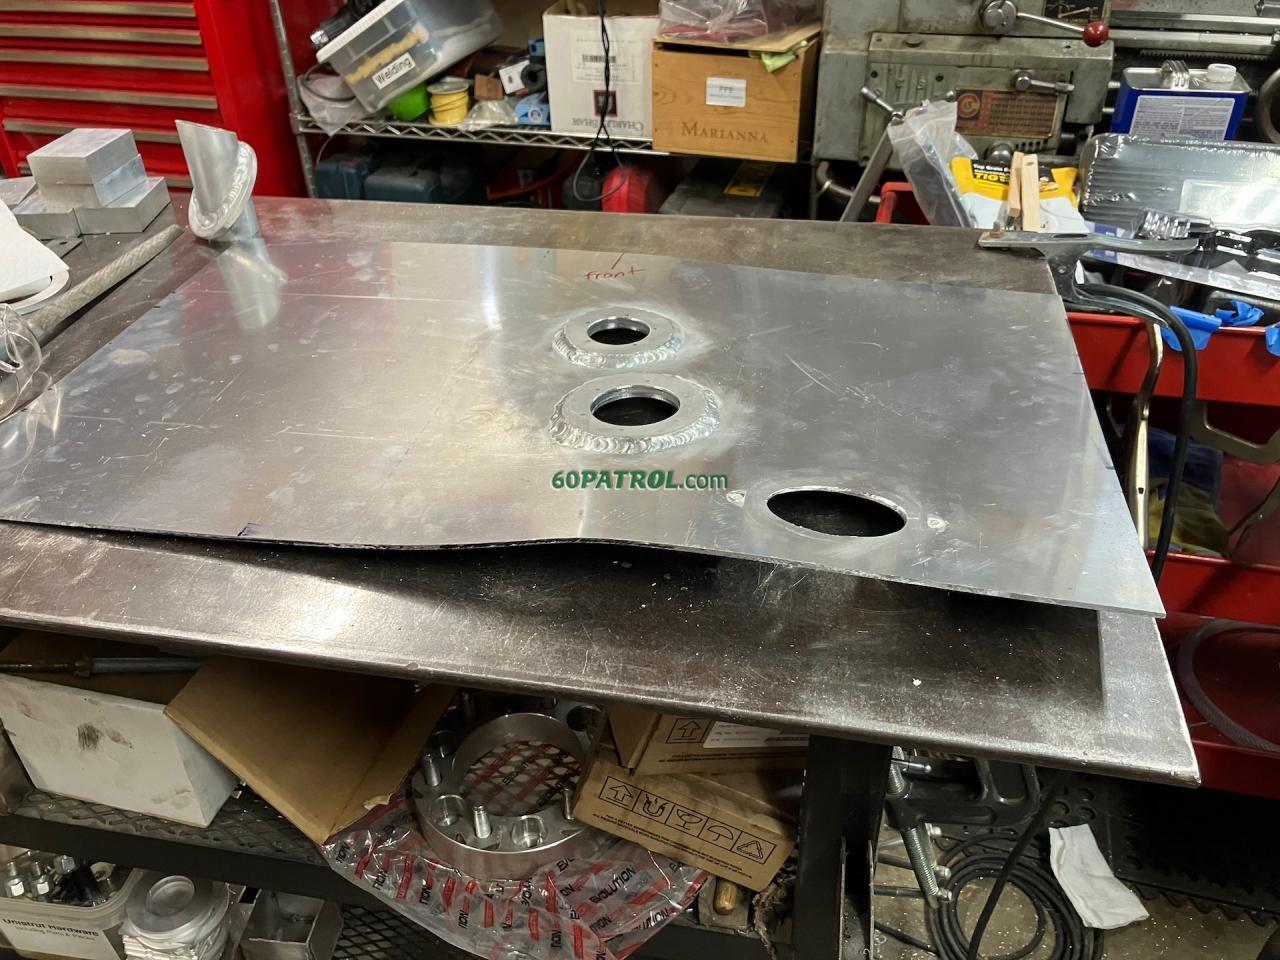
The filler neck will need to be adjusted as it will point slightly down rather than level across the tank. So, off to the belt sander!
Sorry -- no pics of belt sanding, but while getting that fit adjusted, I decided to trim the bottom of the fuel filler neck -- If the inside extends too deep, it will create an air-lock that will prevent fully filling the tanks. I want about a half-inch of space or so to assure that there is room on hot days for the gas to expand, but don't want to waste space! But, while I was hyper focused on getting it safely clamped in place and making sure it only extends a half inch or so into the tank, I failed to notice that I was cutting the WRONG SIDE! Doh! See Esteban -- Including my troubles...
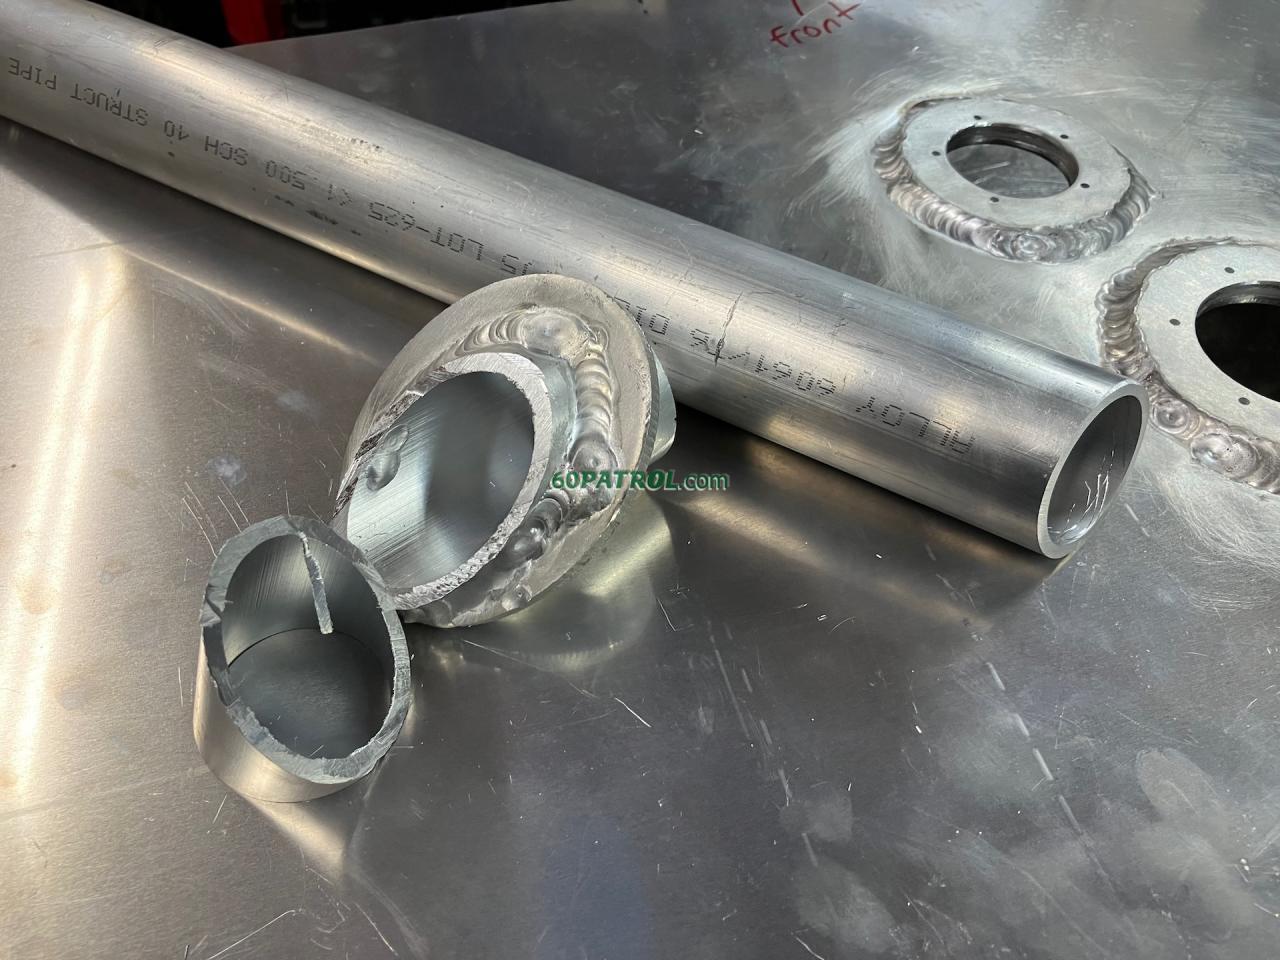
Well, I guess I get to make another fuel filler flange
So, I started attaching the mounting flanges for the pump and sender and tacked my extra fuel filler shape in place as a routing guide
I had to reposition the clamps to get into the second flange... but I was seeing some sheet metal distortion.
Yep. A little more... well, a lot more distortion than I expected. But, I'm sure I will be able to tweak it straight enough to use it.
The filler neck will need to be adjusted as it will point slightly down rather than level across the tank. So, off to the belt sander!
Sorry -- no pics of belt sanding, but while getting that fit adjusted, I decided to trim the bottom of the fuel filler neck -- If the inside extends too deep, it will create an air-lock that will prevent fully filling the tanks. I want about a half-inch of space or so to assure that there is room on hot days for the gas to expand, but don't want to waste space! But, while I was hyper focused on getting it safely clamped in place and making sure it only extends a half inch or so into the tank, I failed to notice that I was cutting the WRONG SIDE! Doh! See Esteban -- Including my troubles...
Well, I guess I get to make another fuel filler flange
-

- Administrator
- Posts: 7819
- Joined: Thu Oct 04, 2012 10:42 am
- Location: Temecula, CA
- Has thanked: 7703 times
- Been thanked: 2480 times
- Contact:
Re: 1967 Family Patrol Project
I used to experience that same issue back when I was driving a Patrol frequently enough to fill it regularly, I understand just how annoying it is. I did find a solution though, and it didn't involve the angle of the filler neck. It is due to back pressure but only because the vent line gets blocked. I was able to correct this on a few Patrols by ensuring the vent line was clear. In the picture below it was usually item #12 that was the culprit. This end piece is located above the filler neck high enough up to prevent water getting in the tank when your fording deep water. It's also a perfect place for mud wasps too crawl into the little hole and build a nest, or it gets clogged up when someone sprayed undercoating on the chassis, or packed with mud, or... I found if I made sure that vent line was clear all the way to the tank the gas pump was much happier. I still had to fill a little slower but it was much easier afterwards.faux40 wrote:I know this is petty... particularly since I have not had the opportunity to fill the Patrol tank in a few years, but it was always frustrating that the pump would continuously shut off during filling. I suspect it has a lot to do with that hard 90-degree angle at the back of the filler pipe into the tank. My guess is that it would create back pressure and convince the pump that the tank was full causing the repeated shut offs.
j
You do not have the required permissions to view the files attached to this post.
Beyond any hope for intervention

-

- So, I just bought this Patrol….

- Posts: 96
- Joined: Tue Jan 10, 2023 5:08 pm
- Location: Bogart, Georgia
- Has thanked: 209 times
- Been thanked: 107 times
- Contact:
Re: 1967 Family Patrol Project
I think we all can relate.....when I read that, I felt just a tiny bit better about myself...faux40 wrote: I failed to notice that I was cutting the WRONG SIDE!

Tom
Modelo 1976 L60
Batalla 2200mm
Cilindrada 130 a 3956cc
Modelo 1976 L60
Batalla 2200mm
Cilindrada 130 a 3956cc
-
- Administrator
- Posts: 1225
- Joined: Sun Jul 28, 2013 12:45 am
- Location: Roseville, California
- Has thanked: 646 times
- Been thanked: 1149 times
- Contact:
Re: 1967 Family Patrol Project
I finally successfully built the fill port -- and here's it's being attached! I also added an extra bung for pressurizing and testing... well, that and just in case I need another port in the future!

While test fitting, I discovered that I welded the shiny new bung into a horrible location! Dang! I do it right because I do it twice!

Time for little Bridgeport love! I clamped the top into the mill and...
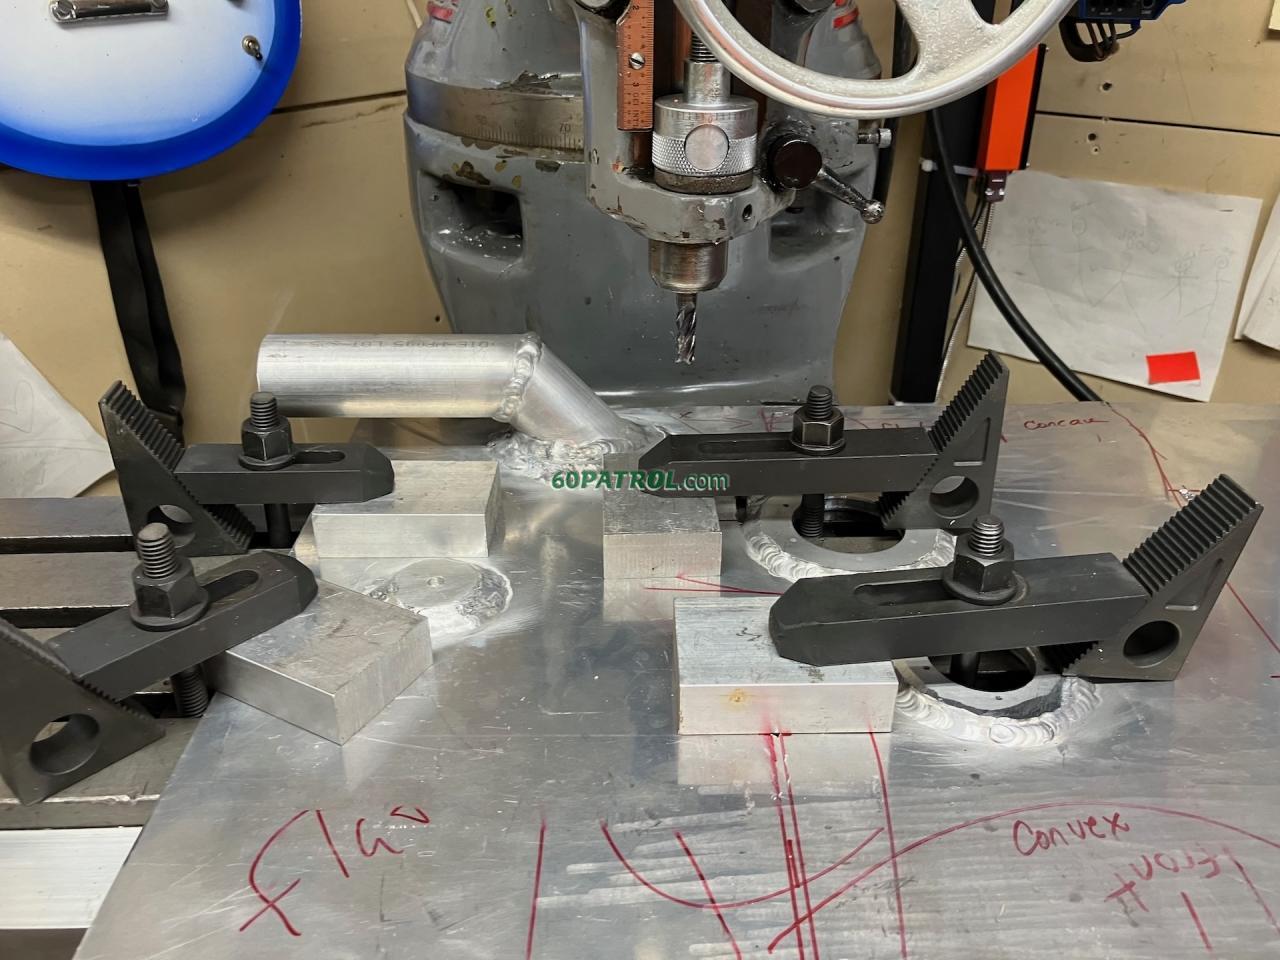
Machined the bung down to zero! Actually, I went a few thousandths too far! Doh! Should be okay -- the lid is 0.120" thick, so the 0.010" won't make a structural difference.

I think I may add a little patch-plate with a bung placed inward a couple inches to make space for the strap! Ignore the stainless ruler and the bung blank sitting on the fuel pump flange... I should have removed those before taking the picture

BTW, TIG Welding the fill port in place seems to have reduced the distortion a whole bunch! With only the center four tabs clamped in place, this is the worst of it around the edges!
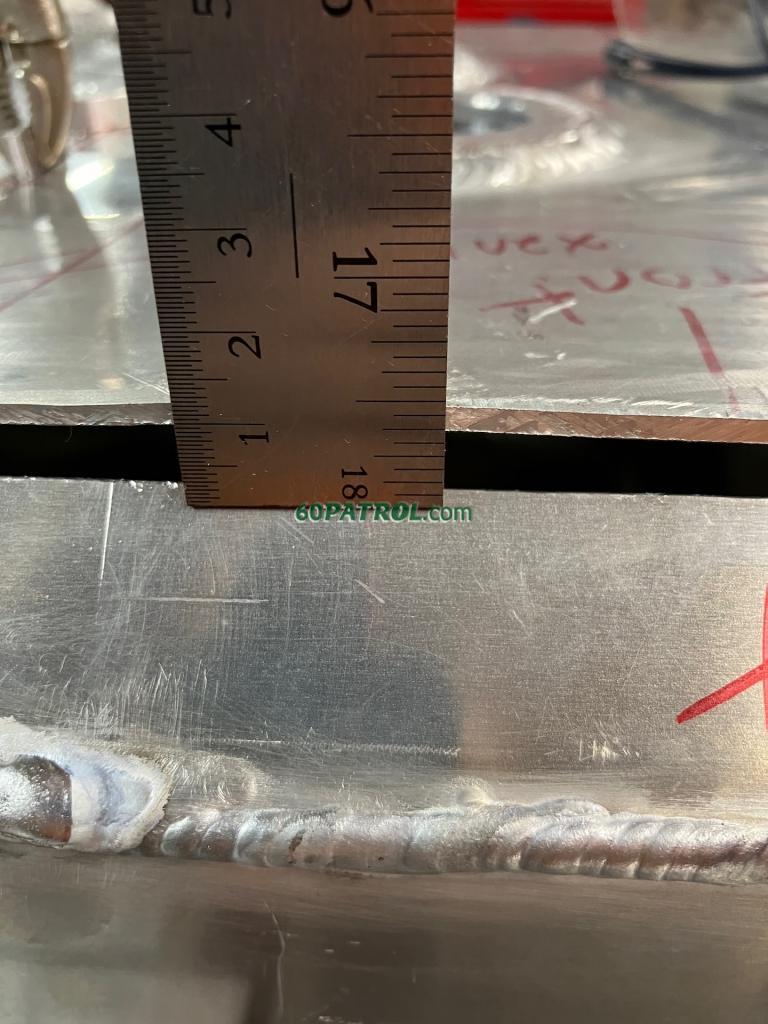
Oh no! I seem to be nearly out of argon! You know, I'm not really sure if I am actually saving any money building my own tank... I've used up an entire argon tank learning how to tig weld, not to mention all weld rod, tungsten rods I've gone through, plus all the vise grips and other welding/tank specific things I've purchased! On the other hand, figuring it out, designing the tank, learning something new (TIG welding aluminum) and building a (moderately) solid tank, despite all the challenges, really is the best part! BUT, IF I EVER NEED A SECOND TANK... I AM GOING TO KILL IT!

Happy Sunday!
j
While test fitting, I discovered that I welded the shiny new bung into a horrible location! Dang! I do it right because I do it twice!
Time for little Bridgeport love! I clamped the top into the mill and...
Machined the bung down to zero! Actually, I went a few thousandths too far! Doh! Should be okay -- the lid is 0.120" thick, so the 0.010" won't make a structural difference.
I think I may add a little patch-plate with a bung placed inward a couple inches to make space for the strap! Ignore the stainless ruler and the bung blank sitting on the fuel pump flange... I should have removed those before taking the picture
BTW, TIG Welding the fill port in place seems to have reduced the distortion a whole bunch! With only the center four tabs clamped in place, this is the worst of it around the edges!
Oh no! I seem to be nearly out of argon! You know, I'm not really sure if I am actually saving any money building my own tank... I've used up an entire argon tank learning how to tig weld, not to mention all weld rod, tungsten rods I've gone through, plus all the vise grips and other welding/tank specific things I've purchased! On the other hand, figuring it out, designing the tank, learning something new (TIG welding aluminum) and building a (moderately) solid tank, despite all the challenges, really is the best part! BUT, IF I EVER NEED A SECOND TANK... I AM GOING TO KILL IT!
Happy Sunday!
j
-
- Administrator
- Posts: 1225
- Joined: Sun Jul 28, 2013 12:45 am
- Location: Roseville, California
- Has thanked: 646 times
- Been thanked: 1149 times
- Contact:
Re: 1967 Family Patrol Project
It's done... ish. All welded out anyway. I certainly can weld aluminum at this point, but my consistency leaves a lot to be desired! Good news is most of that warping on the top sheet came out with clamping while I welded in the filler pipe. The tank is not picture perfect by any stretch, but it is reasonably shaped! Besides, painting hides so much AND it's really not very visible under the patrol!
The finished tank!


Next stop, pressure test! Just a few PSI - like 6 or 7psi - or else it becomes a bomb! Next, spray soapy water over all the welds and watch for bubbles. I'm sure their will be several leaks -- the youtube pro's always seem have a couple leaks... so I expect just a few more than that! At least the fix is easy... just de-pressurize and open a vent hole into the tank, then use the tig to remelt and weld right over the leaky spot. Repeat, repeat, repeat until it holds that pressure for a long time.
I ordered this SBR (Styrene-butadiene Rubber) to use to separate the tank from the tank tray and strapping. I would have preferred black rubber, but the tank is 53" around and all the black rubber strips on Amazon were either too short (36") or stupid expensive. This was a decent price and really won't be visible anyway! I'm so excited to move on to something new! Once the tank is done, it's time for brake and fuel lines!
J
Good news is most of that warping on the top sheet came out with clamping while I welded in the filler pipe. The tank is not picture perfect by any stretch, but it is reasonably shaped! Besides, painting hides so much AND it's really not very visible under the patrol! The finished tank!
Next stop, pressure test! Just a few PSI - like 6 or 7psi - or else it becomes a bomb! Next, spray soapy water over all the welds and watch for bubbles. I'm sure their will be several leaks -- the youtube pro's always seem have a couple leaks... so I expect just a few more than that!
At least the fix is easy... just de-pressurize and open a vent hole into the tank, then use the tig to remelt and weld right over the leaky spot. Repeat, repeat, repeat until it holds that pressure for a long time. I ordered this SBR (Styrene-butadiene Rubber) to use to separate the tank from the tank tray and strapping. I would have preferred black rubber, but the tank is 53" around and all the black rubber strips on Amazon were either too short (36") or stupid expensive. This was a decent price and really won't be visible anyway! I'm so excited to move on to something new! Once the tank is done, it's time for brake and fuel lines!
J
You do not have the required permissions to view the files attached to this post.
-
- I love driving my Patrol!

- Posts: 635
- Joined: Sun Jul 19, 2015 4:36 pm
- Location: USA
- Location: North Carolina, USA
- Has thanked: 455 times
- Been thanked: 791 times
- Contact:
Re: 1967 Family Patrol Project
Nice job on the gas tank!! I can see where that provided a huge amount of practice welding aluminum, lots of seams in that. 
Paul