Page 119 of 124

Re: 1967 Family Patrol Project

Posted: Sat Sep 02, 2023 4:20 pm
by faux40
Lookie! It's up on the engine stand!
8739


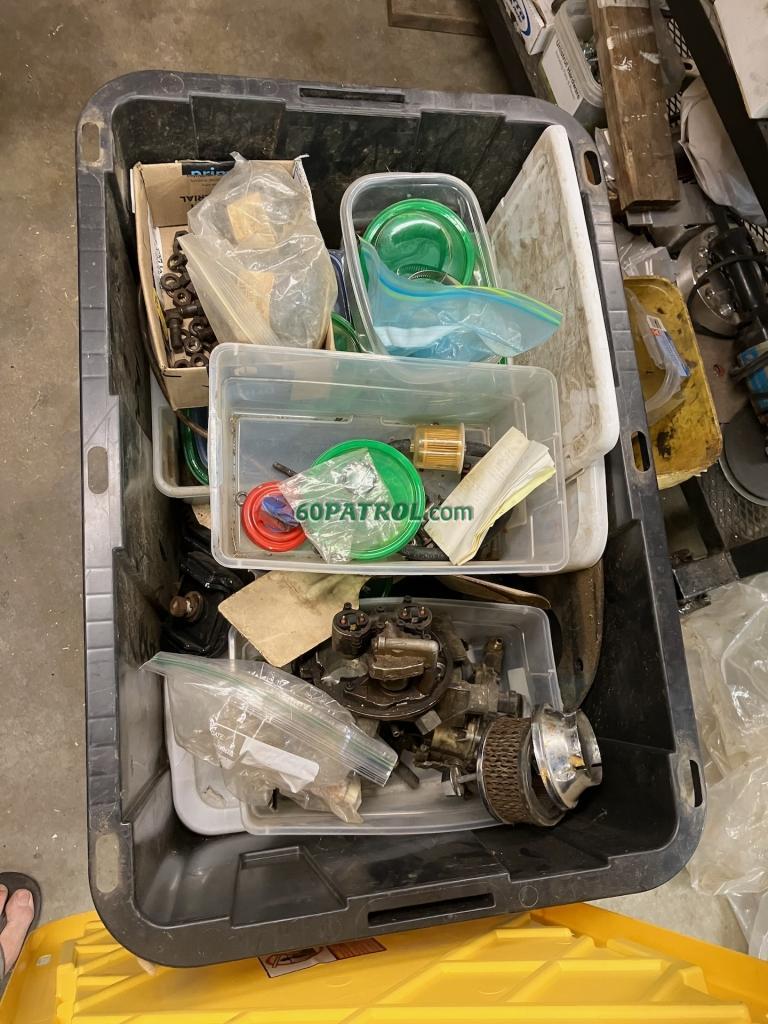
Next, I'm digging through all my Patrol goodies looking for engine parts. Here's the main box of engine goodies
8741

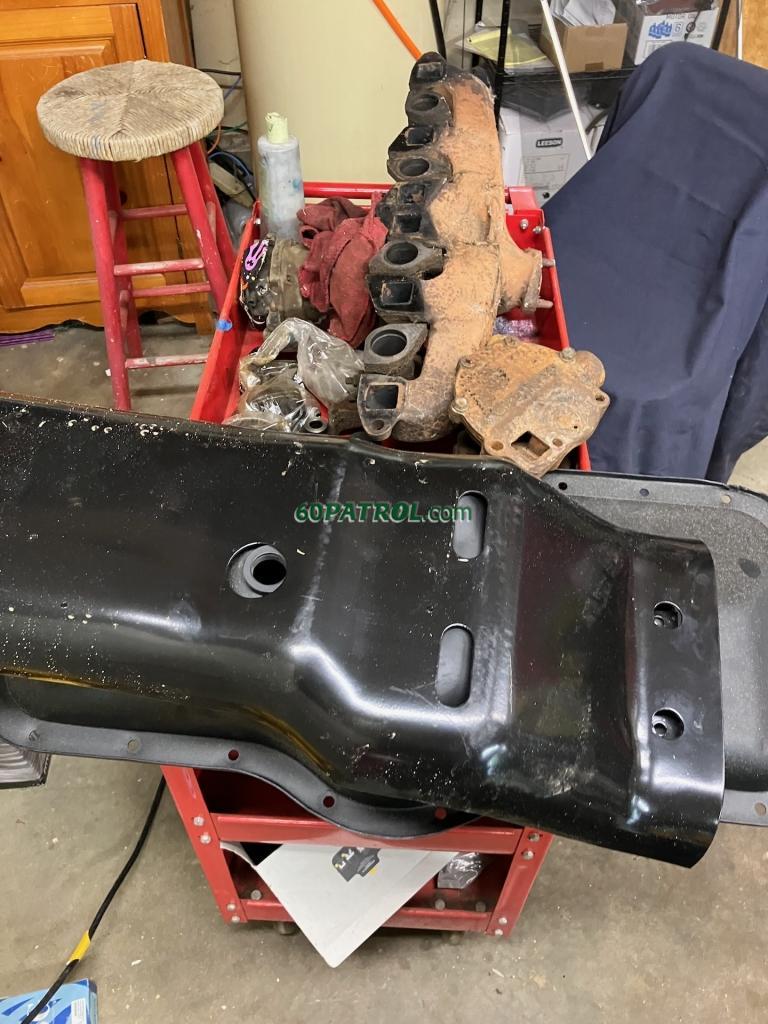
And, the skid plate, oil pan... there are some fit issues that I'll need to think about, then I'll have to weld on the skid plate mount to the back end of the pan.
8742
In the background, the intake/exhaust manifold, and the water pump.

I swear, I went through every box twice and I still cannot find the front harmonic balancer! I really don't want to steal the one off the running P engine!
8740

Happy Saturday!

J

Re: 1967 Family Patrol Project

Posted: Sun Sep 03, 2023 9:14 pm
by faux40
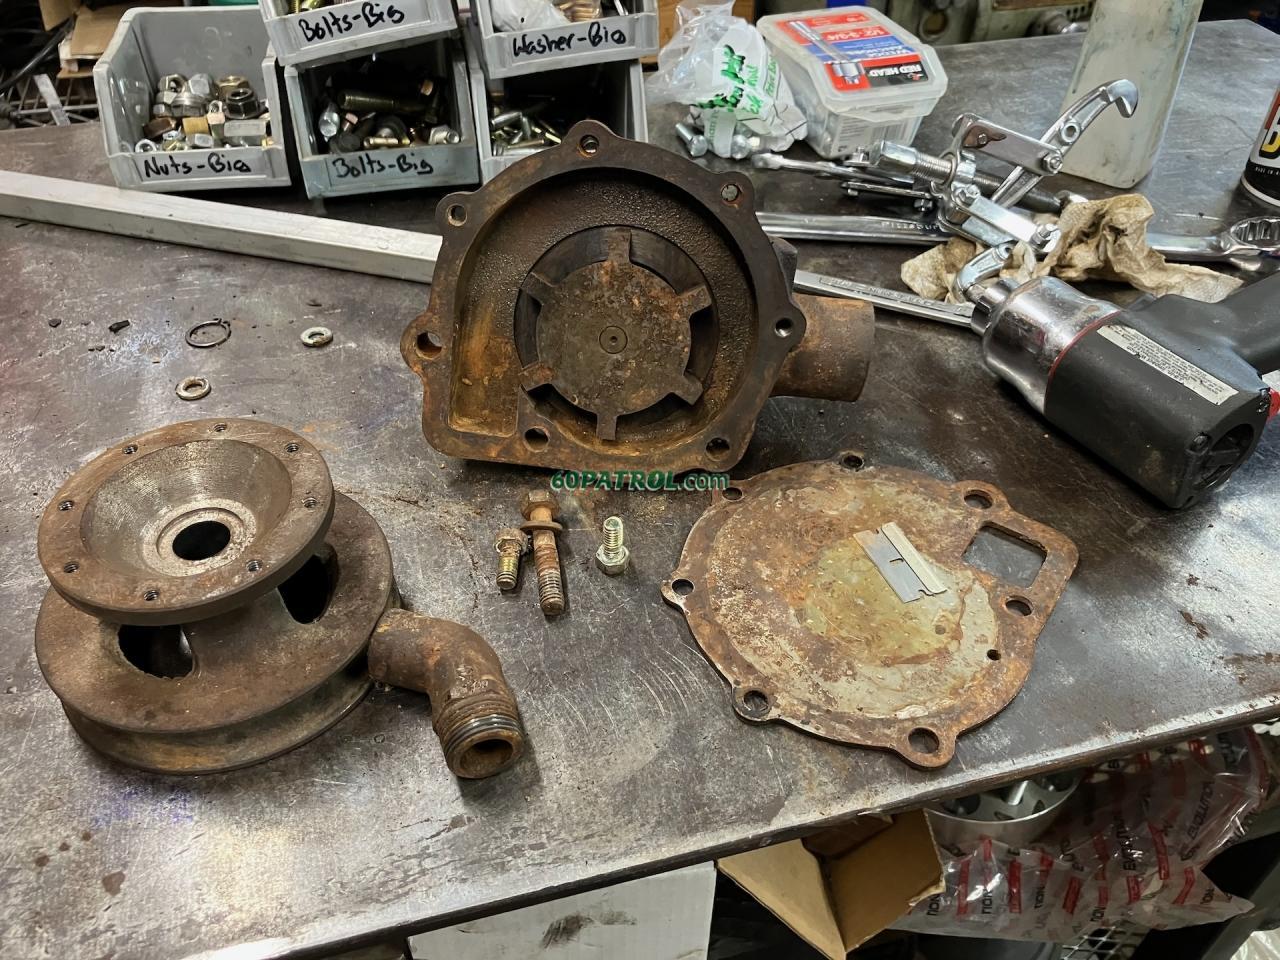
Today was an adventure! Took the water pump apart, then I put some parts on the engine and ended up having to make studs for the valve cover hold downs.

I kicked the day off by taking the water pump apart -- It is in surprisingly good condition! My plan had been to take it all the way apart, then powder coat it, but I am going to just clean it as it is and then re-assemble it and call it good with a coat of blue paint
8745

These were my first attempt at valve cover hold downs... the volunteer bolts were just a wee bit short though
8743

So I ran up to the hardware store and grabbed three longer grade-8 5/16" bolts to try again. I didn't take still images, but I did let the video camera roll as I converted a bolt into a stud. I machined off the hex head and then added some 24tpi threads to that end just like the originals. At 5 minutes, it's kinda long for what it is, but working on the lathe is always fun (for me anyway)


An boom! That valve cover is ON!
8746

The pushrod cover is on-ish... the gasket is in place but the bolts are too short. I've order longer replacements. When they get here, I will swap them out one-by-one.
8747

Have a great weekend!

J

Re: 1967 Family Patrol Project

Posted: Thu Sep 07, 2023 8:01 pm
by faux40
Check it out! Mr. McMaster popped by for a visit! Bolts Galore!
20230906_IMG_5860.jpeg
It's a good day! ;-)

j

Re: 1967 Family Patrol Project

Posted: Sun Sep 10, 2023 11:28 am
by faux40
It's getting exciting! The past few days were all about getting the rebuilt engine ready!

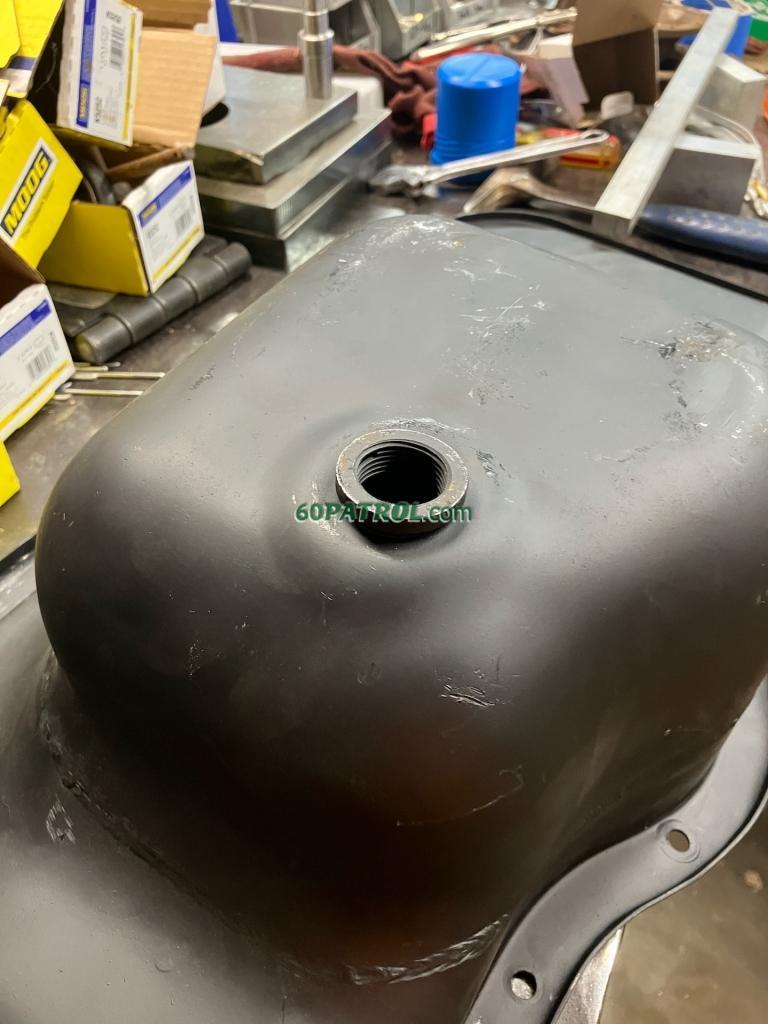
To start, the oil pan needed love. It has two big dents and a few konks around the outer lip
8777

I started by pressing the bottom and the other konk closer to the edge back to shape using the hydraulic press and a chunk of 2x4 (sorry -- no pictures, but the results were really good!).
8754

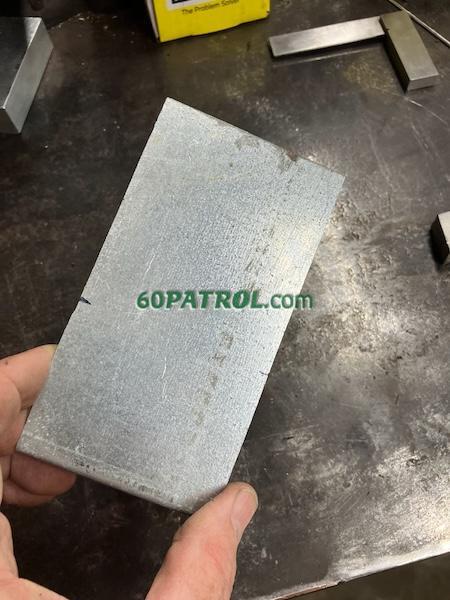
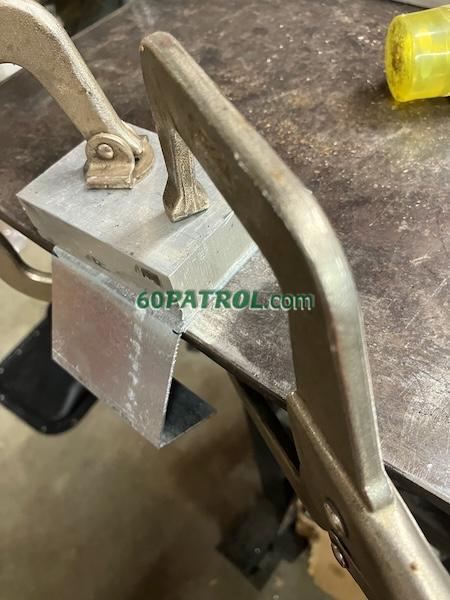
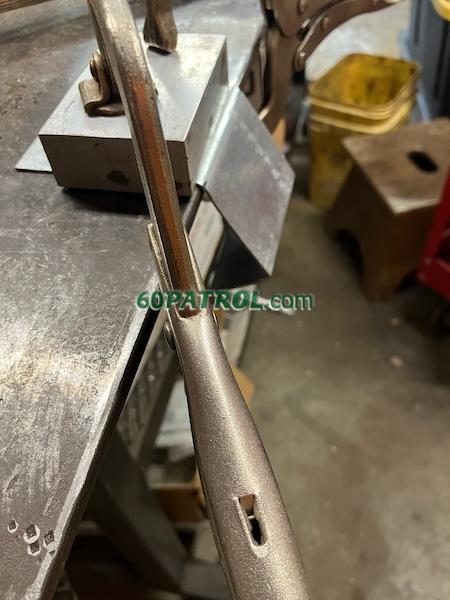
Then I started working on the tweaked lip right by that bottom konk... I used a long chunk of aluminum and clamps to pull it back to straight (ish).
8751


Not only was the edge-flange tweaked, it was bent a just enough that wouldn't sit flat. So I beat it silly -- Just working back and forth along the flange. Sometimes I would "bridge" the pan on blocks and beat the lip. It took awhile, but it - meaning the sealing surface -- finally sits flat on the bench!
8749

Next, I needed to create a new flange mount for the oil pan skid plate. These are the only two pictures I could find that show what the bracket looks like and how high above the pan it sits (thanks jwgreen!)
20230909_Engine5.jpg
20230909_Engine.jpg
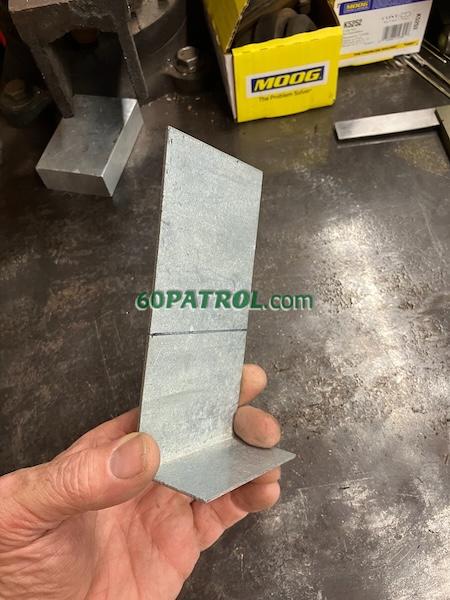
Here are the progress shots while I bent up the bracket to try and match what jwgreen's oil pan skid plate bracket looks like!
8755 8756 8757 8758

And, where it will sit on the pan -- That angled flange is still way too long at this point though
8759

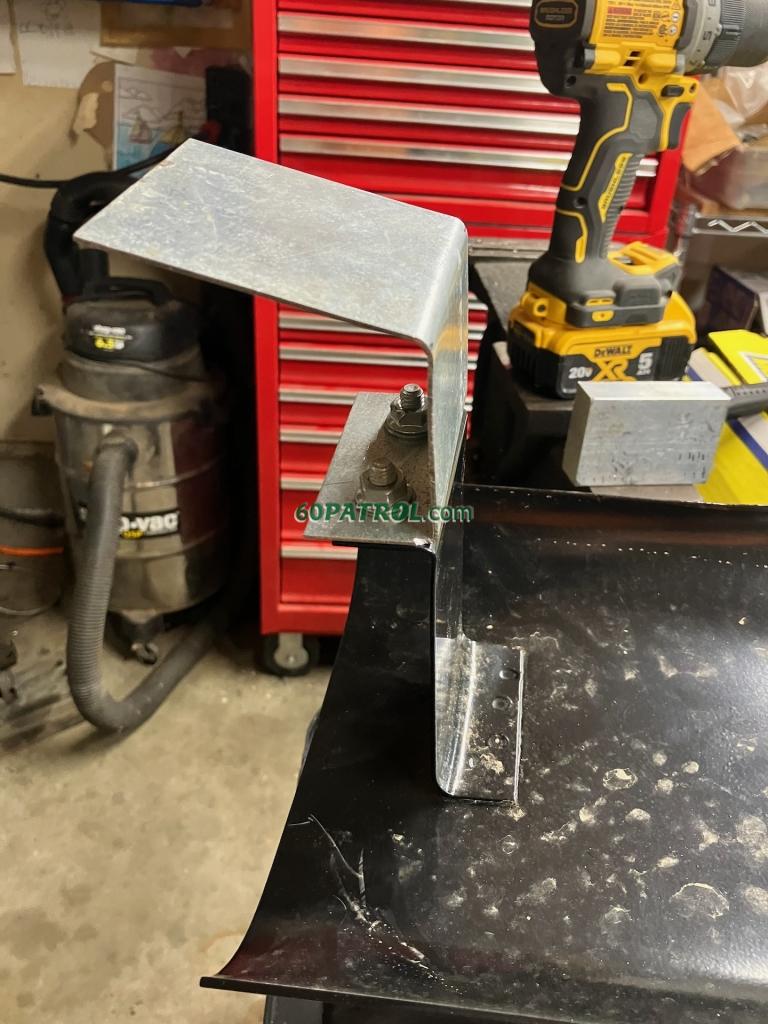
And the new flange attached to the skid plate for fitting -- That angled flange looks even longer here!
8761

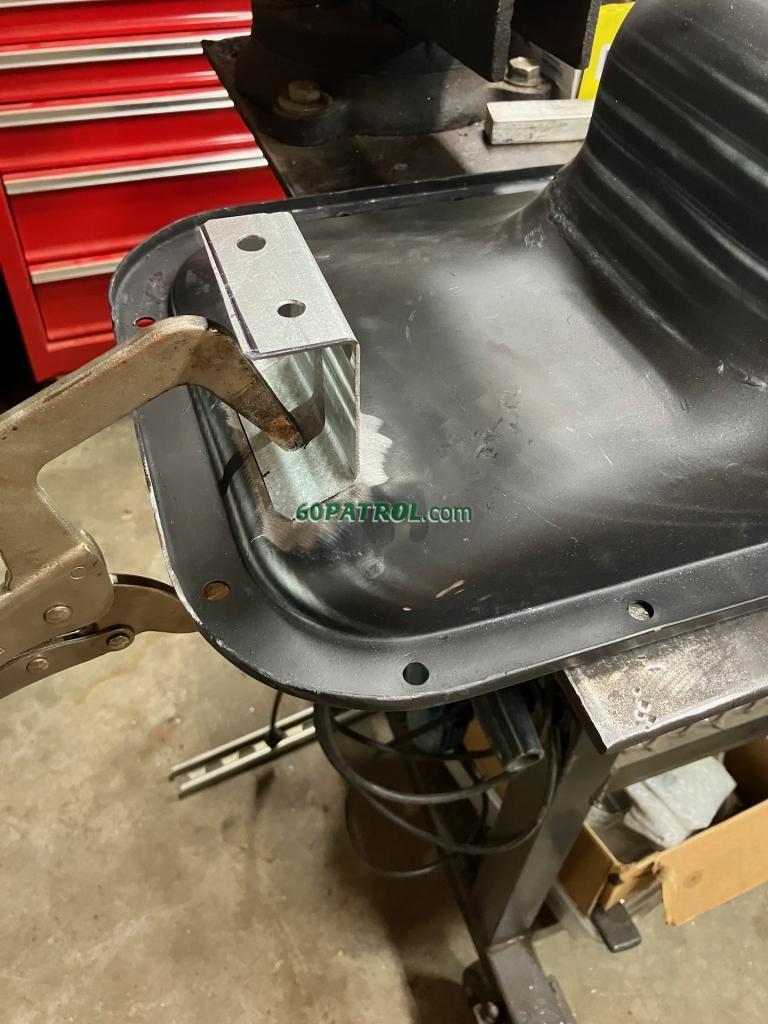
The old bracket residue needed to be removed, but first, I scratched a line to show where the edge should sit on the pan. I wanted to minimize the damage to the pan itself, so I ground down the spot welds, then chiseled it off.
8762

The flange cut to size and clamped in place
8764

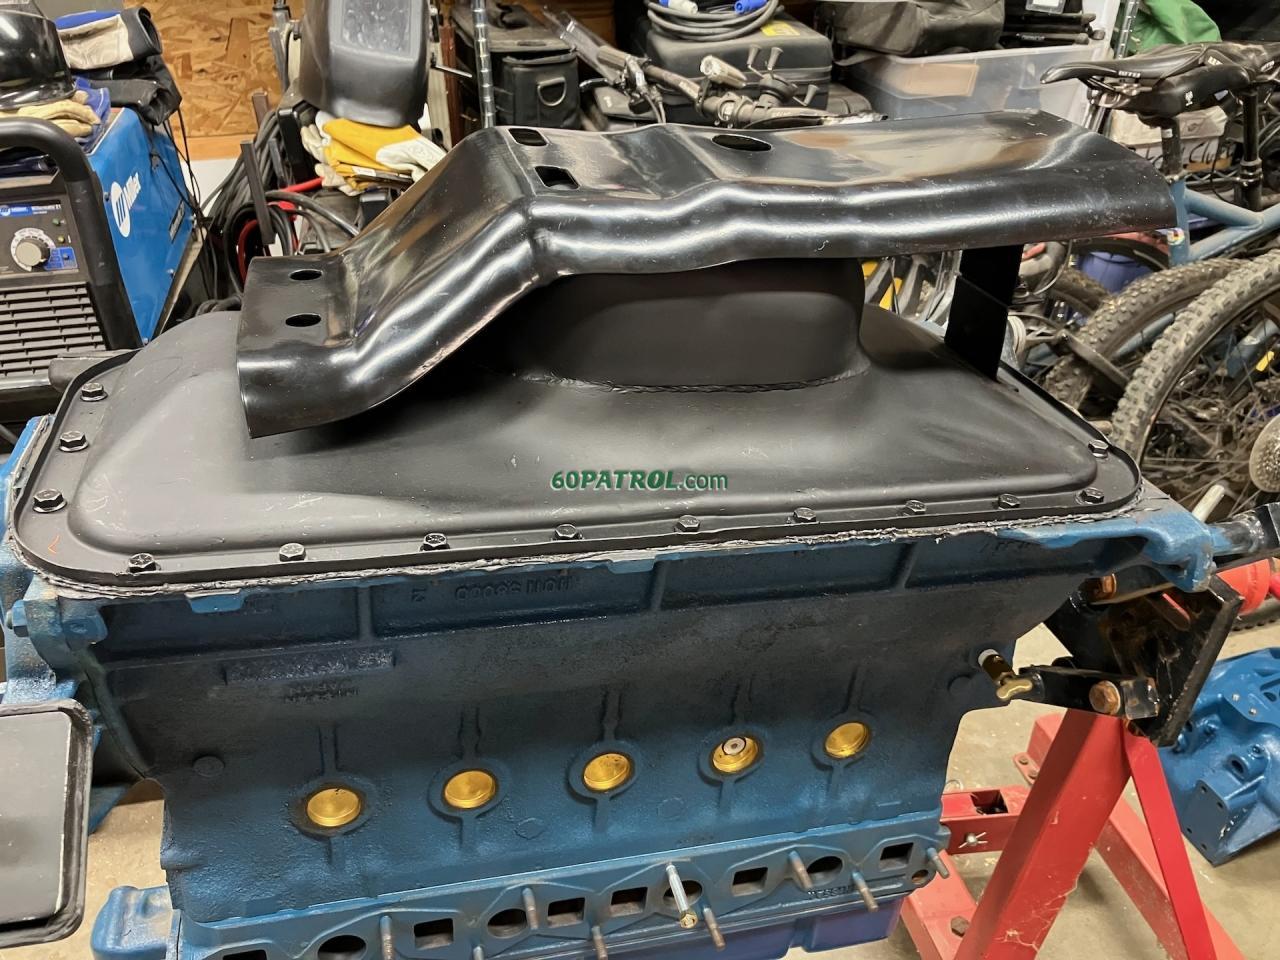
Here's the full fit up with the pan and the skid plate installed. The height was set by the clearance over the sump (actually under the sump, but we are working upside-down! ;-) ). You can't really see it in this picture, but the skid plate sits about 3/8" to maybe 1/2" from the edge of the oil drain hole. Hopefully the plug will be inside the protection and not extending beyond it!
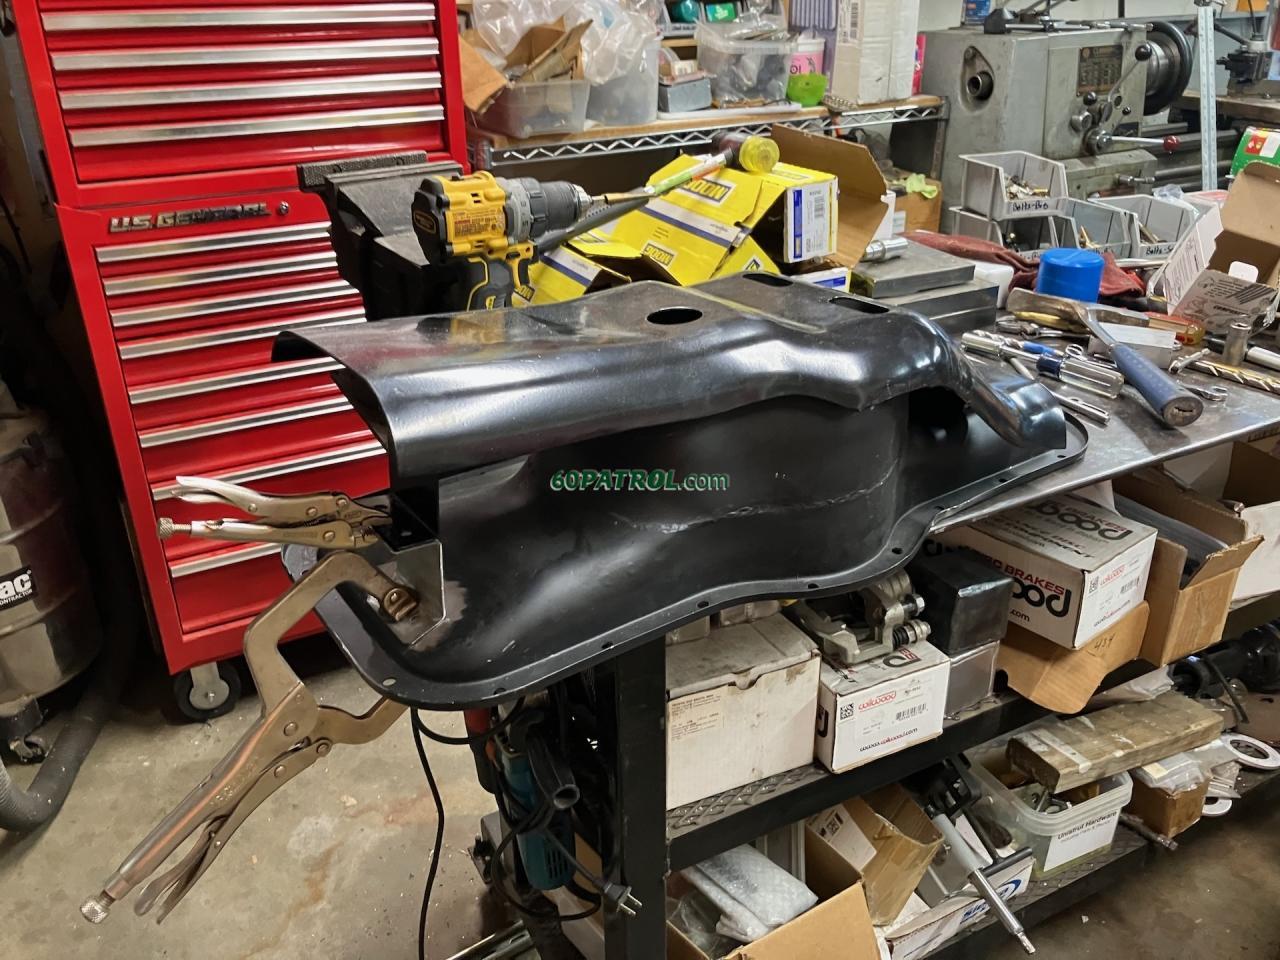
8769

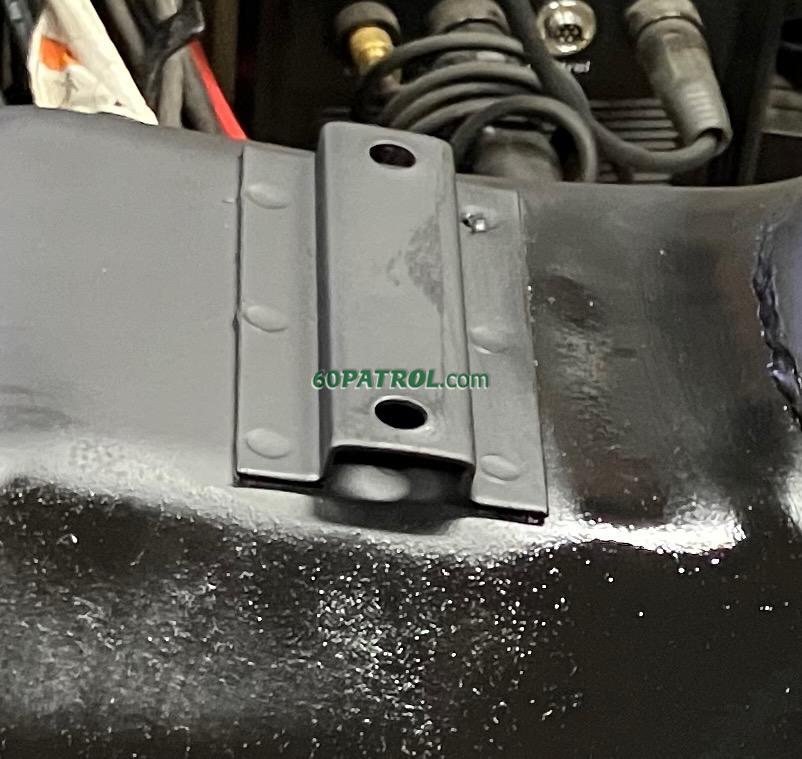
Since I don't own a spot welder, my plan is to plug weld it. Since the factory used three spot welds, I made three holes for plug welding (I'm also add small beads on the edges). I also ground off the galvanizing where I plan to weld... that stuff is bad to breathe in!
8768

Boom! Attached! Three plug welds and two little edge-beads and it's ready for adventure!
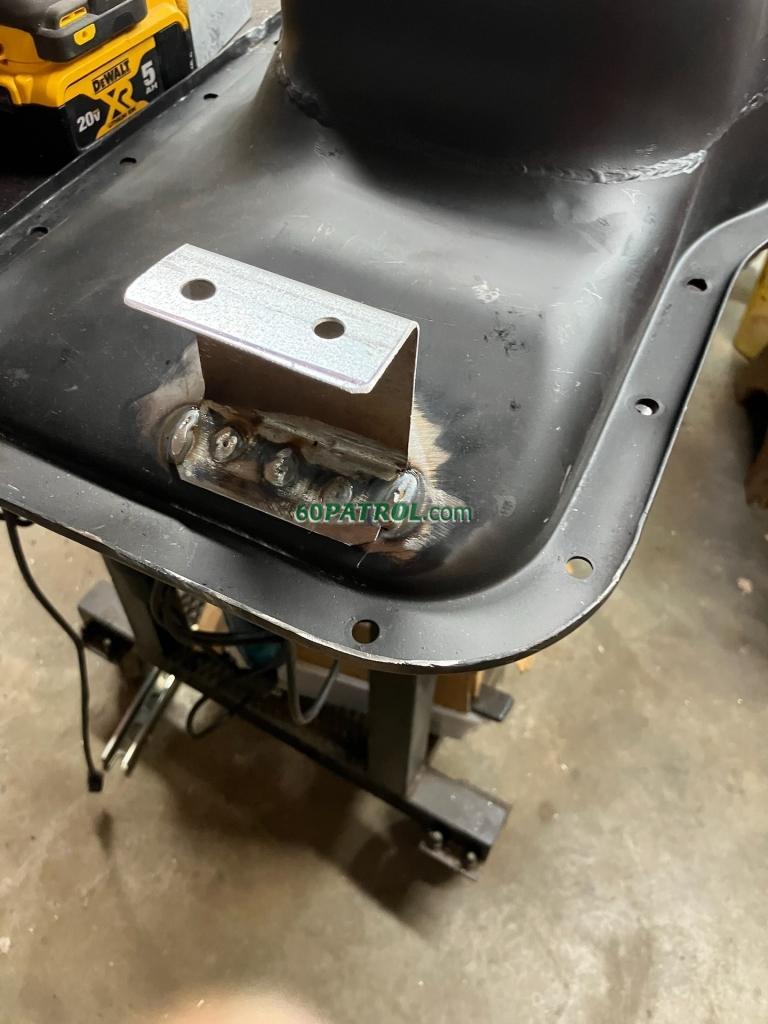
8770

And, a little paint to make it pretty -- The primer really highlights just how much I worked that flange along the side to get it back to shape! It's actually much straighter than the paint makes it appear.
8772

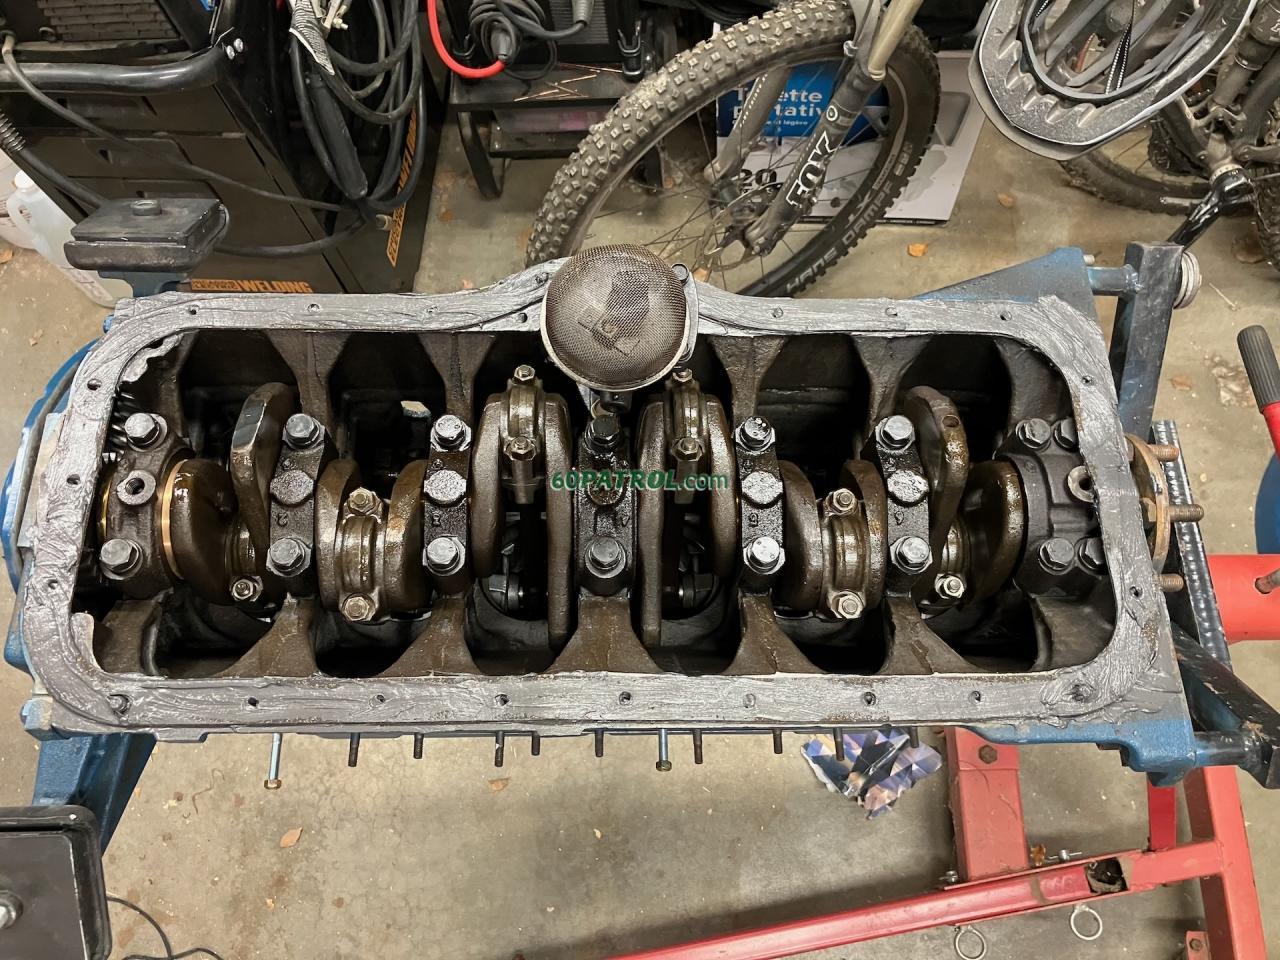
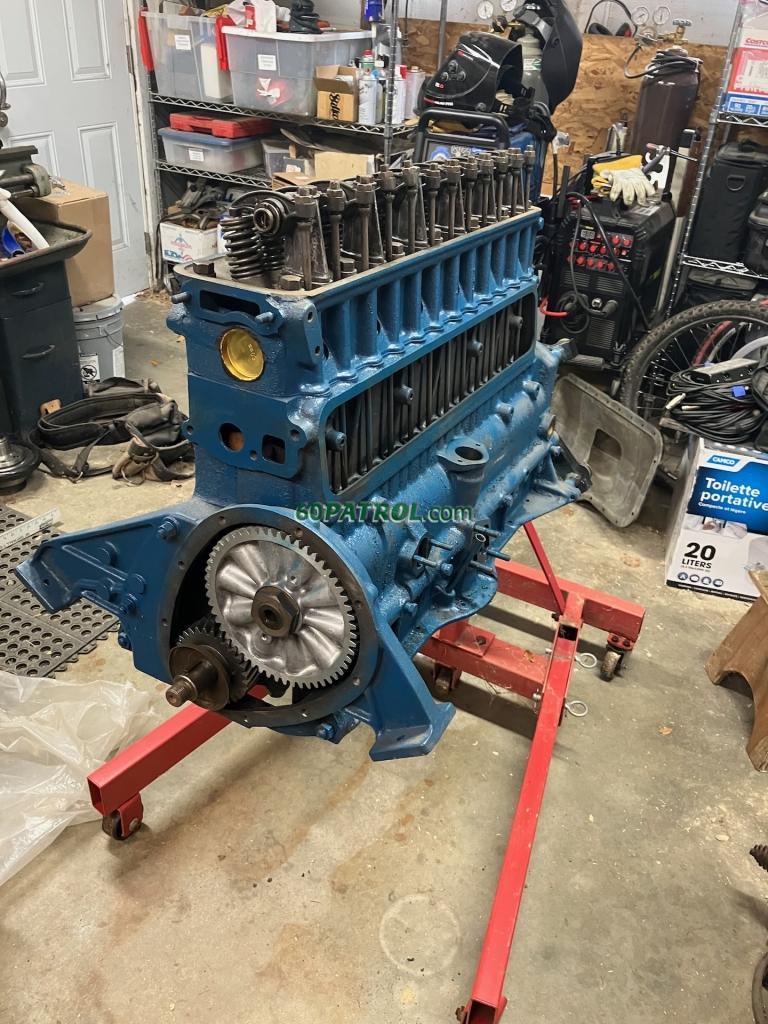
This is really my first look into the engine since I had it rebuilt... it's either been bagged up or right-side-up (and I'm not about to stand under this monster on the stand to see inside!). Other than a couple cobwebs, it's looking great! Still has the assembly lube all over it despite the years of sitting around waiting for me to get moving!
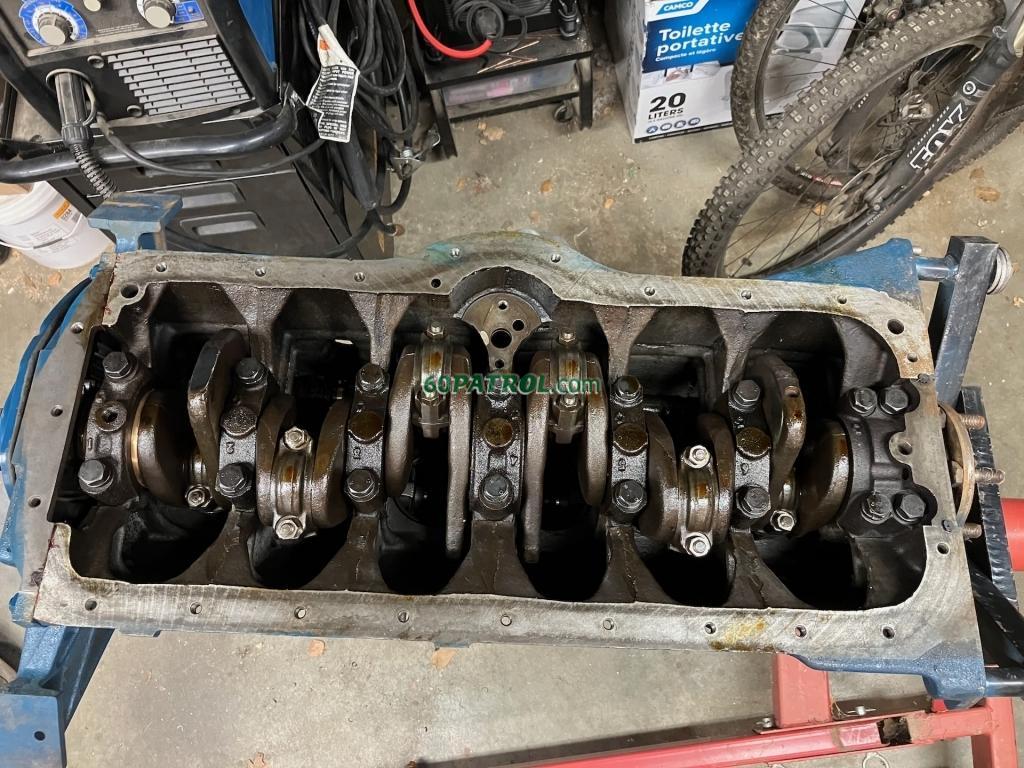
8774


The machinist cleaned up and prepared the oil pump when he rebuilt the engine, so that was an easy install. I had the gasket in my remaining stack of gaskets, so all I had to do was bolt it in and torque it to spec. (Sorry, not shown -- but the pan will come off again one more time before it's permanently installed -- I'll get a picture then)

I've been saving this pan gasket -- a true OEM cork gasket no less! The label has a 5/2003 date, so, true NOS!
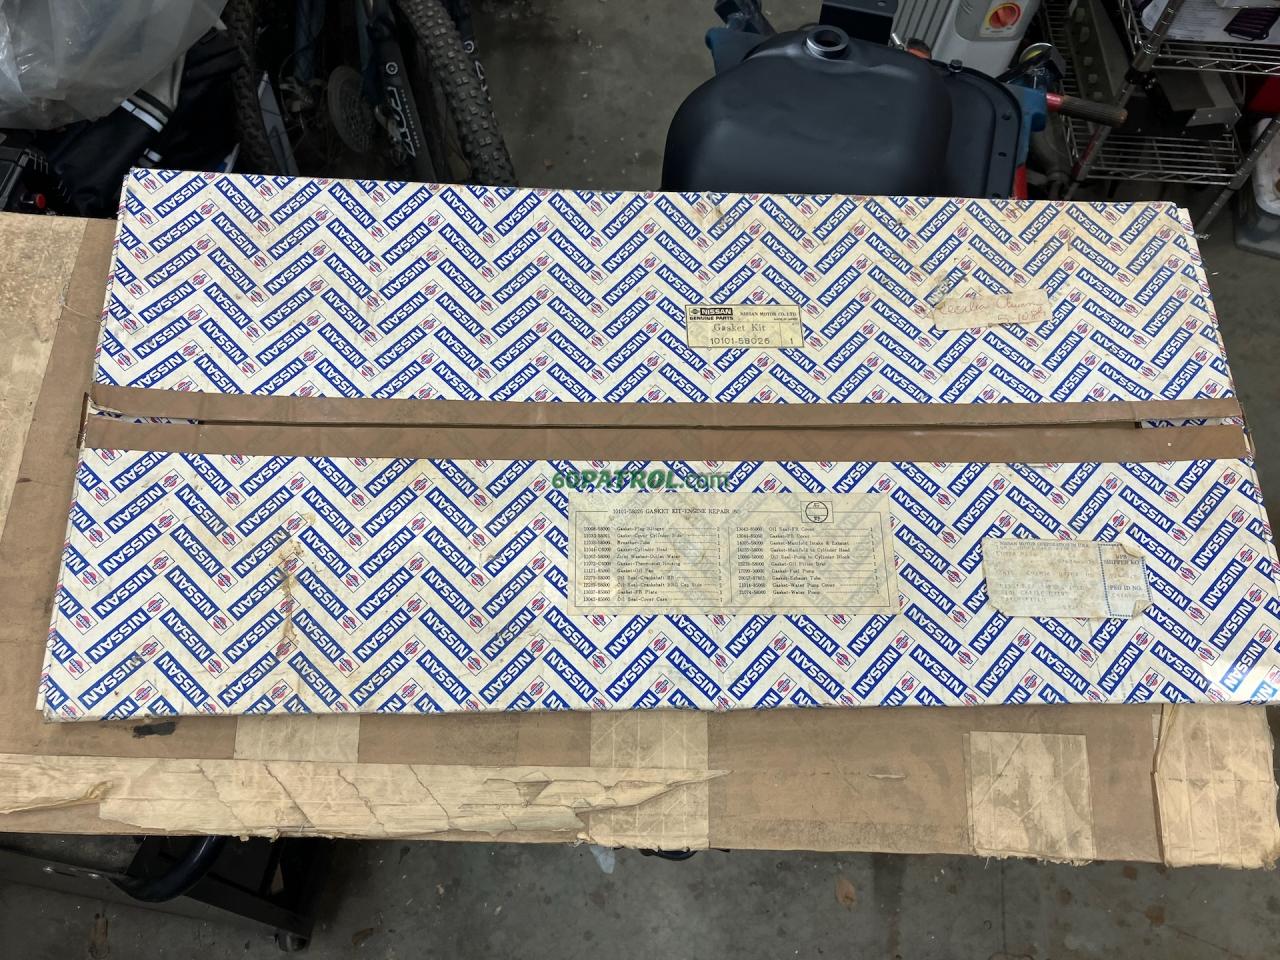
8778

Turns out that cork shrinks and gets brittle -- I mean shrinking a bunch! It was probably one to two inches smaller than the pan - in both dimensions! I was carefully trying to fit the gasket to the block by slowly and evenly stretching it back to shape by using the bolts as dowels to hold it... but, it snapped. Crap.
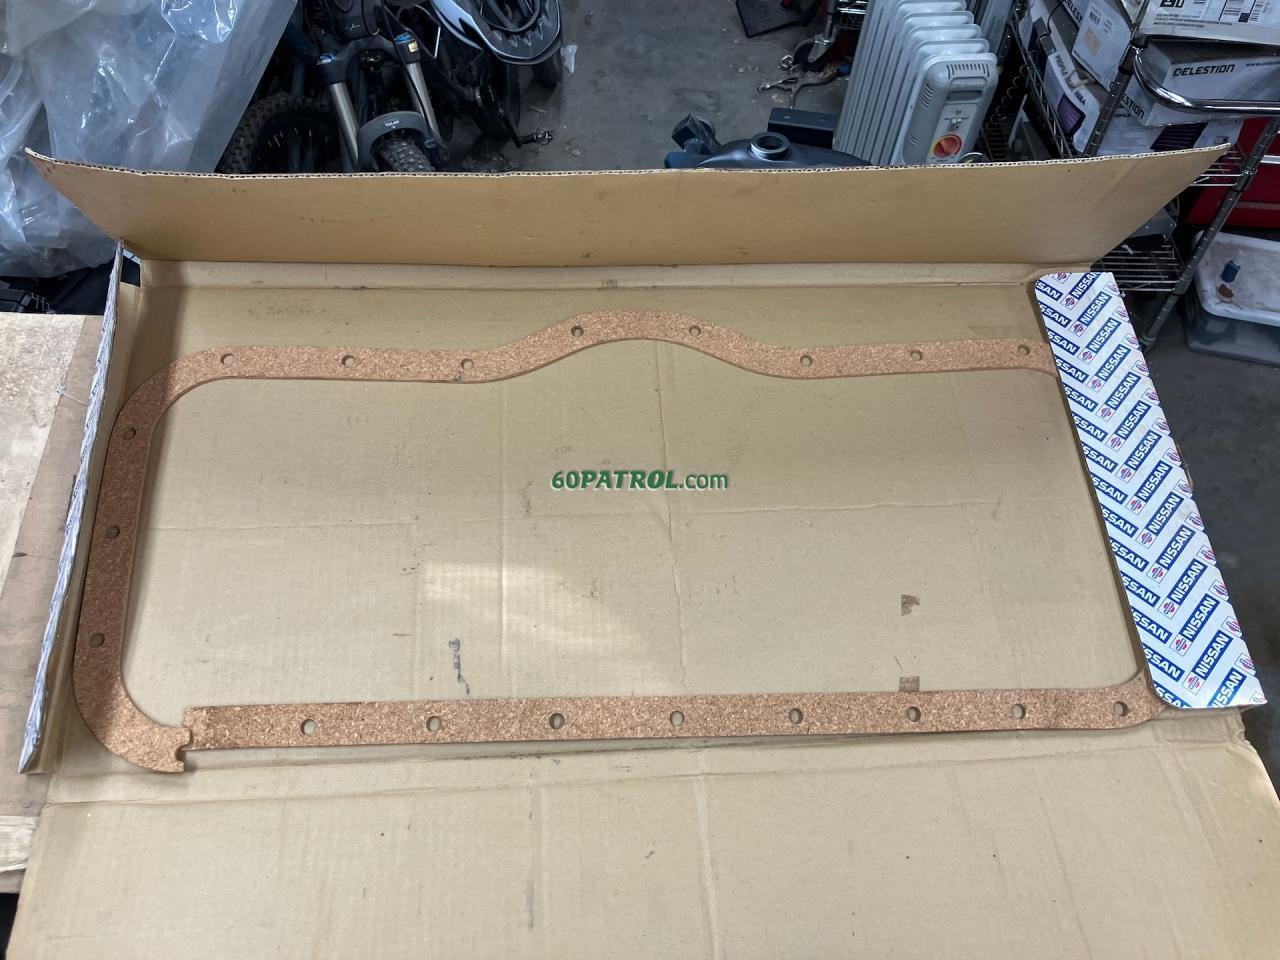
8779

I did, however, have a backup non-oem pan gasket - a cork/rubber hybrid? It did age better than the cork one for sure! However, it was folded up (they put foam chunks into the folds to make it round-over rather than a crease). But, the gasket doesn't sit flat as the fold-over locations have a memory! Like with my attempt to re-size the cork gasket, I gently pinned it to the pan shape, then put the pan on it, hopefully to reset its memory to flat! My plan is to use a thin layer of form-in-place gasket maker goo on each side, then bolt the pan down. BUT, I forgot to include 3/4" bolts in my super McMaster order. The 1" bolts I have are just too long (and I am not about to try to hand-shorten all million or so pan bolts! I also need those shorter bolts for the timing cover too... they are supposed to arrive in a couple days).
8775

Not sure what's next while I wait for bolts... but I'll try to come up with something!

Happy Sunday!
J
Re: 1967 Family Patrol Project

Posted: Sun Sep 10, 2023 2:42 pm
by faux40
Aaaarrrrrgggghhhh! I cannot find the rear motor mount brackets. I KNOW that both sets were here at one point!!!

There is the set currently on the engine/trans from Aerogirl that are still sitting on the stand. AND, the another set from the green '66 (that is down to just a frame at this point... Here's my Proof

Aerogirl's nuymber-matching engine/bellhousing moments after is came out of her way back on January 4, 2014 (this is the same engine that will be going back in shortly...)
2161

And, the engine in that green '66 before it even cam out.
5609

Now, where on earth did I put it! ;-)

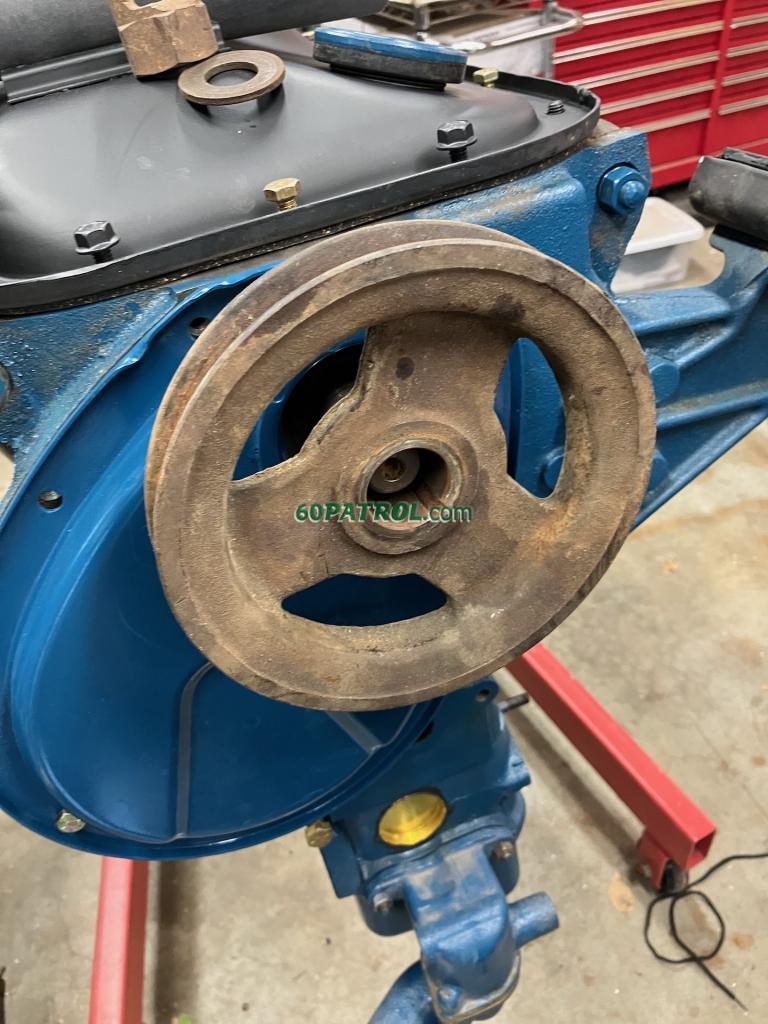
On a brighter note, did I tell you that I found the front engine pulley! It was in the last place I looked! ;-) (same place I swear it looked a dozen times before -- probably the same place as the two rear motor mount brackets!) ;-)
8781

J

Re: 1967 Family Patrol Project

Posted: Mon Sep 11, 2023 9:38 am
by RiverPatrol
It looks like you're having way too much fun. :D

Re: 1967 Family Patrol Project

Posted: Mon Sep 11, 2023 11:39 am
by faux40
faux40 wrote:Aaaarrrrrgggghhhh! I cannot find the rear motor mount brackets. I KNOW that both sets were here at one point!!!
I found them... again, in the last place I looked! ;-)

They were in the back of the hardtop '66... Whodathunk! But, on the bright side, my Patrol parts are a lot more organized as a result of the search!

J

Re: 1967 Family Patrol Project

Posted: Wed Sep 13, 2023 10:50 am
by faux40
A quick update!

My next batch of McMaster nuts and bolts arrived yesterday -- an order that included a bunch of 5/16" x 18 x 3/4" bolts destined to bolt down the oil pan and timing cover! Of course, I made a mistake torquing the bolts... the P Engine manual it shows 4.9 ft. lbs. but I read 14.9 ft. lbs. Ooops! I made the discovery as I finished tightening the bolts and noticed one section of gasket squish-out. Doh! Not all the way out, just very proud. So, I loosened that side up some, tucked the gasket back in, and then re-tightened (to a somewhat lower torque). At least I made the discovery before I torqued down the timing cover! ;-)

There is a decent chance that it won't leak (please, please, please!) -- Since I had to reshape that pan to get the dents and tweaks out, I put a thin layer of form-in-place gasket goo on each side of the gasket to help seal any less than 100% perfect areas.
8784

So the pan and timing cover are on! The pan still needs blue paint, but I couldn't resist bolting down the skid plate! The skid plate is powder coated black and will stay black to contrast with the blue engine. The pre-fixed gasket squishout is visible along the right side of this picture... right at the third bolt counting from the rear
8782

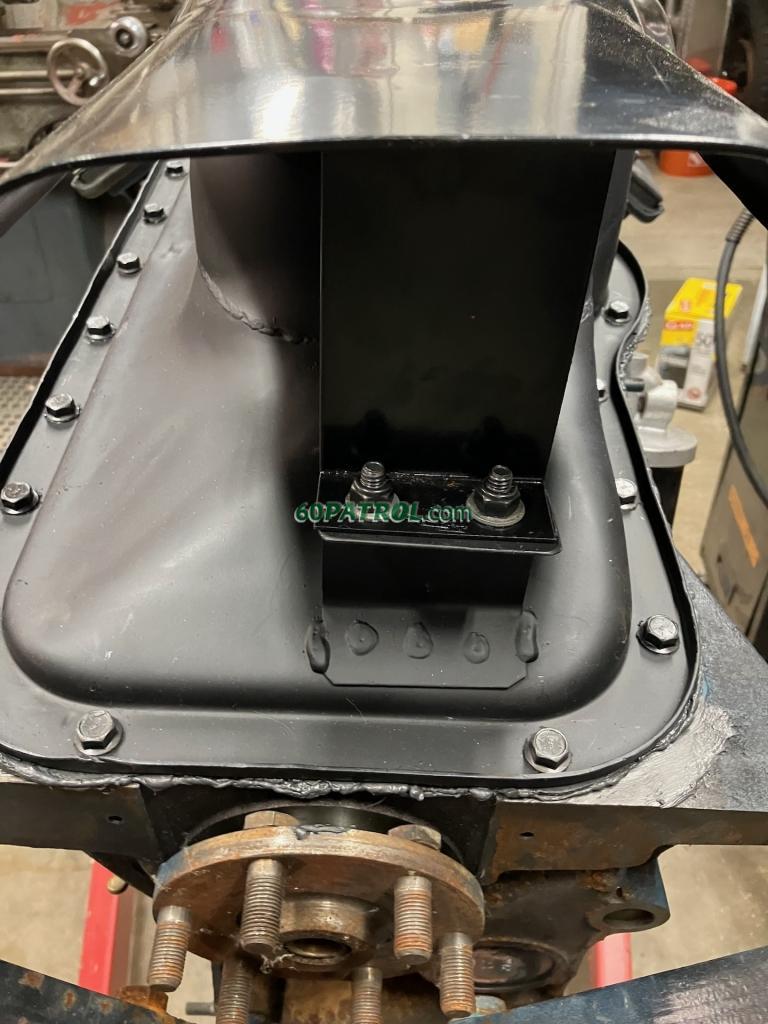
Here's my diy skid-plate mount in use.
8783

Speaking of the skid plate -- I had to do some custom machining on the bolts to make them fit! Those 3/4" bolts were *WAY* too long! The bolts go through the skid plate tab, then the bracket -- which combined are about 1/8", then there is only about 3/16" from the underside of the bracket to the pan itself. I used nylock nuts inside the bracket -- because they fit... barely fit in that gap! So happy that I have a lathe! I put three washers and a non-nylock nut onto the bolt (the three washers & non-nylock are the same thickness as the skid plate bracket, the mounting bracket and the nylock). Then I put that tiny bolt into the lathe -- the three jaw chuck aligns well with the six sides of the bolt cap. Then I shortened the bolt down to the face of the nut. Backing the nut off cleaned up the threads and I was left with a bolt that was the perfect length for the bracket! Repeat for the second one!
8785

My next short term goal is to get the engine installed into the frame. The challenges to get there are:
  • Get the engine painted -- the pan is just primered, but the paint on the block has a few spots that need touch ups -- particularly in the areas where the engine block casting is porous. I'm going to wire-brush it in those areas, then add a fresh top coat to the whole thing.
  • Find a new front timing cover seal -- the old one is in surprisingly good shape and it's the multi-lip seal, but it is old. If I can find a new one great. If not, the old one should work.
  • I need a new oil pan plug. a 3/4" (I think) pipe plug seems to fit (how well it seals is unknown though). But, the square stub that sticks out beyond the skid plate! I'd like to find a plug that uses an inward socket drive for a lower profile... or a bolt? Does anyone know what the original looks like? What is the thread pitch?
  • Install the fuel pump -- Technically, I don't need a fuel pump since I put one in the tank, but I'd like to keep it somewhat original looking. I'm actually toying with disassembling one of my pumps (there are several in my parts collection) and removing the internals and adding a pass through pipe so it will *LOOK* like there is a pump on the engine...
  • Install the oil filter housing assembly. I was thinking of modifying the filter housing assembly to support either a remote filter or a standard cartridge filter, but decided to hold off on that for now! I still have a couple brand new filters so there is no hurry!
  • Find the flywheel nuts. They are not my bucket-o-bolts, but they should be somewhere! I do have a freshly surfaced flywheel and rebuilt clutch just waiting to be installed (and, unlike some of the other parts, I know *EXACTLY* where they are hiding! ;-)
  • Get some new bronze bell housing bushings for the clutch shaft and other shafts that attach to it. I actually may have some left over somewhere from the previous engine install... like with many of the other parts, "somewhere" is the key term here!
  • Install the bell housing
  • Get the engine bolted into the chassis!
I'm going to hold off on attaching the Marks 5-Speed for now. According to the Marks installation procedures, the cross member will need to be notched and I think it will be easier to layout the notch, etc. by test fitting the trans to the engine after its mounted than trying to swing that huge beast in place with the trans dangling off the back!

J

Re: 1967 Family Patrol Project

Posted: Wed Sep 13, 2023 3:20 pm
by faux40
To be fair, I should not have opened my previous post with "A quick update!"... because it was everything but quick! ;-)

However, this is a quick update! I just dropped my DIY gas tank off at the powder coaters! It's gonna be glossy black soon!

j

Re: 1967 Family Patrol Project

Posted: Thu Sep 14, 2023 11:56 pm
by faux40
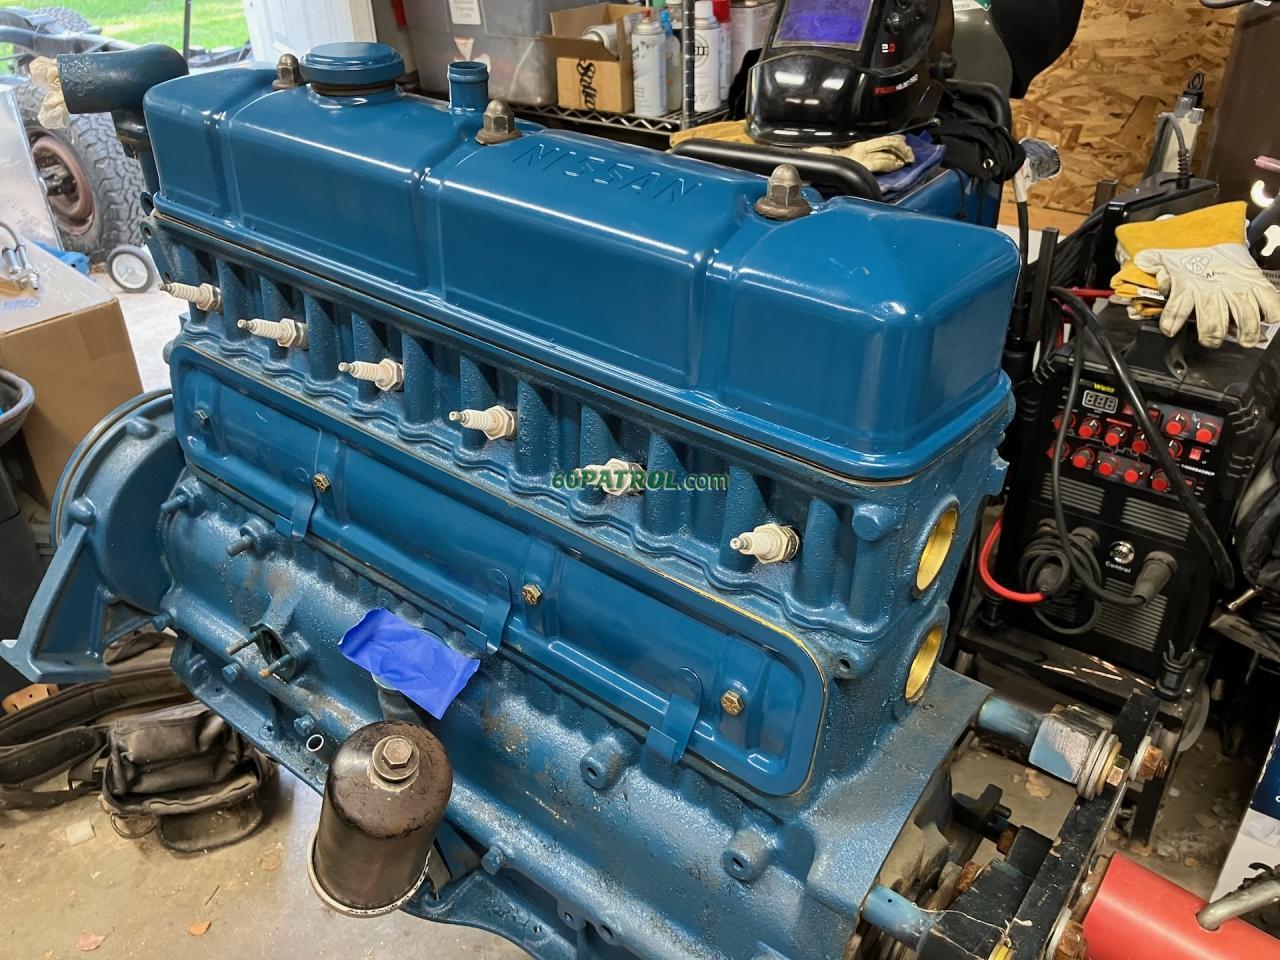
With the right bolts and a little BriteTouch BT-27 blue and BOOM! It looks fantastic! Time to flip it back right-side-up!
8791

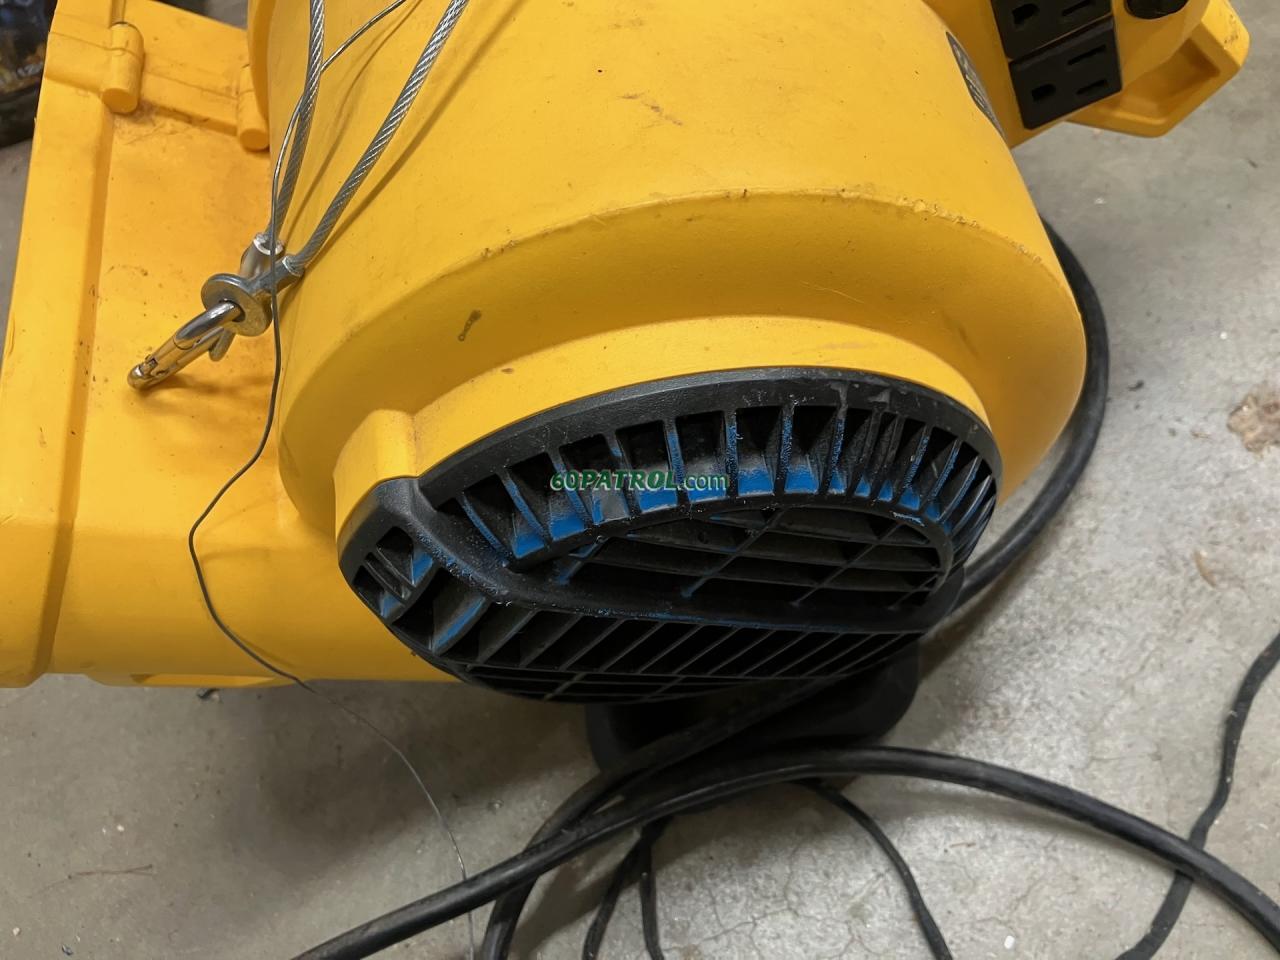
I usually paint outside, but the engine wouldn't be easy to roll outside (too wide on the stand), so I painted inside the garage... Certainly glad I used my respirator! This fan was blowing outward -- that's not paint stuck to it, but rather paint dust setting on it. It wipes off easily... but imagine that crap in your lungs! Eeeeeew!
8788

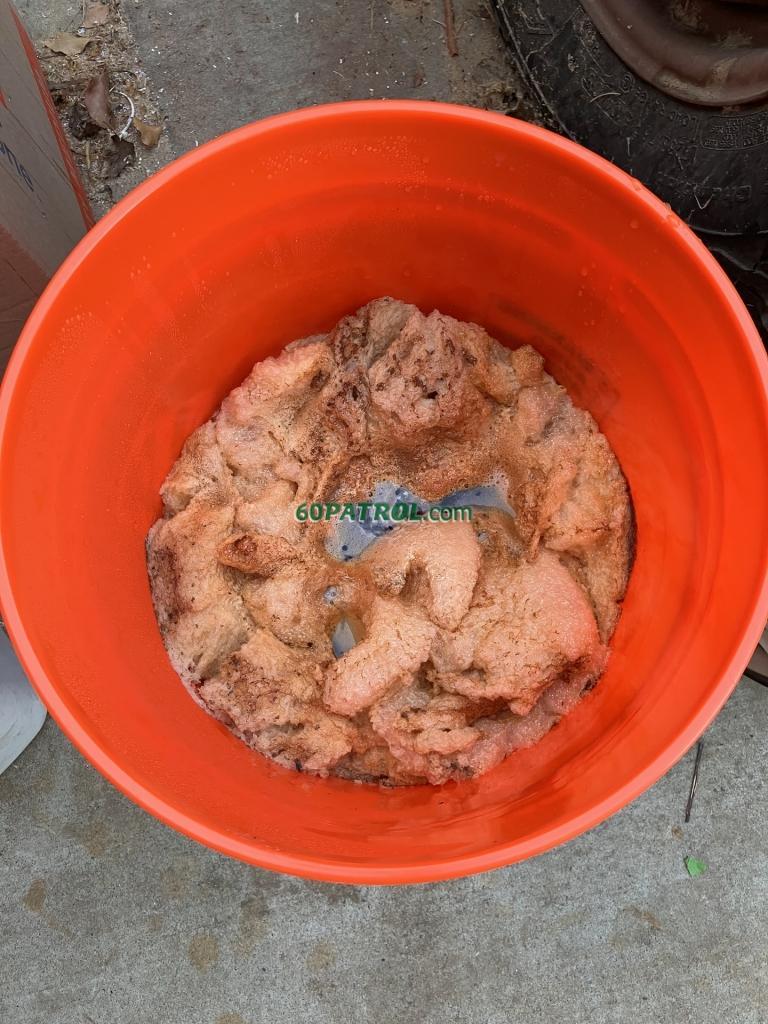
On the other side of the shop, those parts that have been vinegaring to two days needed to come out... Check out what it looked like when I opened the lid! Again, Eeeeeew!
8787

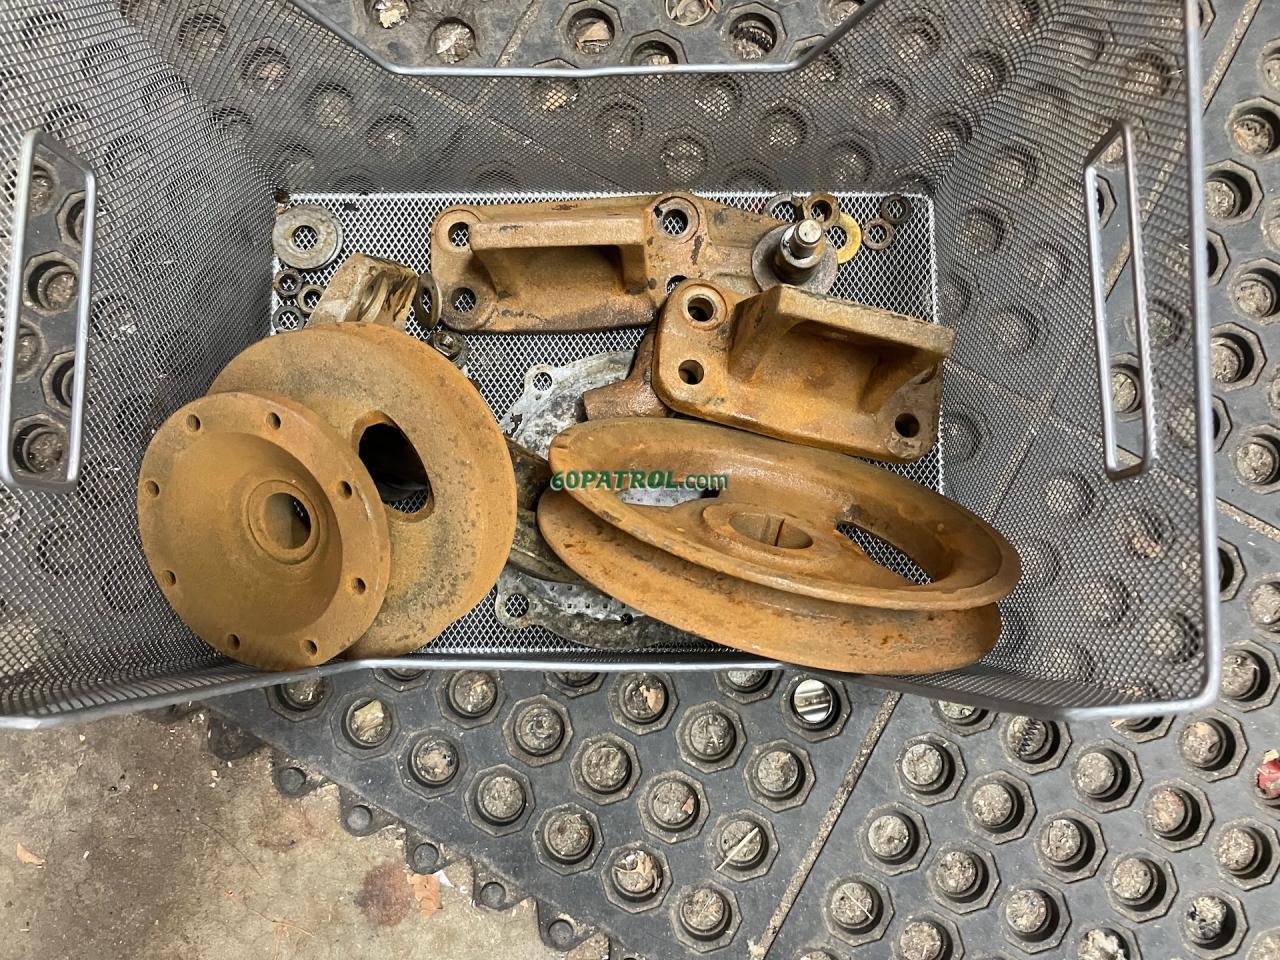
And, about an hour after removing the parts and pressure washing them. There was no rust then... but 60 minutes later! I get them wiped and primed with rust converter then painted painted or blasted and powder coated soon. I am a little worried about the seal-surface... it's fairly worn and far from smooth! How does one repair the seal surface on a front engine pulley? Braze a layer, then turn it in the lathe? Or build up weld and turn it? Any ideas would be greatly appreciated! ;-)
8790

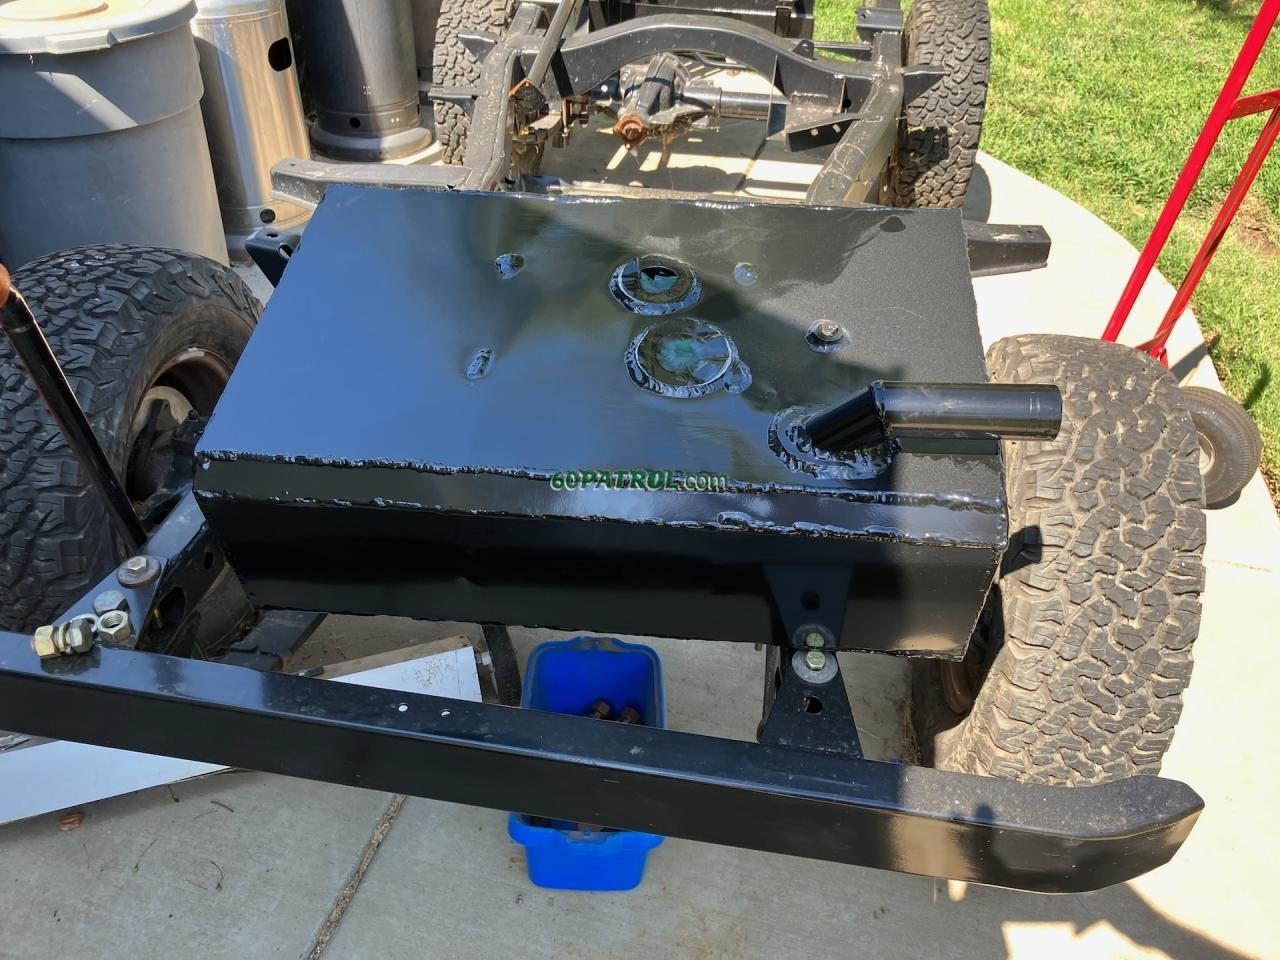
But, the most exciting thing today -- the powder coater called and the parts are ready! less than 24 hours since I dropped them off! My timing was perfect -- they were starting a load of black as I showed up, so my fuel tank just jumped in line!
8789

J