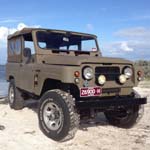
Love the picture with your "ACME" spinning sparks machine...
Moore_rb's 66 Ebay Patrol (re)build thread
- Patrol Fanatic!

- Posts: 3005
- Joined: Sat Feb 23, 2013 11:28 am
- Location: Lutherville, MD
- Has thanked: 6020 times
- Been thanked: 1603 times
Re: Moore_rb's Green 66 build thread
Great pictures that show every minute detail that you're facing.
Love the picture with your "ACME" spinning sparks machine...
Owner of the same Patrol since 1967
- Administrator

- Posts: 2460
- Joined: Wed Jul 03, 2013 11:49 pm
- Location: Arizona
- Location: Arizona
- Has thanked: 800 times
- Been thanked: 1269 times
- Contact:
Re: Moore_rb's Green 66 build thread
Thanks everyone.
Swerve- very good questions. After spending hours on google and looking at millions of images, I think I have finally correctly ID'd the springs that were being used on the front- they are from either a Dodge 1/2 ton 4x4 pickup, or from a Ramcharger. Energy suspension does make ployurethane replacement bushings for these springs, so they could be rebuilt and re-used...
I need to do some more research on the spring rates, and decide if I will re-use them, or go with another set of springs
Swerve- very good questions. After spending hours on google and looking at millions of images, I think I have finally correctly ID'd the springs that were being used on the front- they are from either a Dodge 1/2 ton 4x4 pickup, or from a Ramcharger. Energy suspension does make ployurethane replacement bushings for these springs, so they could be rebuilt and re-used...
I need to do some more research on the spring rates, and decide if I will re-use them, or go with another set of springs
L-R:
White 65 Hardtop L60-3-00617 (undergoing restoration)
Red 65 hardtop 4L60-002565 (scrapped for parts)
66 Hardtop "El-Bondo Patrol", L60-00511 (Restored, then sold June2020)
Blue 67 Hardtop (sold March1997)
Green 62 Softtop L60-2-00504 (undergoing restoration)
- Administrator

- Posts: 2460
- Joined: Wed Jul 03, 2013 11:49 pm
- Location: Arizona
- Location: Arizona
- Has thanked: 800 times
- Been thanked: 1269 times
- Contact:
Re: Moore_rb's Green 66 build thread
More on the front springs-
I dug out my set of spare front 60 series springs, and compared them to these Dodge springs to see how the spring rate compared.
My (very) scientific method of comparing the spring rate was to turn the spring upside-down on the garage floor, and then jump up and down on them to see which ones deflected more
The Dodge springs actually acted softer than the Patrol springs, so I went ahead and ordered some Polyurethane replacement bushings from Energy Suspension products so I can re-use the Dodge springs. The parts arrived today... 20 bucks- can't beat that.
Hope to be out there tomorrow working on the project some more.
I dug out my set of spare front 60 series springs, and compared them to these Dodge springs to see how the spring rate compared.
My (very) scientific method of comparing the spring rate was to turn the spring upside-down on the garage floor, and then jump up and down on them to see which ones deflected more
The Dodge springs actually acted softer than the Patrol springs, so I went ahead and ordered some Polyurethane replacement bushings from Energy Suspension products so I can re-use the Dodge springs. The parts arrived today... 20 bucks- can't beat that.
Hope to be out there tomorrow working on the project some more.
L-R:
White 65 Hardtop L60-3-00617 (undergoing restoration)
Red 65 hardtop 4L60-002565 (scrapped for parts)
66 Hardtop "El-Bondo Patrol", L60-00511 (Restored, then sold June2020)
Blue 67 Hardtop (sold March1997)
Green 62 Softtop L60-2-00504 (undergoing restoration)
- I love driving my Patrol!

- Posts: 1076
- Joined: Wed Dec 05, 2012 4:25 pm
- Location: Geelong, Australia
- Has thanked: 84 times
- Been thanked: 327 times
- Contact:
Re: Moore_rb's Green 66 build thread
Great work there Robert. Those PO welds are scary
The 33's look really good. It doesn't look scary high at all.
1964 MWB Soft top Patrol - 1972 MWB Soft top Patrol "Diablo" - 1977 MWB V8 "Mr Muck" - 1978 G60 Patrol Ute "HP"
- Administrator

- Posts: 2460
- Joined: Wed Jul 03, 2013 11:49 pm
- Location: Arizona
- Location: Arizona
- Has thanked: 800 times
- Been thanked: 1269 times
- Contact:
Re: Moore_rb's Green 66 build thread
miller wrote:Great work there Robert. Those PO welds are scary![]()
The 33's look really good. It doesn't look scary high at all.
Thanks Tim-
Those scary welds got some attention this past Sunday afternoon. I had two things I needed to do with that driver-side spring pad:
1) I had to mitigate and rectify those failed welds
2) I had to clean up the hole that the leaf spring shear pin fits into so that the spring will not be able to slide around on the pad.
So, with that, I started by grinding everything down. (Just imagine all the sparks I was making

Scary indeed- the more material I removed, the deeper that crack went.
Once I had a nice dish cut out of the pad for the spring centering hole, I welded in a 1/16 thick washer:

And then I laid in the new beads on either side to make sure that spring pad will never come unglued again. You can also see where I started re-grinding the top flat for the spring to sit on it:


On the passenger side, I also cut in a washer for the spring shear pin, and then just used the grinder and wire-brush to clean everything else up:

The passenger side spring pad is basically built out of the existing pad that was cast into the top of the differential housing for the suspension snubber (the red circle)- they ground that down flat, and then they welded in the front and rear parts of the spring pad to make it rectangular (blue lines). the washer that I blended in to make the spring shear pin hole round again is green.
This is what has me scratching my head - This is a solid design, and the very challenging welds needed to bond the mild steel brackets to the cast iron housing were all solid and very well done (the grinder exposed no cracks, and no gas or slag pockets); and yet the far easier welds between the sping pad and the axle tube on the driver's side all looked like they were someone's very first attempt to ever weld anything together....
At any rate- It's all good now, and ready to be cleaned up, painted, and hung back under the truck.
L-R:
White 65 Hardtop L60-3-00617 (undergoing restoration)
Red 65 hardtop 4L60-002565 (scrapped for parts)
66 Hardtop "El-Bondo Patrol", L60-00511 (Restored, then sold June2020)
Blue 67 Hardtop (sold March1997)
Green 62 Softtop L60-2-00504 (undergoing restoration)
- Administrator

- Posts: 7823
- Joined: Thu Oct 04, 2012 10:42 am
- Location: Temecula, CA
- Has thanked: 7716 times
- Been thanked: 2481 times
- Contact:
- Administrator

- Posts: 2460
- Joined: Wed Jul 03, 2013 11:49 pm
- Location: Arizona
- Location: Arizona
- Has thanked: 800 times
- Been thanked: 1269 times
- Contact:
Re: Moore_rb's Green 66 build thread
Today I got to work on these Dodge Ramcharger leaf springs.
I started with my replacement polyurethane bushings:

Because these springs are 1/4 wider than Patrol springs, I had to cut the shoulders off for the rear spring eyes so they would fit in the stock Patrol frame bracket:

The stock rear spring pivot bolt is also the same diameter as the inner diameter of the bushing, so I didn't need the inner sleeves for the rear, either; so I greased up the bushings with silicone grease and pressed them into the spring eyes, and then bolted them in, re-using the original factory Patrol pivot bolts:
For the front, I had to get creative- The stock Patrol shackles were totally wasted, and had to be cut apart when I dismantled the front end. Urban60 generously offered to ship me her "Giraffe shackles" from the rear of her blue Patrol, but they were just too long to use safely on the front springs. (but I do appreciate the offer, Audrey- even if it was extended so that you could get a good laugh at seeing those shackles being on another Patrol )
So, with no spare Patrol shackles on hand, I started digging around in my parts boxes and I re-discovered why you NEVER throw anything away - I had 3 full sets of Jeep YJ Wrangler shackles that I've probably had for 15 years, and bonus: the bolt holes on the Jeep shackles matched the inside diameter of the steel sleeves that came with the poly bushings... all I would need are some 1/2 inch bolts, and I'd be all set, so I shot down to the ACE Hardware and got the grade 8 bolts I needed.
since I had extra width to work with up front, I used the poly bushings and sleeves as they came. I just greased them up and pressed them into the spring eyes:

On the top frame shackle mount, to account for both the added width, and for the smaller diameter pivot bolt, I ran the extra, unused sleeves from the rear spring bushings through the frame mount, and then used the shoulders that I had cut off the rear bushings to act as washers to fill the side gaps- The steel spacers keep the shackles square, and the polyurethane washers keep everything snug:

Here is a side shot that shows how the jeep shackles compare to the slightly shorter stock Patrol shackles- I wish this pic had better shown just how oblong the holes in that Patrol piece were- this is actually the plate that the factory splined bolts are supposed to be press-fit into, but they had been so heavily worn that the splines were totally gone, and the holes were ovaled out and are way too large for even the stock 9/16 inch bolts to fit... they're junk, but I'll still save them- because one day 15 years from now, I'm sure I'll need them for some other project...

And here it is with the axle re-positioned underneath it:

You may have also noticed that the frame, front bumper, and all the chassis and suspension components are losing their gray. If anyone has been wondering how the people who make "Chassis Black" paint have been able to stay in business during this economic downturn, well now you know...
So, I made a fair bit of progress today, and the good part is that tomorrow is a work holiday, so maybe I'll get to spend another few hours underneath it getting things all bolted up, getting the front shocks mounted, and maybe even get started on the custom bracket I'm going to make to replace those God-awful twisted, warped and mishapen U-bolts that were on the passenger side spring mount.
I started with my replacement polyurethane bushings:

Because these springs are 1/4 wider than Patrol springs, I had to cut the shoulders off for the rear spring eyes so they would fit in the stock Patrol frame bracket:

The stock rear spring pivot bolt is also the same diameter as the inner diameter of the bushing, so I didn't need the inner sleeves for the rear, either; so I greased up the bushings with silicone grease and pressed them into the spring eyes, and then bolted them in, re-using the original factory Patrol pivot bolts:
For the front, I had to get creative- The stock Patrol shackles were totally wasted, and had to be cut apart when I dismantled the front end. Urban60 generously offered to ship me her "Giraffe shackles" from the rear of her blue Patrol, but they were just too long to use safely on the front springs. (but I do appreciate the offer, Audrey- even if it was extended so that you could get a good laugh at seeing those shackles being on another Patrol )
So, with no spare Patrol shackles on hand, I started digging around in my parts boxes and I re-discovered why you NEVER throw anything away - I had 3 full sets of Jeep YJ Wrangler shackles that I've probably had for 15 years, and bonus: the bolt holes on the Jeep shackles matched the inside diameter of the steel sleeves that came with the poly bushings... all I would need are some 1/2 inch bolts, and I'd be all set, so I shot down to the ACE Hardware and got the grade 8 bolts I needed.
since I had extra width to work with up front, I used the poly bushings and sleeves as they came. I just greased them up and pressed them into the spring eyes:

On the top frame shackle mount, to account for both the added width, and for the smaller diameter pivot bolt, I ran the extra, unused sleeves from the rear spring bushings through the frame mount, and then used the shoulders that I had cut off the rear bushings to act as washers to fill the side gaps- The steel spacers keep the shackles square, and the polyurethane washers keep everything snug:

Here is a side shot that shows how the jeep shackles compare to the slightly shorter stock Patrol shackles- I wish this pic had better shown just how oblong the holes in that Patrol piece were- this is actually the plate that the factory splined bolts are supposed to be press-fit into, but they had been so heavily worn that the splines were totally gone, and the holes were ovaled out and are way too large for even the stock 9/16 inch bolts to fit... they're junk, but I'll still save them- because one day 15 years from now, I'm sure I'll need them for some other project...

And here it is with the axle re-positioned underneath it:

You may have also noticed that the frame, front bumper, and all the chassis and suspension components are losing their gray. If anyone has been wondering how the people who make "Chassis Black" paint have been able to stay in business during this economic downturn, well now you know...
So, I made a fair bit of progress today, and the good part is that tomorrow is a work holiday, so maybe I'll get to spend another few hours underneath it getting things all bolted up, getting the front shocks mounted, and maybe even get started on the custom bracket I'm going to make to replace those God-awful twisted, warped and mishapen U-bolts that were on the passenger side spring mount.
L-R:
White 65 Hardtop L60-3-00617 (undergoing restoration)
Red 65 hardtop 4L60-002565 (scrapped for parts)
66 Hardtop "El-Bondo Patrol", L60-00511 (Restored, then sold June2020)
Blue 67 Hardtop (sold March1997)
Green 62 Softtop L60-2-00504 (undergoing restoration)
- I love driving my Patrol!

- Posts: 1076
- Joined: Wed Dec 05, 2012 4:25 pm
- Location: Geelong, Australia
- Has thanked: 84 times
- Been thanked: 327 times
- Contact:
Re: Moore_rb's Green 66 build thread
Making good progress again Robert! Shackles are a clean fit too. Well done!
1964 MWB Soft top Patrol - 1972 MWB Soft top Patrol "Diablo" - 1977 MWB V8 "Mr Muck" - 1978 G60 Patrol Ute "HP"
- Administrator

- Posts: 7823
- Joined: Thu Oct 04, 2012 10:42 am
- Location: Temecula, CA
- Has thanked: 7716 times
- Been thanked: 2481 times
- Contact:
Re: Moore_rb's Green 66 build thread
Very ambitious. Nice progress.
Beyond any hope for intervention

- Administrator

- Posts: 2460
- Joined: Wed Jul 03, 2013 11:49 pm
- Location: Arizona
- Location: Arizona
- Has thanked: 800 times
- Been thanked: 1269 times
- Contact:
Re: Moore_rb's Green 66 build thread
I finally had some time to figure out what I was going to do about this passenger side front spring clamp ..
Since I only had one good factory spring plate hole left:

I whipped up this removeable bracket that is designed to sit flat against the factory spring seat, and to bolt into the forward factory hole - I added a shear pin that fits into the factory spring hole as an additional measure to keep it from shifting around.

Here is is bolted in place:

Here it is from the rear:

then I drilled a new top plate for the springs. painted, and bolted everything back up:

And with that, the front suspension is back under the Patrol for good - Now I need to get the wheels on it, drop it on the ground, and get back to lining up those rear driveline angles....
Since I only had one good factory spring plate hole left:

I whipped up this removeable bracket that is designed to sit flat against the factory spring seat, and to bolt into the forward factory hole - I added a shear pin that fits into the factory spring hole as an additional measure to keep it from shifting around.

Here is is bolted in place:

Here it is from the rear:

then I drilled a new top plate for the springs. painted, and bolted everything back up:

And with that, the front suspension is back under the Patrol for good - Now I need to get the wheels on it, drop it on the ground, and get back to lining up those rear driveline angles....
L-R:
White 65 Hardtop L60-3-00617 (undergoing restoration)
Red 65 hardtop 4L60-002565 (scrapped for parts)
66 Hardtop "El-Bondo Patrol", L60-00511 (Restored, then sold June2020)
Blue 67 Hardtop (sold March1997)
Green 62 Softtop L60-2-00504 (undergoing restoration)