
Congratulations!
Removing the steering wheel is the easiest.
1971 Nissan Patrol from Mexico
-

- Administrator

- Posts: 7814
- Joined: Thu Oct 04, 2012 10:42 am
- Location: Temecula, CA
- Has thanked: 7689 times
- Been thanked: 2476 times
- Contact:
-
- So, I just bought this Patrol….

- Posts: 95
- Joined: Thu Jun 08, 2017 6:41 am
- Location: Pennsylvania USA
- Has thanked: 38 times
- Been thanked: 47 times
- Contact:
Re: 1971 Nissan Patrol from Mexico
It has been a while since I have posted. I bought a house and then had to setup a garage.
With warm weather and an outfited garage I have started the process of getting my patrol together. Currently the Patrol sits on a painted frame, new suspension and a rebuilt engine with a new clutch disk.
I have some parts that we may consider adding to the parts list:
BUMP STOPS - 99137 from Energy Suspension:
They work well with a little bit of bending at a drilling and tapping a new hole. link: http://www.energysuspensionparts.com/9.9137
The second product is another bump stop, but these go to the front:
BUMP STOPS - 99103 from Energy Suspension:
These work great to add what is close to the original bump stops on the front diff. They go on the two steel plates that I was very confused about when I cleaned and painted the front axle. On my second patrol they still had them bump stop glued on. To make these work you need to drill a hole in the two steel plates you took of the front diff. then weld on the a nut that doesnt have the plastic in it. take 3 large washers that fit over the nut and screw the bump stop down tightly. finish by hacking off the protruding threads and grinding flat. Spray paint the washers black to bring the look together.
http://www.energysuspensionparts.com/9.9103
I found that my Virus protection was blocking my uploads, So I`m going to start posting pictures!
Questions for the board:
Does anyone have a good replacement for the rear brake/turn lights?
Can someone way in on how I should route the fuel line? I have 3/8 bendable copper hose, but honestly can`t figure out the best way to route it.
Now that I can update pictures I`ll provide some more and hopefully better updates!
With warm weather and an outfited garage I have started the process of getting my patrol together. Currently the Patrol sits on a painted frame, new suspension and a rebuilt engine with a new clutch disk.
I have some parts that we may consider adding to the parts list:
BUMP STOPS - 99137 from Energy Suspension:
They work well with a little bit of bending at a drilling and tapping a new hole. link: http://www.energysuspensionparts.com/9.9137
The second product is another bump stop, but these go to the front:
BUMP STOPS - 99103 from Energy Suspension:
These work great to add what is close to the original bump stops on the front diff. They go on the two steel plates that I was very confused about when I cleaned and painted the front axle. On my second patrol they still had them bump stop glued on. To make these work you need to drill a hole in the two steel plates you took of the front diff. then weld on the a nut that doesnt have the plastic in it. take 3 large washers that fit over the nut and screw the bump stop down tightly. finish by hacking off the protruding threads and grinding flat. Spray paint the washers black to bring the look together.
http://www.energysuspensionparts.com/9.9103
I found that my Virus protection was blocking my uploads, So I`m going to start posting pictures!
Questions for the board:
Does anyone have a good replacement for the rear brake/turn lights?
Can someone way in on how I should route the fuel line? I have 3/8 bendable copper hose, but honestly can`t figure out the best way to route it.
Now that I can update pictures I`ll provide some more and hopefully better updates!
You do not have the required permissions to view the files attached to this post.
-
- So, I just bought this Patrol….
- Posts: 95
- Joined: Thu Jun 08, 2017 6:41 am
- Location: Pennsylvania USA
- Has thanked: 38 times
- Been thanked: 47 times
- Contact:
Re: 1971 Nissan Patrol from Mexico
Today I got sheet metal for the Patrol. I had them bend up two of the body mounts for the bed portion where it ties into the frame in the front. I am hoping that someone can post a picture of what the front section of the bed should look like. As you can see in the attached image, mine was pretty much entirely rusted away.
On the successful part of today I bought a chop saw to help turn the metal that I have into usable patches for the partol. I used energy suspensions 1/4" pads and cut 1/8" steel to recreate the mounts. I don`t have a drill press so tomorrow I am going to drop the 2x2" blocks of 1/8" steel at a machine shop to get a hole drilled into the center.
On the successful part of today I bought a chop saw to help turn the metal that I have into usable patches for the partol. I used energy suspensions 1/4" pads and cut 1/8" steel to recreate the mounts. I don`t have a drill press so tomorrow I am going to drop the 2x2" blocks of 1/8" steel at a machine shop to get a hole drilled into the center.
You do not have the required permissions to view the files attached to this post.
-

- Patrol Fanatic!

- Posts: 3000
- Joined: Sat Feb 23, 2013 11:28 am
- Location: Lutherville, MD
- Location: Lutherville, MD
- Has thanked: 6010 times
- Been thanked: 1600 times
Re: 1971 Nissan Patrol from Mexico
Hope this one helps. The picture is not mine.KyleAnschuetz wrote:Today I got sheet metal for the Patrol. I had them bend up two of the body mounts for the bed portion where it ties into the frame in the front. I am hoping that someone can post a picture of what the front section of the bed should look like. ...
You do not have the required permissions to view the files attached to this post.
Owner of the same Patrol since 1967
-
- So, I just bought this Patrol….
- Posts: 95
- Joined: Thu Jun 08, 2017 6:41 am
- Location: Pennsylvania USA
- Has thanked: 38 times
- Been thanked: 47 times
- Contact:
Re: 1971 Nissan Patrol from Mexico
Hello fellow Patrol`ers,
Does anyone have any idea where I can find the fuel pump fittings? I am having no luck finding fittings that I can use onto the mechanical fuel pump that I purchased off the parts list.
Thanks,
Kyle
Does anyone have any idea where I can find the fuel pump fittings? I am having no luck finding fittings that I can use onto the mechanical fuel pump that I purchased off the parts list.
Thanks,
Kyle
-
- Administrator
- Posts: 7814
- Joined: Thu Oct 04, 2012 10:42 am
- Location: Temecula, CA
- Has thanked: 7689 times
- Been thanked: 2476 times
- Contact:
Re: 1971 Nissan Patrol from Mexico
They shouldn't be too hard to find. I've seen them at auto parts stores before.
Beyond any hope for intervention


-
- Patrol Newbie

- Posts: 6
- Joined: Mon Jan 22, 2018 4:09 am
- Location: Tampa
- Location: Tampa
- Been thanked: 1 time
Re: 1971 Nissan Patrol from Mexico
Kyle, where did you send the p40 to be rebuilt? I know there are companies that rebuild the p40 but they are more of a industrial application. Thanks and good luck on yours
-
- So, I just bought this Patrol….
- Posts: 95
- Joined: Thu Jun 08, 2017 6:41 am
- Location: Pennsylvania USA
- Has thanked: 38 times
- Been thanked: 47 times
- Contact:
Re: 1971 Nissan Patrol from Mexico
Mitch,
The Nissan`s have a P engine. The P40 is essentially the same engine with a different exhaust/intake combo. There are detailed threads in the mechanical section that break that information down part by part.
That being said. I had mine done at a local Engine shop. They were:
Leedy Automotive in York PA
the total price was around 3,200$. Mine ended up needing all new valves with hardened seats and bored with oversized pistons put in.
The Nissan`s have a P engine. The P40 is essentially the same engine with a different exhaust/intake combo. There are detailed threads in the mechanical section that break that information down part by part.
That being said. I had mine done at a local Engine shop. They were:
Leedy Automotive in York PA
the total price was around 3,200$. Mine ended up needing all new valves with hardened seats and bored with oversized pistons put in.
-
- So, I just bought this Patrol….
- Posts: 95
- Joined: Thu Jun 08, 2017 6:41 am
- Location: Pennsylvania USA
- Has thanked: 38 times
- Been thanked: 47 times
- Contact:
Re: 1971 Nissan Patrol from Mexico
The project has slowly been progressing as i deal with one rust patch after another and the headaches of aftermarket body panels. The Troa body panels really deserve a post of their own, but if you care my gallery has some of my thoughts on the panels (some are better than others).
Back to what is important, updating this amazing board on what I have completed and some of the questionable changes to my Patrol (that really should have gone to the scrap yard.... )
)
I was very frustrated after removing the rear panels and patching the tub to find out how poorly the Troa rear panels were. I ended up having to cut almost everthing except the stamped portion of the rear. I made a frame out of angle iron and some scrap I had lying around.

Then I filled the gap with mig tack welds until I had a bead and what looked like a reasonable line up. The area was ground down and then hit with primer.

That being taken care of it was time to remount the license plate mount, but the original license plate mount didn`t match my '72 plate. I ended up making my own license plate bracket out of more scrap.
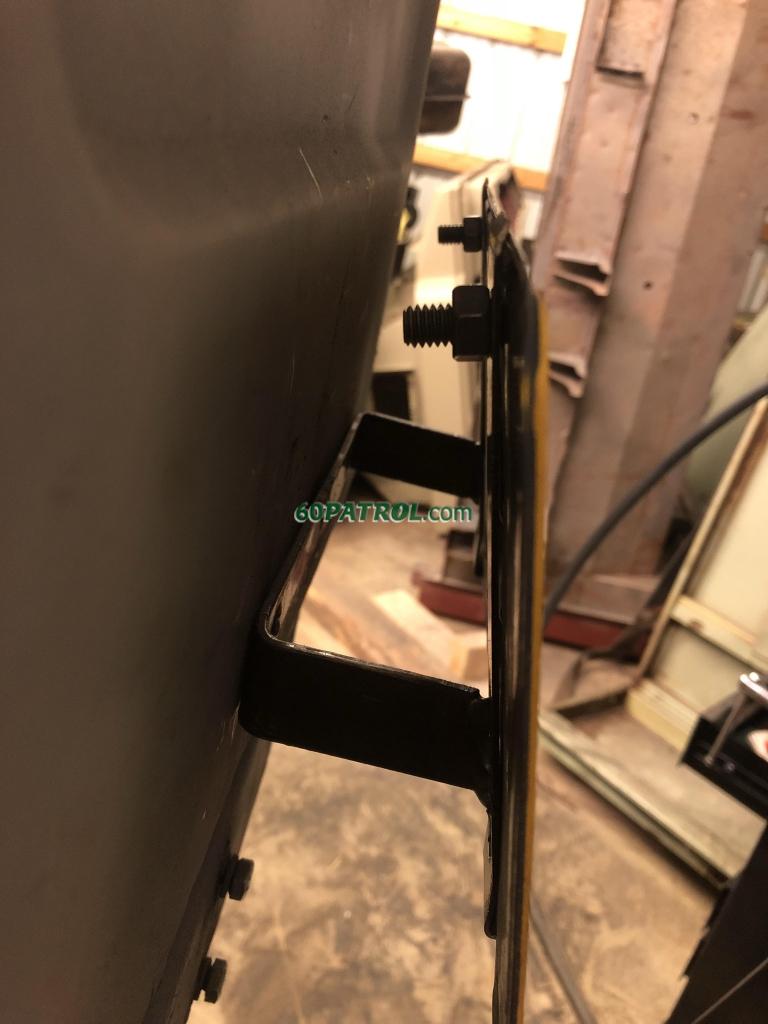
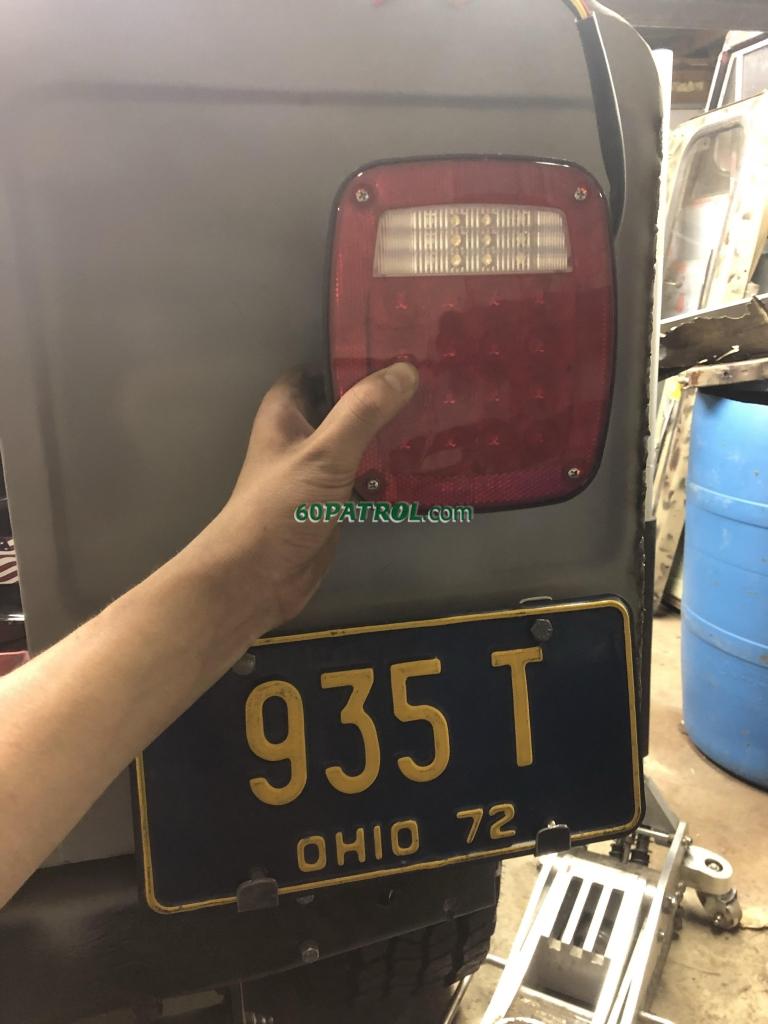
Now I couldn`t find a stock rear light, so I gave up and bought a bunch of after market lights. I think the jeep TJ ones provide a nice look and replace the need for a seperate dedicated license plate light
Tomorrow I will mount the rear lights, and post a picture for some to admire and others to scoff at. The next big issue is to repair the rear doors and get them back into decent shape and mounted. this is a back to front type of project.
I wanted to also provide some updates on rust repairs. Hopefully some of the answers I came up with will help others to save some rust tubs.

This is how I repaired my rusty rear body mounts and tub. The square tubing really does work well for a decent fix and it is very rigid.

This rusted out area was patched with careful grinding and cutting. I used the Troa door jamb, but it was off and the bends were sub par. Do yourself a favor and just use a metal brake to match the part.
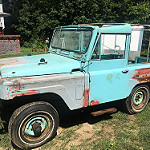
Oh and here is front of my Patrol:

Back to what is important, updating this amazing board on what I have completed and some of the questionable changes to my Patrol (that really should have gone to the scrap yard....
)I was very frustrated after removing the rear panels and patching the tub to find out how poorly the Troa rear panels were. I ended up having to cut almost everthing except the stamped portion of the rear. I made a frame out of angle iron and some scrap I had lying around.
Then I filled the gap with mig tack welds until I had a bead and what looked like a reasonable line up. The area was ground down and then hit with primer.
That being taken care of it was time to remount the license plate mount, but the original license plate mount didn`t match my '72 plate.
I ended up making my own license plate bracket out of more scrap. Now I couldn`t find a stock rear light, so I gave up and bought a bunch of after market lights. I think the jeep TJ ones provide a nice look and replace the need for a seperate dedicated license plate light
Tomorrow I will mount the rear lights, and post a picture for some to admire and others to scoff at. The next big issue is to repair the rear doors and get them back into decent shape and mounted. this is a back to front type of project.
I wanted to also provide some updates on rust repairs. Hopefully some of the answers I came up with will help others to save some rust tubs.
This is how I repaired my rusty rear body mounts and tub. The square tubing really does work well for a decent fix and it is very rigid.
This rusted out area was patched with careful grinding and cutting. I used the Troa door jamb, but it was off and the bends were sub par. Do yourself a favor and just use a metal brake to match the part.
Oh and here is front of my Patrol: