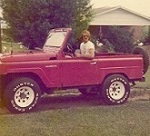
Rehab of Patrol L60-2-00655

Builds, refurbishments, restorations, upgrades
Post Reply
User avatar
I love driving my Patrol!
Posts: 635
Joined: Sun Jul 19, 2015 4:36 pm
Location: USA
Location: North Carolina, USA
Has thanked: 455 times
Been thanked: 789 times
Contact:

Re: Rehab of Patrol L60-2-00655

Post by r1lark »

Made a trip to the Patrol today. Actually a pretty good day, a lot of steps forward and one step back.

Got the good used fuel pump installed (after fighting with the flare fitting and nut on the outlet of the pump, thought I'd never get them lined up so the nut would thread on :x ). Pump works good, engine starts right up and runs good, but the choke has to be pulled out about 1/8" or it stalls; I guess it needs a carb rebuild or I have a vacuum leak or both. The thing smoked like crazy for a while, but a lot of Marvel Mystery Oil had been poured down the cylinders; it did mostly clear up after a while.

There is an exhaust leak where the exhaust manifold bolts up to the bottom of the intake manifold......sigh. So the intake and exhaust will have to come off to fix that. Will rebuild the carb at the same time. The heat riser is froze up too, so that will have to be addressed too.

Brought the beer keg gas tank home to clean it out with the pressure washer. Eventually I'll replace it with a poly Bronco fuel tank but that's lower on the list than other stuff.......like the exhaust leak, brakes, tires, etc.

Topped off the radiator with a gallon of antifreeze, and the coolant is circulating and no leaks and/or strange noises out of the water pump.

With it running, got in and pushed the clutch in and the transmission easily went into gear, so the disc isn't stuck to the flywheel at least.

Pulled the brake master cylinder off and brought it home, but it looks DOA. Not sure if it will even come apart, and honestly I don't see a need to waste time on it, just order a dual m/c.

Not sure what the next step in the project should be. The current location of the Patrol is not conducive to putting it on jackstands to work on the brakes, but I could put it up under the carport where there is a concrete slab. The brakes will be a huge job, including replacing the metal brake lines. Another option for the next step is to pull the intake/exhaust, regasket everything, and rebuild the carb. If I do that, scope creep will rear it's ugly head, and I'll have to make a new exhaust header pipe and put a new muffler on. Haven't done a search yet, but guessing that pre-bent exhaust systems are not available in the US for Patrols. But it looks like it should not be difficult to have an exhaust shop bend the header pipe up, and bend a muffler outlet pipe so it exits in front of the rear tire.

Question: what what is the purpose of the four shims sandwiched between the m/c and the firewall? They show in the parts catalog so they are factory original. Only thing I could think of is to reduce how far the m/c pushrod pushes the m/c piston.
Paul
Helping others revive their Patrol…
Posts: 2027
Joined: Wed Mar 23, 2016 4:50 am
Location: Boerne, Texas
Has thanked: 6 times
Been thanked: 1986 times

Re: Rehab of Patrol L60-2-00655

Post by L60Boerne »

That video is just plain AWSOME! :clap: :dance: Makes me want to get busy finishing the transformation of Punkin. NOTHING (that has a max speed of 58 MPH) is more fun to drive than a topless Patrol while hunting or soft top in the high mountains. IMHO. And it all starts with that harmonious metallic churn.

Well done!
L60Boerne
63 Soft Top - Command & Control Vehicle 5 (CCV5)
65 No Top - Presidio Patrol (CCV4 )-Sold
65 No Top - Santa's Sleigh
66 Soft Top - Phoenix Patrol (CCV6) - Sold
66 No Top - Pinto Patrol (CCV7)
66 No Top - Flagstaff Patrol (CCV8)- For Sale
I love driving my Patrol!
Posts: 985
Joined: Sat Aug 02, 2014 8:59 am
Location: Colorado
Has thanked: 264 times
Been thanked: 776 times

Re: Rehab of Patrol L60-2-00655

Post by plateaucal »

The shims are there to adjust the freeplay of the brake pedal, as I understand it (waiting for Esteban), The freeplay is fairly precise in its adjustment. I believe there is probably a specification for the freeplay in the service manual...available exclusively online right here at 60Patrol. Don't lose those shims, they are hard to come by. Pretty sure L60Boerne has a few if necessary.
I love driving my Patrol!
Posts: 985
Joined: Sat Aug 02, 2014 8:59 am
Location: Colorado
Has thanked: 264 times
Been thanked: 776 times

Re: Rehab of Patrol L60-2-00655

Post by plateaucal »

To remove the master cylinder from dash board take off the
cotter pin that penetrate the clevis pin at the end of pusb rod
Remove the clevis pin that connects the push rod and pedal Back
the nut off that secure the master cylinder to the dash board
Care should be taken to check the thickness of the shim which is
fitted between master cylinder and the dash hoard panel Dis
connect the piping from the master cylinder Then tbe master
cylinder assembly can be withdrawn from tbe vehicle
Remove the filler cap and drain tbe fluid out Pull

I think the combination of the return spring and proper shims allows for the brake fluid to return to the cylinder after application of the brakes.
I love driving my Patrol!
Posts: 985
Joined: Sat Aug 02, 2014 8:59 am
Location: Colorado
Has thanked: 264 times
Been thanked: 776 times

Re: Rehab of Patrol L60-2-00655

Post by plateaucal »

file:///C:/Users/plate/Downloads/1980_01_Chapter_MA%20(1).pdf
User avatar
I love driving my Patrol!
Posts: 635
Joined: Sun Jul 19, 2015 4:36 pm
Location: USA
Location: North Carolina, USA
Has thanked: 455 times
Been thanked: 789 times
Contact:

Re: Rehab of Patrol L60-2-00655

Post by r1lark »

L60Boerne wrote:That video is just plain AWSOME! :clap: :dance: Makes me want to get busy finishing the transformation of Punkin. NOTHING (that has a max speed of 58 MPH) is more fun to drive than a topless Patrol while hunting or soft top in the high mountains. IMHO. And it all starts with that harmonious metallic churn.

Well done!
L60Boerne
Thanks David! I just wanted to capture that first firing of the engine, and was lucky that it fired right off.
Paul
User avatar
I love driving my Patrol!
Posts: 635
Joined: Sun Jul 19, 2015 4:36 pm
Location: USA
Location: North Carolina, USA
Has thanked: 455 times
Been thanked: 789 times
Contact:

Re: Rehab of Patrol L60-2-00655

Post by r1lark »

plateaucal wrote:The shims are there to adjust the freeplay of the brake pedal, as I understand it (waiting for Esteban), The freeplay is fairly precise in its adjustment. I believe there is probably a specification for the freeplay in the service manual...available exclusively online right here at 60Patrol. Don't lose those shims, they are hard to come by. Pretty sure L60Boerne has a few if necessary.
Thanks plateaucal for all the info! I can understand how you would need to have a way to adjust the freeplay, since there is no adjustment on the rod that attaches to the brake pedal.

So that does bring up a question in my mind: when using the Wilwood dual master cylinder, how is the freeplay adjusted? The shims don't match the Wilwood bolt pattern.................
Paul
I love driving my Patrol!
Posts: 985
Joined: Sat Aug 02, 2014 8:59 am
Location: Colorado
Has thanked: 264 times
Been thanked: 776 times

Re: Rehab of Patrol L60-2-00655

Post by plateaucal »

You can buy shim stock at a variety of places and make your own. Search shim stock and you will see. I assume that the new cylinder will give a spec. for free play. Usually free play is measured at the pedal. I remember seeing info. on that in the service manual somewhere.

As an example: I had a 1972 Ford truck. After replacement of the master cylinder the brakes would occasionally lock-up. I pulled the cylinder and discovered a threaded plunger on the tip and backed it off. Nor more lock-up. You may also be able to find a threaded push rod.

When I did my Patrol brake conversion I very carefully measured the rod insertion lengths for the old and new master cylinder and cut the push rod as needed. In my case the the rod needed to have 15/16" cut off. According to the manual, you should have 1.5 mm clearance at the plunger. Which equates to 1/2" to 3/4" at the pedal...according to the manual.
User avatar
I love driving my Patrol!
Posts: 635
Joined: Sun Jul 19, 2015 4:36 pm
Location: USA
Location: North Carolina, USA
Has thanked: 455 times
Been thanked: 789 times
Contact:

Re: Rehab of Patrol L60-2-00655

Post by r1lark »

Another option may be to modify the Patrol push rod to make it adjustable. I'll have to look at the pushrod when it's off the pedal (I didn't worry about the pushrod yesterday, just pulled the master cylinder off) to see if that is feasible.
Paul
I love driving my Patrol!
Posts: 985
Joined: Sat Aug 02, 2014 8:59 am
Location: Colorado
Has thanked: 264 times
Been thanked: 776 times

Re: Rehab of Patrol L60-2-00655

Post by plateaucal »

r1lark wrote:Another option may be to modify the Patrol push rod to make it adjustable. I'll have to look at the pushrod when it's off the pedal (I didn't worry about the pushrod yesterday, just pulled the master cylinder off) to see if that is feasible.
I think that was done in the way later models, 1979-80 or so. My only advice is to carefully consider the force multiplication that goes into that pushrod. It is in the order of 10 to 1 or better. In a panic stop there will likely by over a thousand pounds of force on the push rod. You may try to source a factory made push rod rather than modifying your own. Considering that a rod in compression will fail due to slenderness or bending , the bending forces could be an issue depending on where you place the adjuster. It seems that the very end of the rod would be the ideal location.

Here is an interesting article on slenderness.

https://www.sciencedirect.com/topics/en ... s%20ratios.

"When the slenderness ratio exceeds a value of 100 for a strong slim column, failure by buckling can be expected. Columns of stiffer and more brittle materials will buckle at lower slenderness ratios. " You likely won't exceed that but there will be a reduced cross section due to threading and there may be a mild eccentricity of applied load that could factor in. The latter suggests that you carefully mate the rod end to the socket in the master.
Post Reply