
You might use something like carb cleaner but the system has a cleaner in it and a sealer in it. If you take it to a shop it usually cost a couple hundred bucks.bosque wrote:I like this product.....well, what it says anyways....nice resource and thanks for sharing this. I need to get after my tank too.
What do you reckon using to clean it first?
1967 Family Patrol Project
-
- I love driving my Patrol!

- Posts: 931
- Joined: Thu Oct 24, 2013 11:23 am
- Location: Iola, Tx
- Location: Iola, Tx
- Has thanked: 97 times
- Been thanked: 568 times
- Contact:
Re: 1967 Family Patrol Project
Justin
-

- Patrol Fanatic!

- Posts: 3000
- Joined: Sat Feb 23, 2013 11:28 am
- Location: Lutherville, MD
- Location: Lutherville, MD
- Has thanked: 6010 times
- Been thanked: 1600 times
Re: 1967 Family Patrol Project
Justin, just make sure to take some before and after pictures. You're the official product tester for fuel tank repair now. 
I have a neighbor that has used on a 72 Porsche, products from the link below. His tip on how to handle the tank is great. He suspended with the tank with cables from an overhead support (his 2nd story deck) while handling the coating of the product. Great, since mine is heavy compared with the stock one, since I replaced it some years ago, and a friend did it with 1/16" plate.
I have a neighbor that has used on a 72 Porsche, products from the link below. His tip on how to handle the tank is great. He suspended with the tank with cables from an overhead support (his 2nd story deck) while handling the coating of the product. Great, since mine is heavy compared with the stock one, since I replaced it some years ago, and a friend did it with 1/16" plate.
Owner of the same Patrol since 1967
-

- Administrator

- Posts: 2460
- Joined: Wed Jul 03, 2013 11:49 pm
- Location: Arizona
- Location: Arizona
- Has thanked: 800 times
- Been thanked: 1269 times
- Contact:
Re: 1967 Family Patrol Project
Another option, quite a bit cheaper than the product Justin posted:
http://www.eastwood.com/gas-tank-sealer-kits.html
I've used this Eastwood kit about 5 times throughout the years... good product- comes with full instructions, and most of the components you would need to perform every step yourself (you also need a gallon of acetone and 2 cups of pool acid from the local hardware store to complete the process) :
1) clean
2) de-rust
3) etch
4) seal
But, Read the reviews- some people love this product, while several said it failed to stick and separated from their tanks-
I personally never encountered any separation or peeling issuse, but the longest I ever kept a vehicle after using this sealer was about 2 years...
http://www.eastwood.com/gas-tank-sealer-kits.html
I've used this Eastwood kit about 5 times throughout the years... good product- comes with full instructions, and most of the components you would need to perform every step yourself (you also need a gallon of acetone and 2 cups of pool acid from the local hardware store to complete the process) :
1) clean
2) de-rust
3) etch
4) seal
But, Read the reviews- some people love this product, while several said it failed to stick and separated from their tanks-
I personally never encountered any separation or peeling issuse, but the longest I ever kept a vehicle after using this sealer was about 2 years...
L-R:
White 65 Hardtop L60-3-00617 (undergoing restoration)
Red 65 hardtop 4L60-002565 (scrapped for parts)
66 Hardtop "El-Bondo Patrol", L60-00511 (Restored, then sold June2020)
Blue 67 Hardtop (sold March1997)
Green 62 Softtop L60-2-00504 (undergoing restoration)
-
- I love driving my Patrol!
- Posts: 931
- Joined: Thu Oct 24, 2013 11:23 am
- Location: Iola, Tx
- Location: Iola, Tx
- Has thanked: 97 times
- Been thanked: 568 times
- Contact:
Re: 1967 Family Patrol Project
Yeah the reviews were what steered me away from the Eastwood stuff. I will do a detailed write up when I get mine done hopefully in the next few weeks.moore_rb wrote:Another option, quite a bit cheaper than the product Justin posted:
http://www.eastwood.com/gas-tank-sealer-kits.html
I've used this Eastwood kit about 5 times throughout the years... good product- comes with full instructions, and most of the components you would need to perform every step yourself (you also need a gallon of acetone and 2 cups of pool acid from the local hardware store to complete the process) :
1) clean
2) de-rust
3) etch
4) seal
But, Read the reviews- some people love this product, while several said it failed to stick and separated from their tanks-
I personally never encountered any separation or peeling issuse, but the longest I ever kept a vehicle after using this sealer was about 2 years...
Justin
-
- Helping others revive their Patrol…

- Posts: 1619
- Joined: Thu Oct 04, 2012 8:35 am
- Location: USA
- Has thanked: 310 times
- Been thanked: 176 times
- Contact:
Re: 1967 Family Patrol Project
Yes Justin get some visuals for a write up.....probably not too time consuming but....this is an important procedure and sounds like with some wires on opposing corners, you could "rotisserie" the material in the tank.Esteban wrote:Justin, just make sure to take some before and after pictures. You're the official product tester for fuel tank repair now.
I have a neighbor that has used on a 72 Porsche, products from the link below. His tip on how to handle the tank is great. He suspended with the tank with cables from an overhead support (his 2nd story deck) while handling the coating of the product. Great, since mine is heavy compared with the stock one, since I replaced it some years ago, and a friend did it with 1/16" plate.

Esteban, I'd love to see this gas "bunker" tank you have!

-

- Administrator
- Posts: 1225
- Joined: Sun Jul 28, 2013 12:45 am
- Location: Roseville, California
- Has thanked: 646 times
- Been thanked: 1149 times
- Contact:
Re: 1967 Family Patrol Project
A few things today --
First, while picking up the head at the shop yesterday, Dave let me run our fuel tank skid plate in his cabinet washer. I saw some brown on it before it went in, but it was more like overspray than paint... Lookie what came out!

Here's the head, all cleaned up and ready to go... again
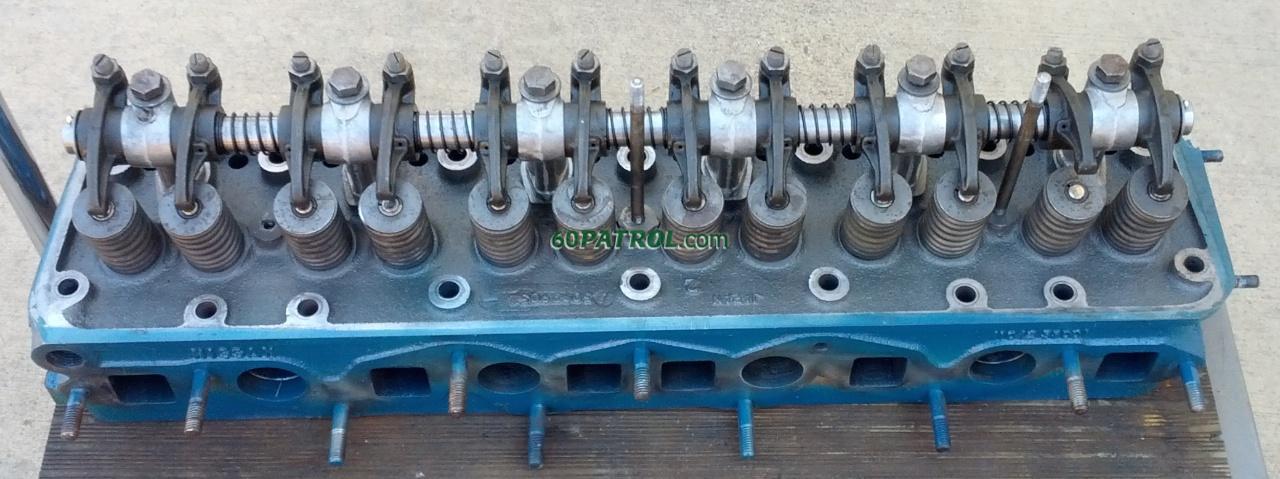
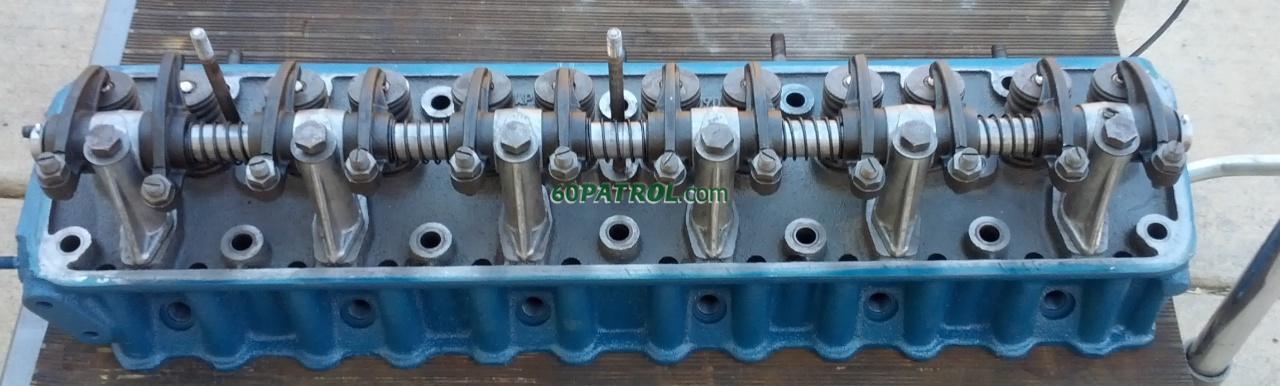
Today, we're tackling the rear wiring. Turns out that the rear harness in the ol' green parts patrol is in fairly good shape. Needs new ends, but the rest is solid. So, I brought it into the house and re-wrapped it. While at it, I measured it and created a template in case anyone... including me... wants to recreate a harness from scratch.

Now it's time to install the refreshed harness into the Patrol!
John
The front half of the re-wrapped rear harness
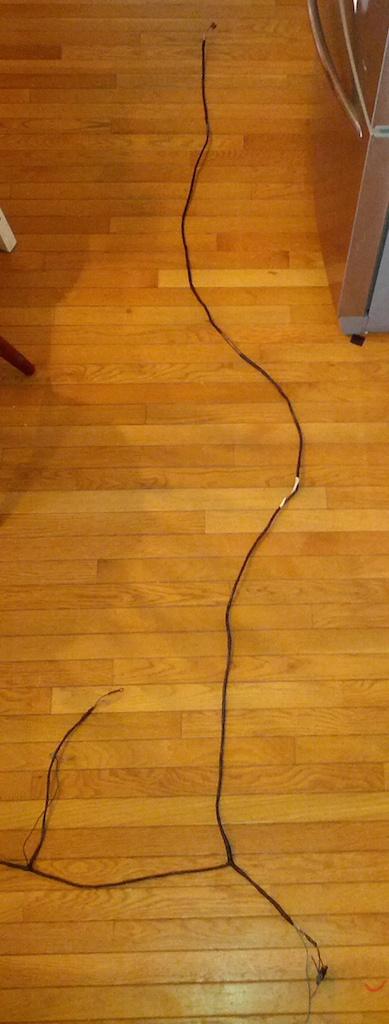
And the back half

This is what the strain relief about 1/2 way up the harness looks like. The white stuff is strong, doesn't stretch and has no adhesive. It's wrapped several turns into the harness on either end. On the back, it's wrapped into the harness the same direction as the front and then folded back.

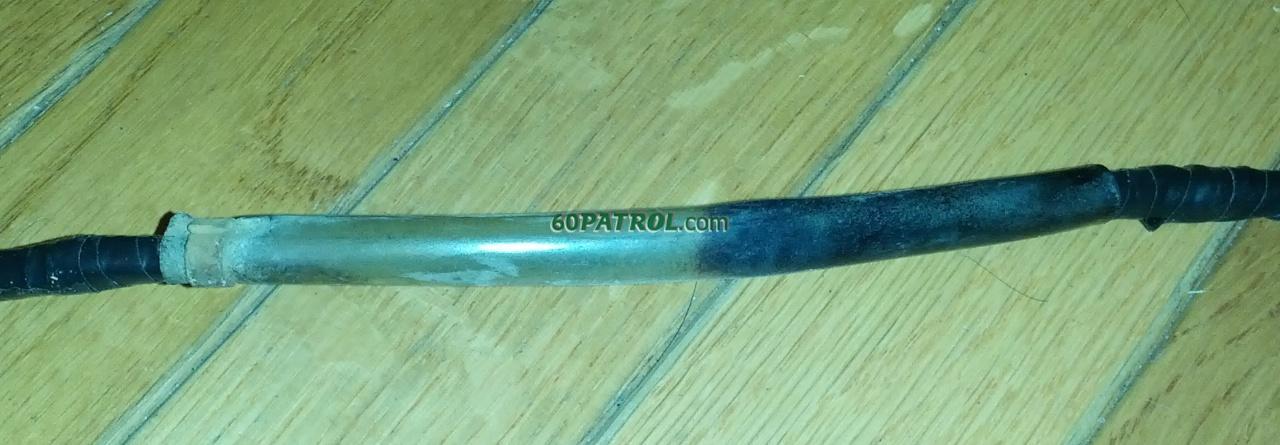
Here's the protective cover that protects the harness where it goes through the frame hole. Plastic tubing with a crimp at the front end only (no evidence it was ever crimped at the back end)
First, while picking up the head at the shop yesterday, Dave let me run our fuel tank skid plate in his cabinet washer. I saw some brown on it before it went in, but it was more like overspray than paint... Lookie what came out!
Here's the head, all cleaned up and ready to go... again
Today, we're tackling the rear wiring. Turns out that the rear harness in the ol' green parts patrol is in fairly good shape. Needs new ends, but the rest is solid. So, I brought it into the house and re-wrapped it. While at it, I measured it and created a template in case anyone... including me... wants to recreate a harness from scratch.
Now it's time to install the refreshed harness into the Patrol!
John
The front half of the re-wrapped rear harness
And the back half
This is what the strain relief about 1/2 way up the harness looks like. The white stuff is strong, doesn't stretch and has no adhesive. It's wrapped several turns into the harness on either end. On the back, it's wrapped into the harness the same direction as the front and then folded back.
Here's the protective cover that protects the harness where it goes through the frame hole. Plastic tubing with a crimp at the front end only (no evidence it was ever crimped at the back end)
-
- Administrator
- Posts: 1225
- Joined: Sun Jul 28, 2013 12:45 am
- Location: Roseville, California
- Has thanked: 646 times
- Been thanked: 1149 times
- Contact:
Re: 1967 Family Patrol Project
The newly cleaned up harness is now in place... mostly. I still have to make connections for the lights to the harness, but it's routed and secure!
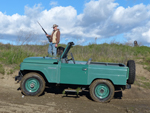
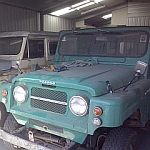
However, when you're in work mode and the job is as done as it's gonna get, you can always find more to do! I decided that the top needed to come off. Barritt and I removed upper half of the rear doors, all the bolts between the tub & top, then the bolts to the windshield. We parked the trailer behind the Patrol as a place to store the top so it can be moved around the yard easily.
We started sliding it rearward when... we discovered that there was only one bolt on one side and two on the other holding one sides to the top. Ever see a parallelogram fail? Kind of what happened. Here's what it looked like after I started using welding vise-grips in a panic filled attempt to secure everything!

Luckily, we were able to contain the carnage without any damage and without too much trouble, move it to the trailer. So, now it looks like this!

With any luck, we may have it on the road next weekend!
John
However, when you're in work mode and the job is as done as it's gonna get, you can always find more to do! I decided that the top needed to come off. Barritt and I removed upper half of the rear doors, all the bolts between the tub & top, then the bolts to the windshield. We parked the trailer behind the Patrol as a place to store the top so it can be moved around the yard easily.
We started sliding it rearward when... we discovered that there was only one bolt on one side and two on the other holding one sides to the top. Ever see a parallelogram fail? Kind of what happened. Here's what it looked like after I started using welding vise-grips in a panic filled attempt to secure everything!
Luckily, we were able to contain the carnage without any damage and without too much trouble, move it to the trailer. So, now it looks like this!
With any luck, we may have it on the road next weekend!
John

-
- You know you own a Patrol when…

- Posts: 234
- Joined: Sat Mar 23, 2013 1:41 am
- Location: Adelaide, South Australia
- Has thanked: 42 times
- Been thanked: 247 times
- Contact:
Re: 1967 Family Patrol Project
An inspiring project faux40, all 30 pages of it ( so far ! ). There are so many lessons for so many people in reading about this project, and I won't try to pen them here - but thanks for the posts so far, particularly for the level of detail and the thought processes and rationale behind each step.
I really hope no-one got hurt removing that hardtop, I made the mistake of thinking a neighbour and I would be able to lift a well made hardtop with glass windows onto my G61 and have no idea how we managed it without at least one of us losing a finger or worse ! Never again - it's a minimum 3, preferably 4 person job even for healthy sport-loving adults...your 60 looks great without it btw, good luck with the engine work to come !
cheers,
D
I really hope no-one got hurt removing that hardtop, I made the mistake of thinking a neighbour and I would be able to lift a well made hardtop with glass windows onto my G61 and have no idea how we managed it without at least one of us losing a finger or worse ! Never again - it's a minimum 3, preferably 4 person job even for healthy sport-loving adults...your 60 looks great without it btw, good luck with the engine work to come !
cheers,
D
'71 P510 Wagon - the smile generator.
'74 G60H - strawberry farm patrol.
'78 G60H Ute Cab - the cherry on top.
'80 G61H - the start of things to come.
'92 Pulsar Ti - my SR20 powered daily driver.
'01 Kessner 7x4 - the pack horse.
'07 Challenge Camper - home away from home.
'09 Prado - the family fourby and her daily driver.
'14 200EXC - a chainsaw with wheels.
'74 G60H - strawberry farm patrol.
'78 G60H Ute Cab - the cherry on top.
'80 G61H - the start of things to come.
'92 Pulsar Ti - my SR20 powered daily driver.
'01 Kessner 7x4 - the pack horse.
'07 Challenge Camper - home away from home.
'09 Prado - the family fourby and her daily driver.
'14 200EXC - a chainsaw with wheels.
-
- Helping others revive their Patrol…
- Posts: 1619
- Joined: Thu Oct 04, 2012 8:35 am
- Location: USA
- Has thanked: 310 times
- Been thanked: 176 times
- Contact:
Re: 1967 Family Patrol Project
Your hoist with extension and new driveway will soon help do this one handed! 

