
So one thing led to another
-

- Administrator

- Posts: 7819
- Joined: Thu Oct 04, 2012 10:42 am
- Location: Temecula, CA
- Has thanked: 7703 times
- Been thanked: 2480 times
- Contact:
Re: So one thing led to another
Great progress and pics! The exhaust strap secures the muffler in place, probably useful when actually driving to keep it from flexing and bouncing. One less source of a rattle.
Beyond any hope for intervention

-

- Administrator
- Posts: 1225
- Joined: Sun Jul 28, 2013 12:45 am
- Location: Roseville, California
- Has thanked: 646 times
- Been thanked: 1149 times
- Contact:
Re: So one thing led to another
Boy, do I envy your progress! Congrats!PetrolPatrol wrote:The truck sitting on her own weight!
J
-
- You know you own a Patrol when…

- Posts: 133
- Joined: Tue Aug 01, 2017 12:50 pm
- Location: Annapolis, MD
- Been thanked: 95 times
Re: So one thing led to another
Looking great. Motivating for me to get back to working on mine and get my rolling chassis complete.
I love the shift knobs too, where did you source those?
I love the shift knobs too, where did you source those?
-
- You know you own a Patrol when…
- Posts: 107
- Joined: Mon Aug 12, 2019 6:51 am
- Location: USA
- Has thanked: 17 times
- Been thanked: 115 times
Re: So one thing led to another
I searched, but I couldn't find the info. I found a custom knob maker on Facebook and they turned out amazing. Sorry I can't say who though.yuke175 wrote:I love the shift knobs too, where did you source those?
Wish I could say this is a huge update, but I feel like I've barely made any progress. Last episode I finally had the truck on its own weight and was going to start some body work - well, that s*** takes forever!.
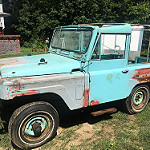
Step 1 was to get it all cleaned up again. Washed all the classics on a nice summer day eons ago. My bed was (still is) in pretty rought shape. Lots of dents, dings, some minor rust, etc. I then proceeded to strip the bed (almost) bare. Still need to fix some of the rear door bolts, but after my MIG welding practice, I'm slowly gaining more confidence to tackle that. Once bare, I practiced my body work. 3C Body Shop won't be hiring me any time soon, but I got it a lot straighter than it was. Still more to do but it's coming along. And then progress basically stopped for months. Stripping the bed fully took forever and a day and was shockingly harder than I thought it would be. But of course other cars got in the way. Took a detour to work on the Sonoma and installed coil overs all the way around. Then the girlfriend's truck got new motor mounts along with some other goodies And then the Sprite decided to blow a headgasket one day facilitating not just that, but also switching from a generator to an alternator After months of detours I finally got back to the whole reason this forum exists! While not perfect I needed a break from the bed and started on the firewall/interior. First up was welding a flap a PO cut out to access the rear of the engine. My welding isn't even Busch league yet, but it holds. Kicked it, lifted it up, and it doesn't budge, so I'm happy. I decided not to strip this like I did the exterior - way too much work, but while cleaning it the black "paint" was sticky and nasty. I still have no idea what it is, but I was able to clean it off with brake cleaner and after a lot of elbow grease and towels it actually all came off. The whole thing cleaned up amazingly well and I continued to practice my MIG welding. It's infinitely easier than Flux Core and a heck of a lot better on thin sheet metal. No pictures but a lot of pin holes, screw holes, and rust holes got filled and somehow I didn't blow through the metal at all. Last but not quite least is my continued practice of doing things twice. As I stripped the body/frame/etc. bare I cleaned up all the bolts of dirt, rust, and anything else. Sadly, what I didn't think about was the fact that I was also cleaning them of their protective coats, so a lot of the bolts I didn't paint over rusted. So my immediate future involves trying out bluing. I've tested two pieces already and they came out alright, but I think (hope) I can refine my process a bit more. It's not a rust preventative, but it should 1) give the bolts a nice color and 2) slow down the process quite a bit. This whole project is a learning process though, so if it doesn't work, that's OK.
You do not have the required permissions to view the files attached to this post.
-

- Patrol Fanatic!

- Posts: 3003
- Joined: Sat Feb 23, 2013 11:28 am
- Location: Lutherville, MD
- Location: Lutherville, MD
- Has thanked: 6017 times
- Been thanked: 1601 times
Re: So one thing led to another
Thanks for sharing. Excellent progress
Owner of the same Patrol since 1967
-
- Administrator
- Posts: 7819
- Joined: Thu Oct 04, 2012 10:42 am
- Location: Temecula, CA
- Has thanked: 7703 times
- Been thanked: 2480 times
- Contact: